It’s TIME! I’ve been plotting & planning, dreaming & scheming, adding & subtracting….and now FINALLY it’s time to tear into this house & MAKE IT HAPPEN!
or…time to let the house reveal its dirty secrets…
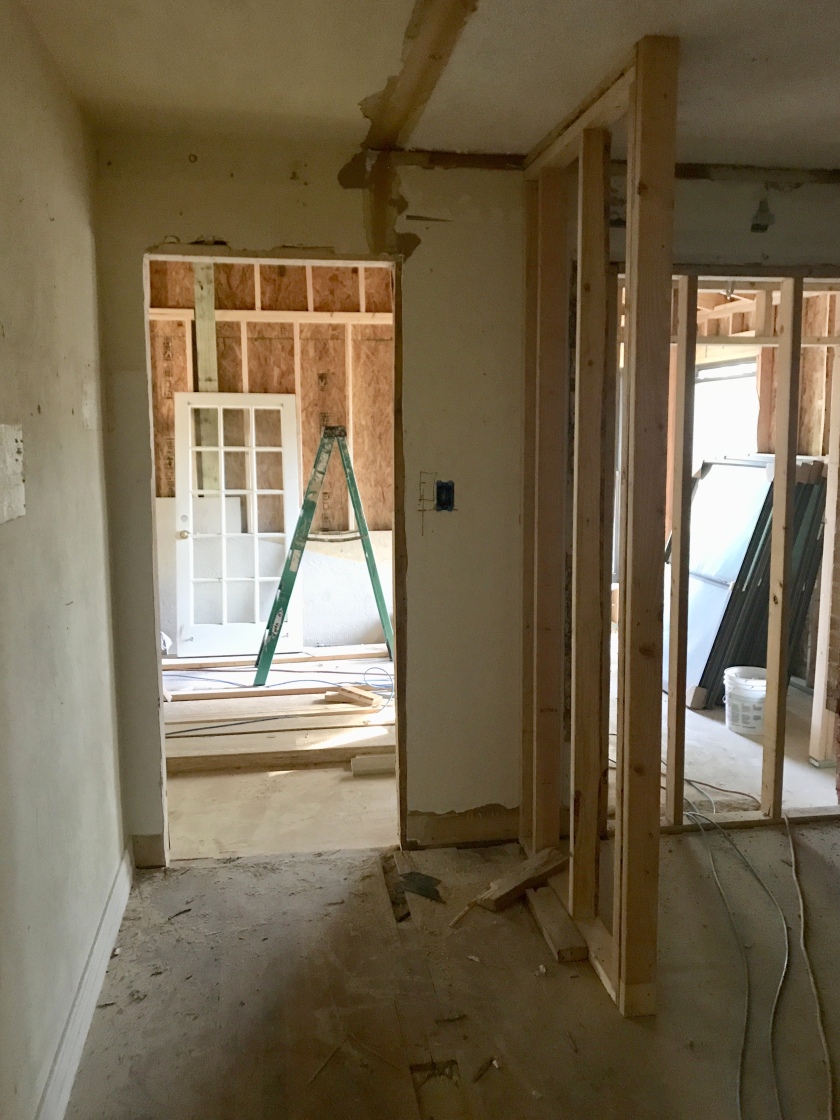
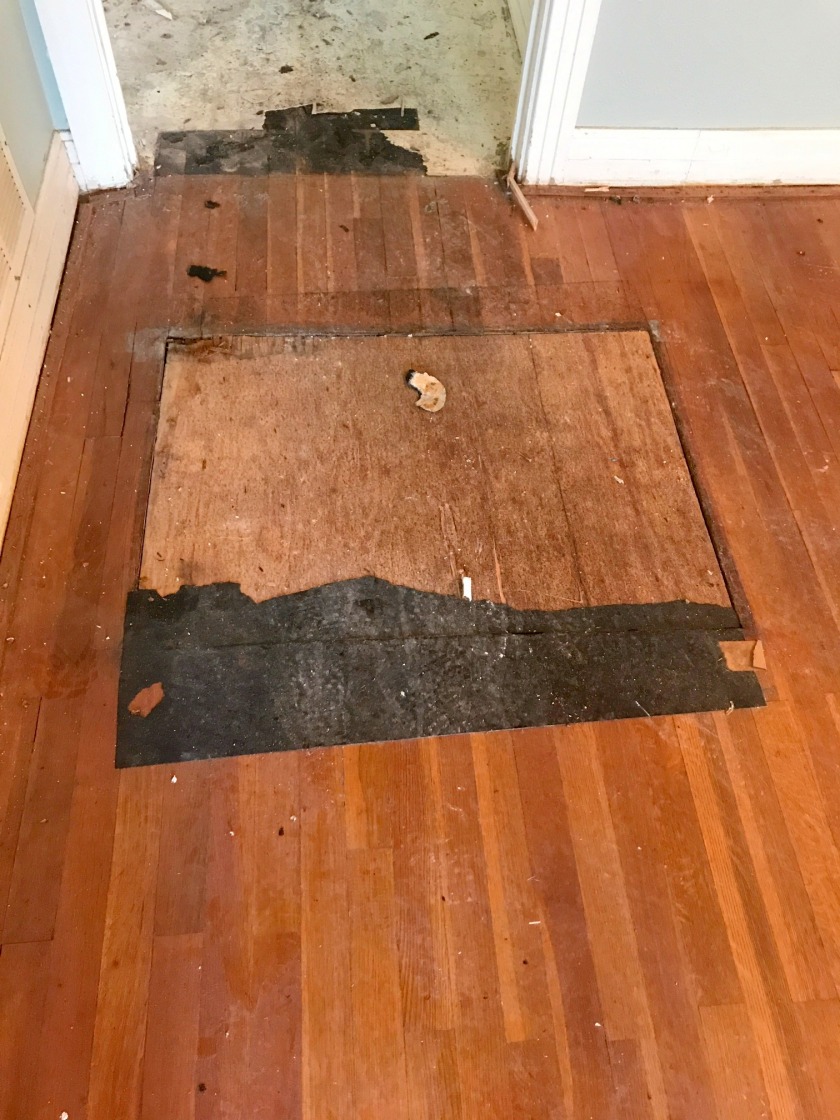
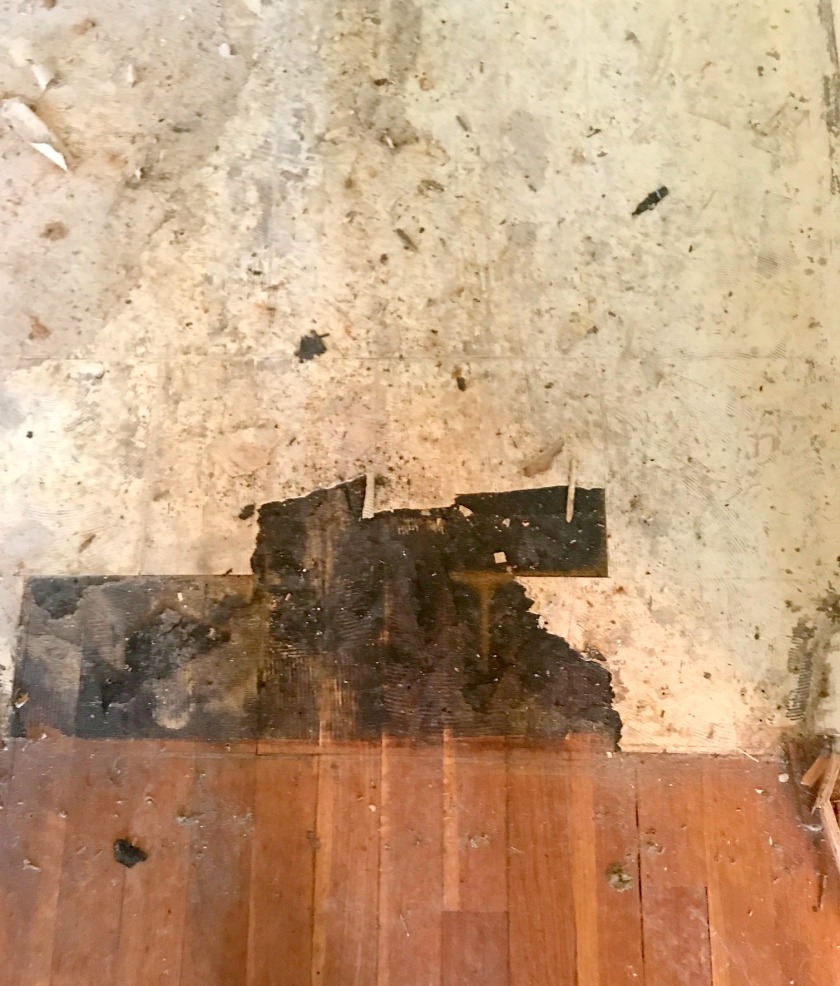
OK, so we KNEW the old ac was leaking….we KNEW the laundry room sub-floor was going to need to be replaced….
But it was still a bit of a shock to see just HOW rotten that floor was, as Jose peeled and scraped away the layers of time-worn flooring! Obviously the old vinyl fashion statements were all that was holding the laundry room floor together!
Just some housekeeping notes (pun intended): when I looked at the house, it was obvious the old HVAC unit housed just above that HOLE in the floor was leaking, though very slowly. The top layer in the laundry room was carpet, and it was damp around the HVAC closet, just a tad….UNTIL the day the appraiser came, that is! Most of you know that an appraiser visits the house about a week or so before the intended closing date…just to be sure it’s worth the sales price, right? Well, on that particular day, for unknown reasons, the AC had really leaked, and there was water on the floor. The appraiser wrote it up as a condition of sale that the AC be replaced to prevent further damage to the structure.
If you’re thinking “that sounds reasonable“…..sure, but he meant it had to be replaced BEFORE closing. BEFORE I owned the house. If you’re thinking “yay, then the seller had to replace it!“….no, that was not reasonable. Not only had they given me a ridiculously low price, but I had already planned to replace the unit first thing after closing. So….I was to replace the AC system in a house I didn’t own??? (shameless plug coming…)
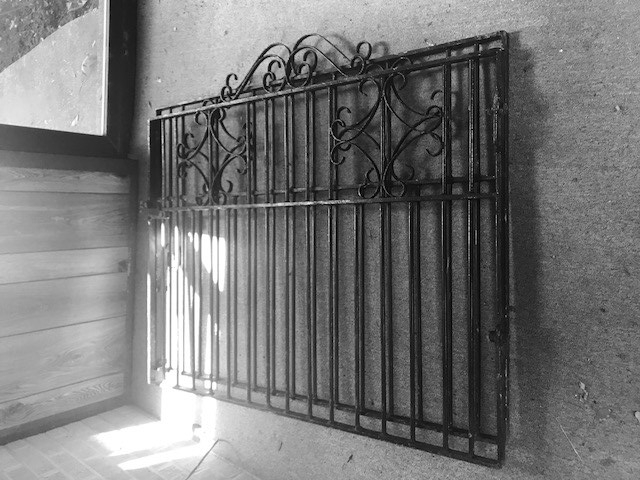
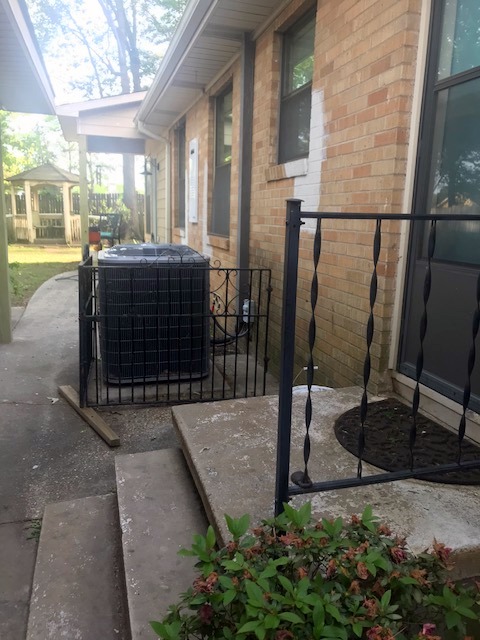
This is when you need a good REALTOR on your side of the transaction! Happily, I had myself (warned you!) We were able to work out putting $$ into escrow with the lender, so that the AC could be replaced once I actually owned the house; this required the appraiser to go back out after replacement to sign off that it HAD in fact been done, and done satisfactorily. By the way, I now own a super duper efficient (and shiny and huge) new Carrier HVAC unit; the inside portion now resides in the attic…the outside unit will be ‘dressed up’ with the L-shaped iron gates I showed you earlier, hopefully covered with beautiful vines of some sort!
(yes, these are actually laying on the floor, and I rotated the pic to make them easier to see….so if you feel dizzy looking at the floor acting like a wall, just move on)
~~here’s a little tear-the-house-apart ditty for you~~
A few demo stories for your enjoyment…
The big blue dumpster was supposed to be delivered & plunked down in the backyard…oh so convenient for the whole sunroom being torn off….the guys were ready, with a section of fencing rolled up and the yard cleared…but the dumpster couldn’t back over the curb – ouch! So when I pulled up later that day I saw the BIG BLUE DUMPSTER right in the middle of the front yard; they had to take down the mailbox to get it in! Not only do we now have deep ruts….it’s already been dumped once and so now they’ve re-delivered and made NEW deep ruts….grrrr
Last Saturday I had real estate appointments stacked up all day, but I finished some showings that happened to be in Kilgore a little early…so I decided to drive by my house before heading back to Longview. I knew nobody was working that day, but something told me to go! As I turned the corner onto my street, I was stopped, as a man was standing in the road (curious yet?!)
(first you should realize I had been knowing I needed to find tree trimmers, as there were huge branches hanging over the garage and part of the house on the other side; they’d have to be removed before we could replace the roof….it was nagging at me, but hadn’t risen to the top of the priority list yet!)
Now, back to the man in the road….my brain took in, all at once, the fact that there was a crew trimming trees across the street from my house, there was a long trailer already piled high with huge branches, there was a truck with a tree trimming sign on the front door….and there was the owner, inexplicably standing in the road as if I wouldn’t run over him! 
Feeling completely bemused that something I so needed was presenting itself so easily, I pulled over and asked the man (still in the road) if he was the owner. “Yes”, he said. “Will you come give me a price to trim my trees too?” I asked……well, within about 5 minutes I had a very good price quoted, and a promise to get it done the next day! Margarito Ramirez and his crew did an excellent job; now the large oaks are canopied nicely all around the house, and it happened while my whole crew was off!
Serendipity??
As it happens, right after I talked to Margarito, at a time I wasn’t supposed to be there, my contractor Roger pulled up, quickly followed by Don, the plumber! Don hadn’t looked at the job yet, so they just came by to go over things….at the absolute perfect time! Having worked with Don a few times before, I was able to go over the particulars of where everything would be…..and he had some great ideas! Since he’s already re-piping the whole system, we can add tankless water heating for just the difference in cost of the system and what the new tank would have cost. YES! This means NO water tank in the attic, and NO chance of running out of hot water ever! I’ve had tankless in my last 2 houses (one a retrofit like this) and admittedly, I’ve become spoiled! It bears noting, however, that a tankless system is more efficient, as you’re not paying to keep gallons of water hot until the moment you choose to use it, and it also cannot suddenly burst and flood your house!
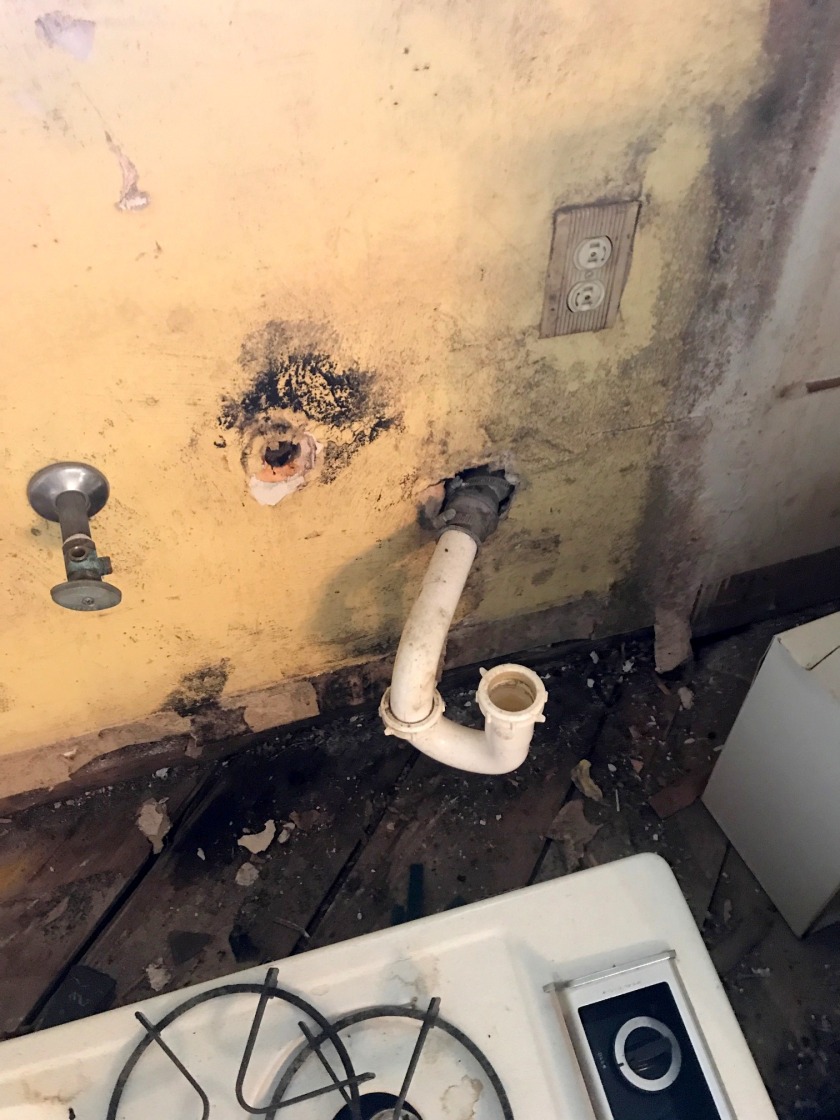
This is the former kitchen sink area; to me it just said NASTY! To Don it said, “Let’s replace that galvanized pipe while we have the chance”. OK, sure…that’s not my thing…..as I always say, I don’t have to KNOW everything….I only have to know who does! Go Don the plumber!
So…I left to continue selling houses, excited about coming back on Sunday to test paint colors on the brick…I was determined to order the exterior paint during the Sherwin Williams Labor Day Paint Sale, you see! I had left home EARLY that morning to go by SW for a few sample jugs. The plan was to test Sunday…. and order paint Monday….

Mmmm hmmmm….yet another blue box greeted me as I pulled into the driveway on Sunday….planning to test paint, right? This was my FIRST CLUE that Don had turned off the water after I left Saturday. Always the optimist, I chose to celebrate PROGRESS rather than bemoaning the fact that I had no water to clean brushes between tests….
Well, I did test the paint around almost noon on Sunday…it was a beautiful day! Saturday when Margarito said they’d trim my trees the next day, I really wasn’t thinking about how much noise tree trimmers make! As I painted bricks against the ear-shattering noise of chainsaws and the front-end loader they used to carry the branches, I just hoped my soon-to-be neighbors would still be talking to me when I finally move in next month!
My last demo story of the day is really a design story….let’s call it the saga of the original wood floors not making the grade…and why:
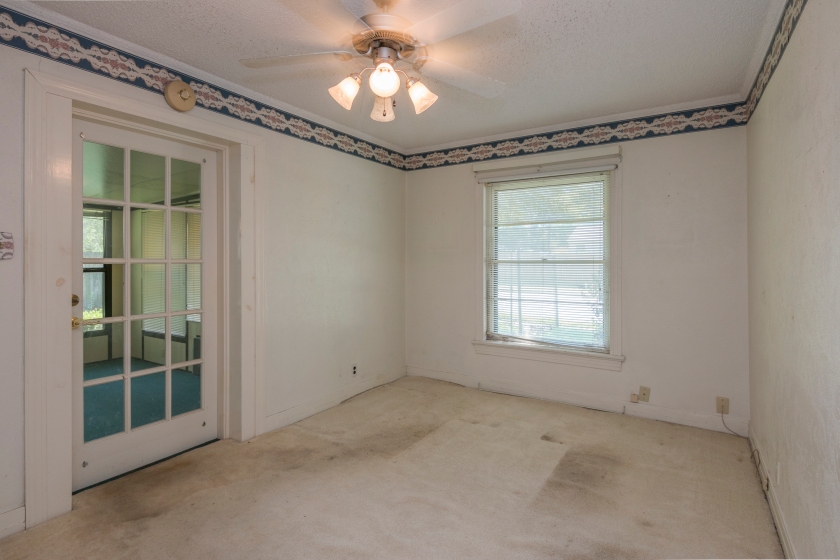
From the beginning, I’ve known that a pier and beam house built in 1961 would have original wood floors under the plethora of flooring subsequent owners chose to “upgrade” it with.
If you wonder how I knew, just think about it; what else would they have used? Though plywood had been widely used in furniture & some construction for 40-ish years, there was a huge shortage of it at the time (the shortage was of the wood used to make plywood). Particle board had come along as an alternative, but wasn’t widely accepted as being stable, and really wasn’t, for a subfloor. This was long before OSB became a standard subfloor material, and just before slab construction began to be common….thus the need for the basic flooring to be used in a pier and beam house. Pine or oak planks were readily available and relatively inexpensive; if you’ve seen old-house wood floors, they were generally 2 3/4″ to maybe 3 1/4″ planks. It’s always good to find a corner of carpet or lineoleum to pull up and peek (and we did) but the chances of ‘original wood floors’ being underneath any other flooring in a 50’s-60’s era house are worth betting on.
OK, back to my flooring saga…I knew there could be some damage to the living room and hall floor due to the leaking AC unit, so had to consider keeping the floors COULD prove to be a problem until all the carpet was removed. Further, Jose had pried up bits of the kitchen vinyl earlier, and it appeared there was some type of plywood under it. That left me with non-matching floors in the kitchen and living room, and I was tearing out that wall! Ugh. Of course I knew the laundry room floor would have to be something different since it was clearly going to have to be replaced all the way down to the sub-floor.
We had determined the bedrooms all had wood floors under the carpet, so I definitely planned to leave those intact….2 of the bedrooms, that is. The 3rd was destined to become the master bath, so that floor would have to go. THIS IS WHAT I THOUGHT I KNEW BEFORE DEMO TOOK PLACE! Remember my subtitle at the beginning of this post?
or…time to let the house reveal its dirty secrets…
Yes, my sweet little house let me down all around on the wood floor issue! I’ll be installing ALL new flooring
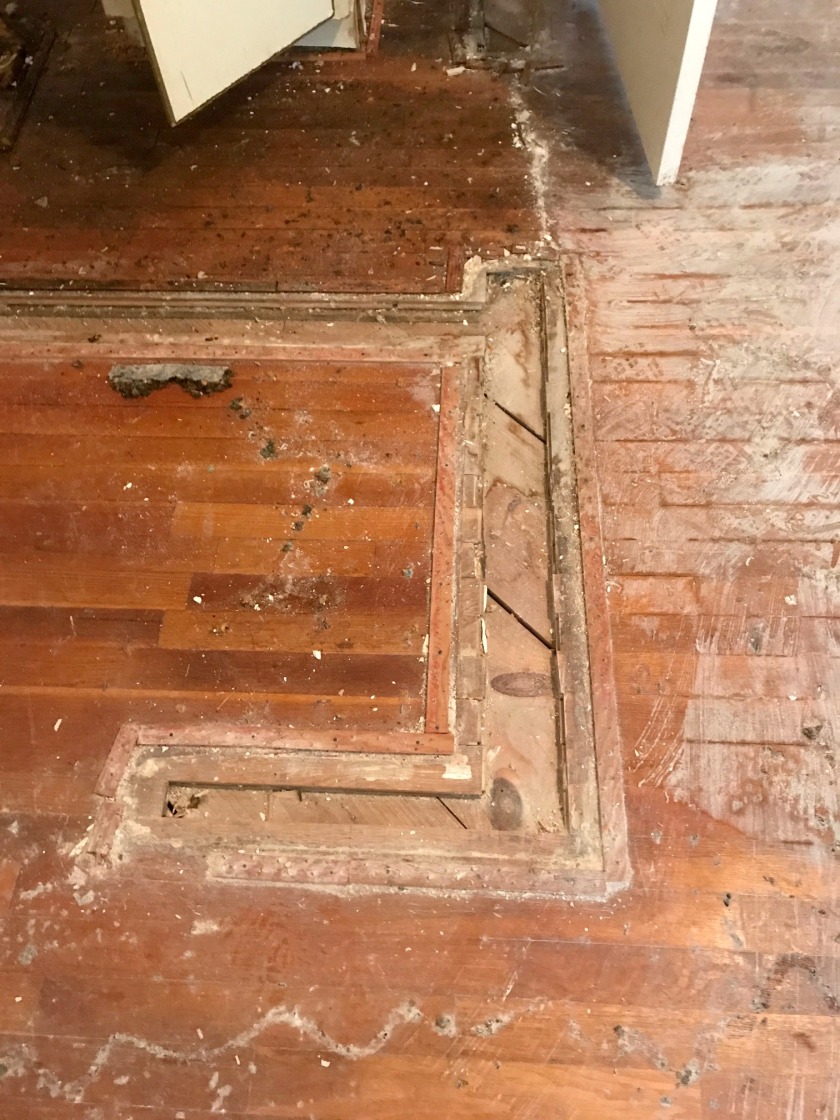
This is in the living room, obviously right in the walk path leading to the hallway….who’s ever seen an old floor grate for an old gas heater?! Yep – at some point the old gas heater was upgraded to CHA – and at that point the old grate had to come out. It’s not IMPOSSIBLE to replace the missing boards with ones from, say, the room that becomes a bathroom, but it would be very difficult to work them in right in this main walkpath! Anyway, that was only problem #1
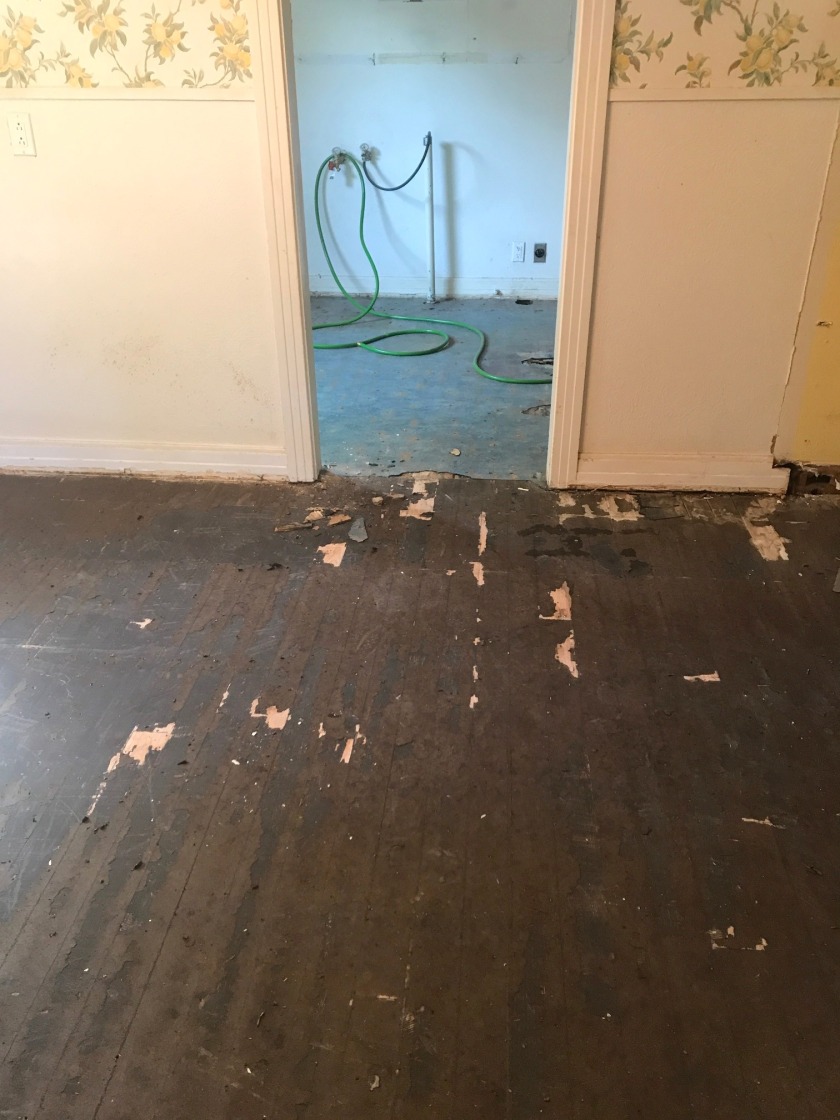
Though the hallway does have the original wood, it does have enough damage from the adjacent leaking AC to rule out it’s use….
 We were surprised to find that under ALL the layers of flooring, the kitchen did in fact have the wood planks. I had argued with Jose that it couldn’t be anything else! But it was buried so deeply…to his credit he did not give up until every piece of every old floor in the house was scraped up and added to the dumpster! But even IF we could patch the former grate in the living room, getting this yucky smucky stuff all the way down wouldn’t have been easy.
Strangely, this room is the one that disappointed me the most! Known as “bedroom 2” it is going to be MY home office. What you’re looking at is the remains of the walls which formed the world’s smallest master bath (remember the pic? if not I’m reposting here)

Not only was this tiny bath useless, the loss of it caused us to NOT be able to use the original wood floor in this room either. I was so bummed! I had just been SURE this bath was added later, as I couldn’t imagine it being part of the original plan! If it had been added later, they wouldn’t likely have dug out the planks for the footer, so either they had the most patient remodeler ever to exist, or they actually built this bath from the beginning. No wood floor for Nancy’s office – pout!

Ditto for the closet in the soon-to-be-master bath…but that floor will be tiled anyway. Ditto again for the hall bath, and ditto on the tile too. There is exactly one bedroom where there is nothing at all wrong with the wood floors! But alas, we can’t really go to all the trouble to refinish ONE bedroom floor….and worse yet, we can’t have new wood, tile, or any other new material come up next to that old wood floor…
So the consensus is….we are unable to use any of the original wood floors and I’m so bummed about it!
Tune in next time to find out what I’ve cooked up to make me feel all better about the floors…..I’ll start sharing colors and finishes with you next week – fun!
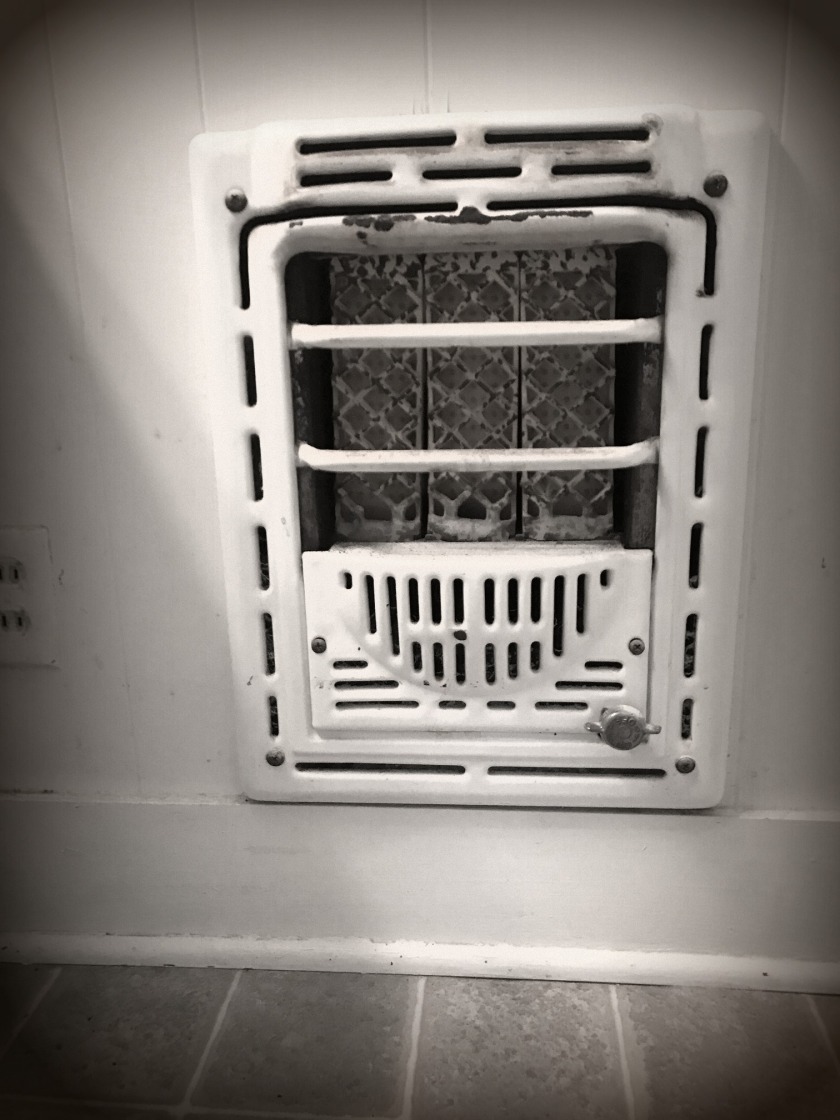
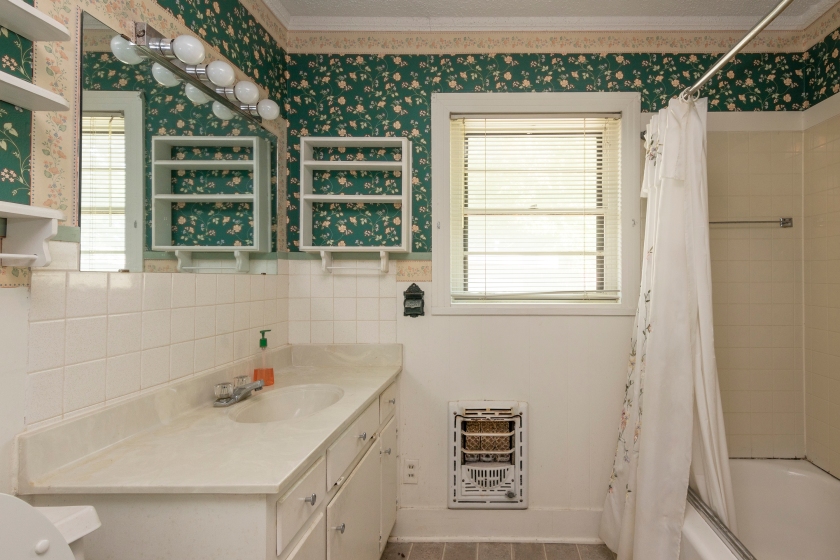
Let’s also say goodbye to the old bathroom heater; I would love to hear from you in COMMENTS if you had one of these in your house growing up! Wow, there was never any WARMER heat than what you got from a gas space heater! These are actually illegal now, though. Of course I wouldn’t use it again anyway, but they have to be removed with a permitted remodel. Say goodbye….and tell me about your favorite childhood gas space heater!
(did you race your siblings to get to it first in the morning???)
Once again, I thank you for keeping me company on my little cottage redo…I’ll be inviting you over to celebrate the finish before you know it!


 until the paint started peeling off in sheets a few months later.


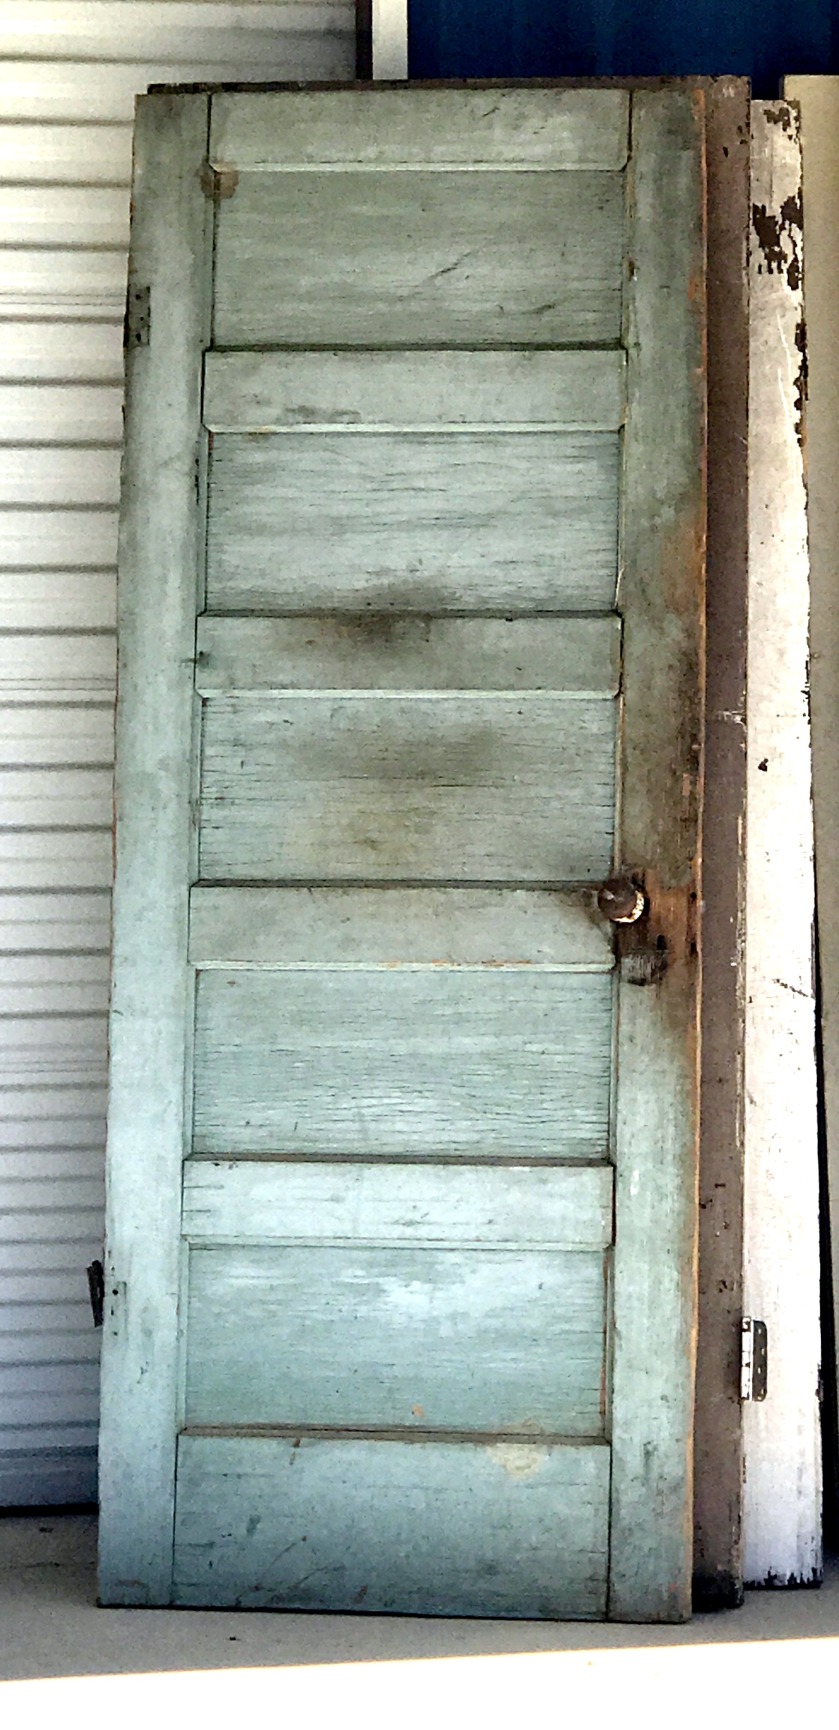
 So here are the 3 doors AFTER treatment (wish I’d thought to photograph the reverse sides too!) And here is what I did: