Posted in Design Tips Included!, Finishing!, Nancy's Kilgore Cottage, Uncategorized

Nancy’s #Urban Cottage, Holiday Edition

To all my loyal  blog readers, I want to sincerely wish for you Happiness & Joy this Christmas, as well as a NEW YEAR full of laughter, smiles, prosperity of soul & spirit….oh, & plenty of money in the bank so you can live & give!   ♥♥♥

I just love a fresh start, don’t you?

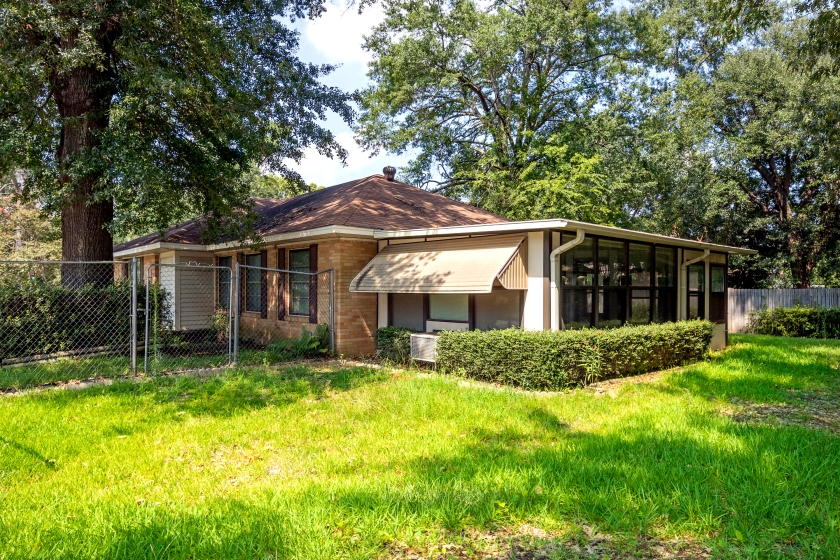
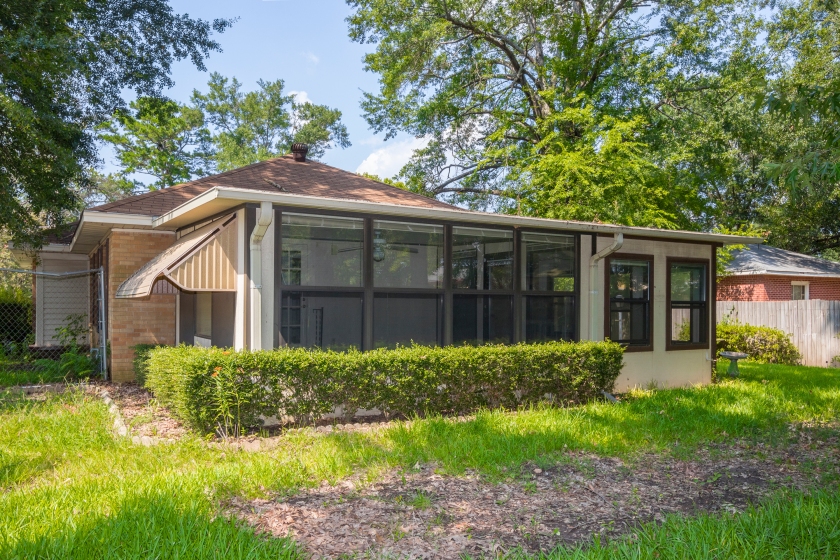
I’m already looking forward to 2018, and all the goals I’d like to achieve in the next, fresh new year….not the least of which is finishing some details inside my little cottage! I’m also looking forward to tackling the fun of face-lifting the facade in the spring!  But before I leave this year behind, I thought I’d give you a visual progress report of where we are now……I hope you’ll enjoy a pictorial snapshot of December 22nd, 2017, as you settle in to enjoy your own Christmas traditions, whatever they may be! (consider sharing pics or traditions with us in the comments below!)

Oh….one last thing:  DISCLAIMERS!!!  This is not complete, and the photography is not professional!  There came a day when Jose really needed to move on to projects/clients who had patiently been waiting for his magic touch, and that coincided with the day I needed a break, to just settle in, unpack, take care of things with my business life, etc.  Suffice it to say we ALL needed a break!  Jose will be back to finish off interior projects soon, then when the weather warms in the spring, we’ll paint the exterior, put up a new privacy fence & redo landscaping & gardens.  For now, ’tis the season of rest….and my cottage is the perfect cozy resting place I knew it would be!  So YES, you’ll see details that need tending to, and I’ll struggle not to point them out…..but I wanted to leave you this December with a feeling of where we are today……enjoy!
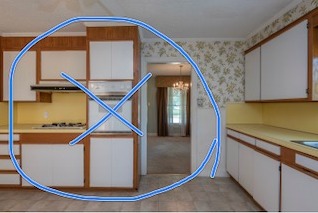
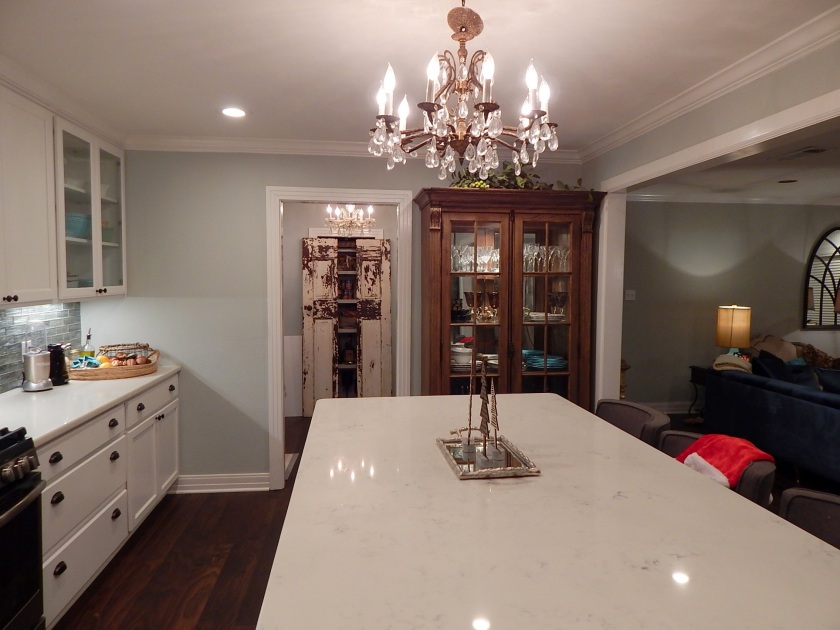
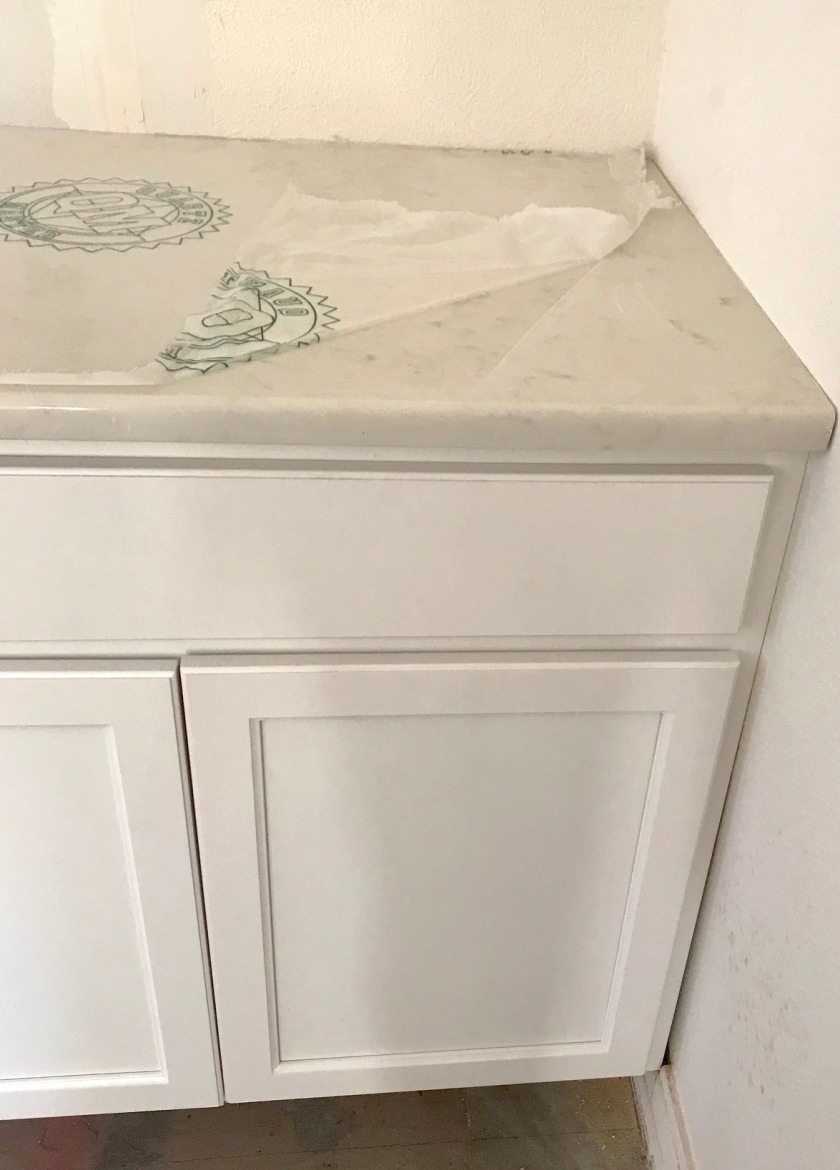
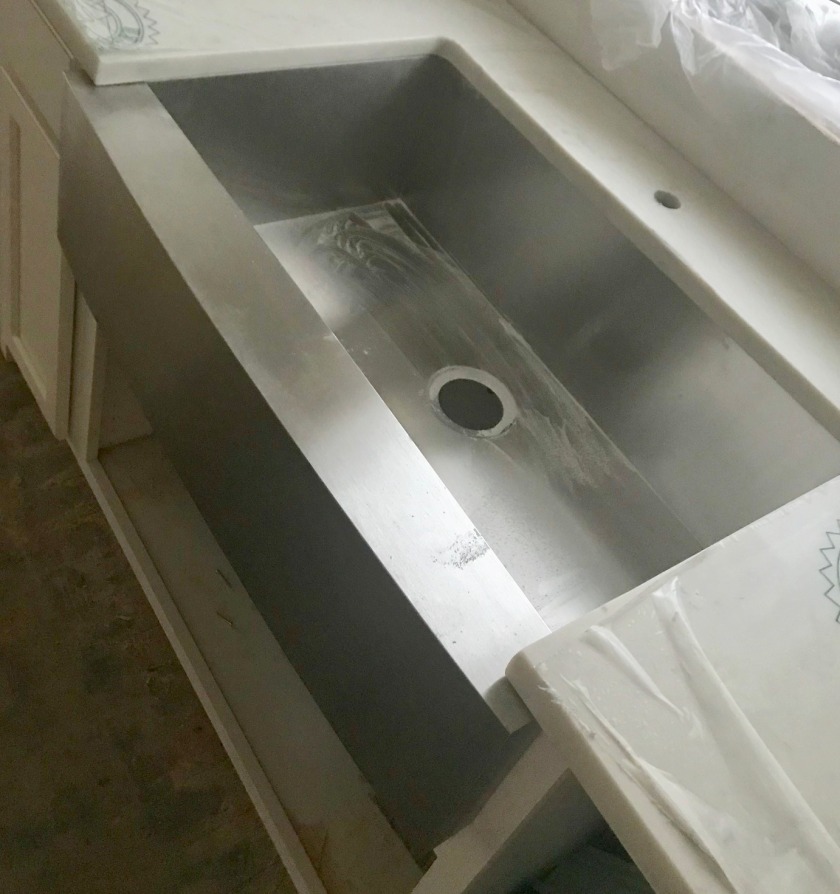
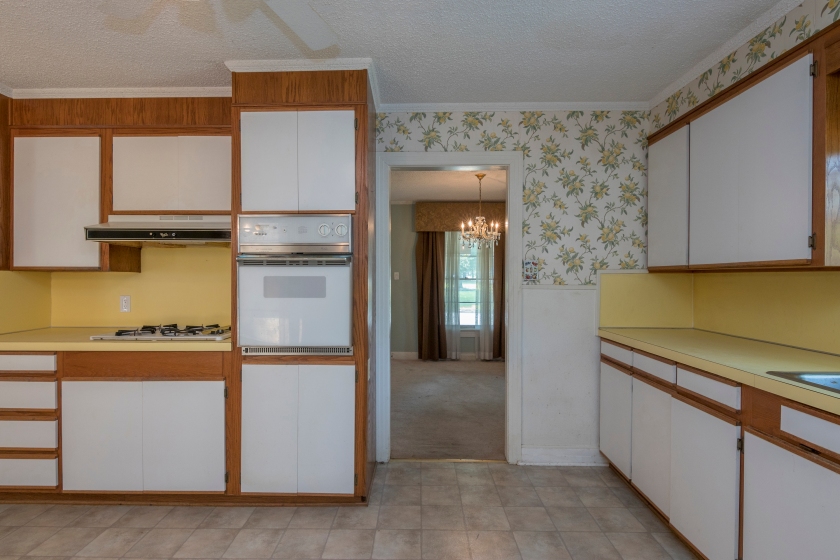
Kitchen

Full frontal (& a little fuzzy) view of the kitchen!

dec kit blog

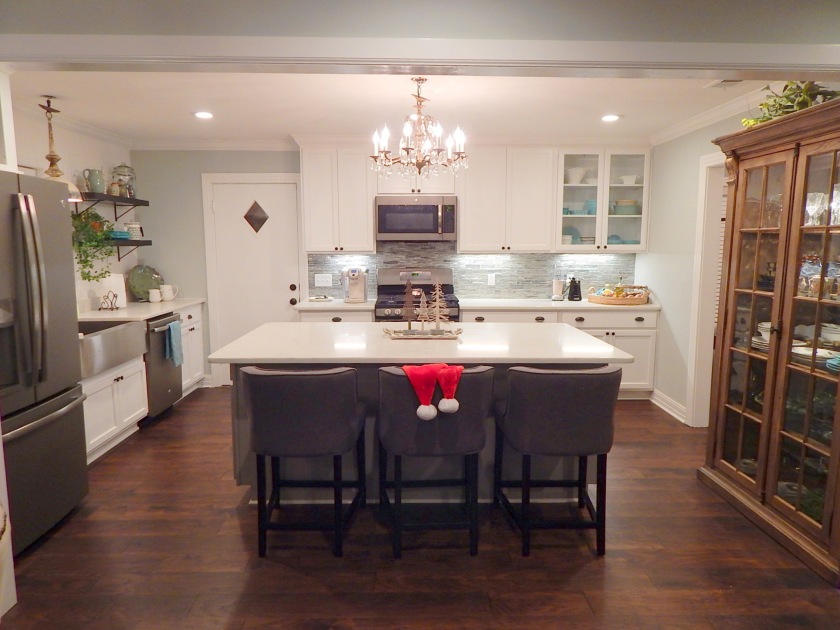
Appliances are GE Adora, Slate

dec kit from china blog

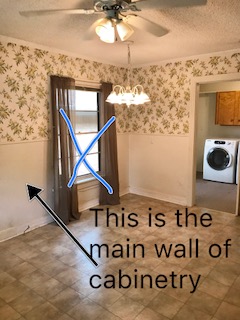
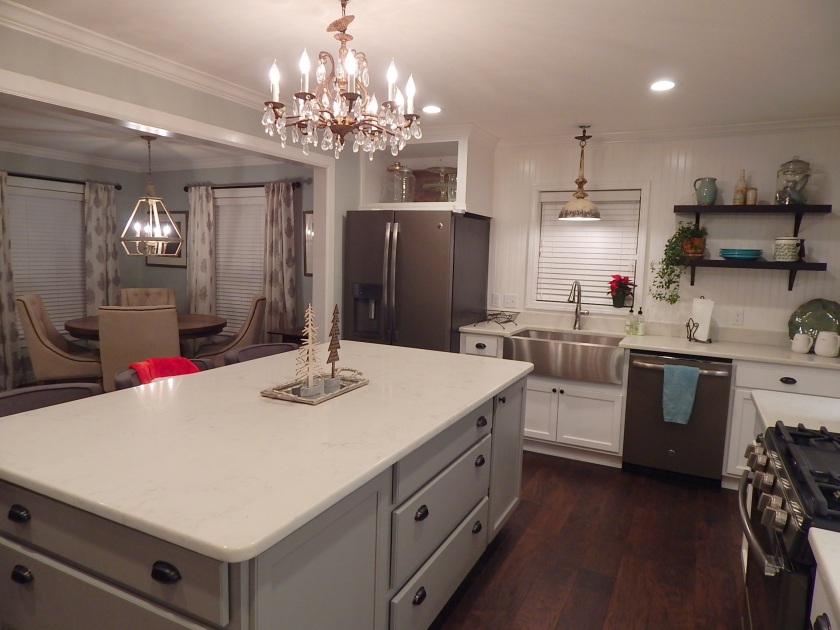
Looking towards the Dining Area…

dec kit to dr blog

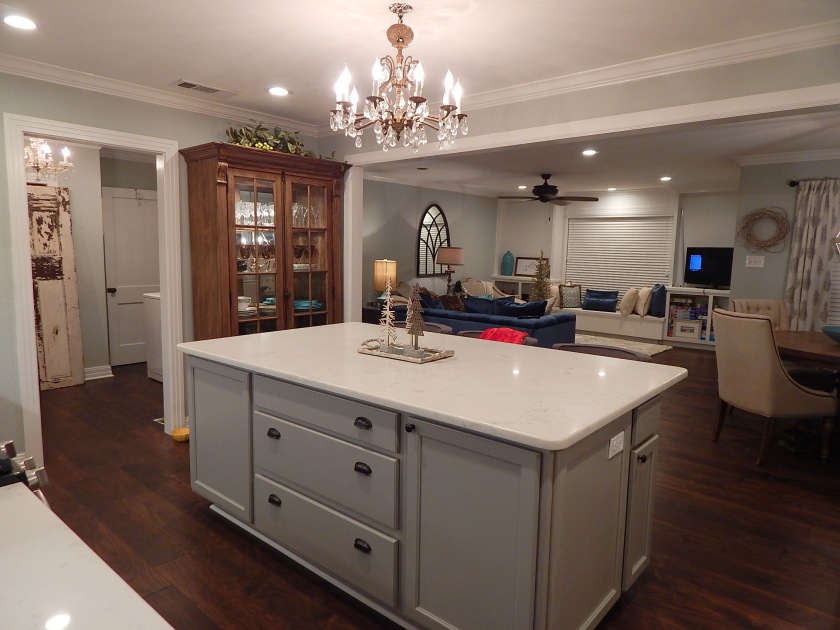
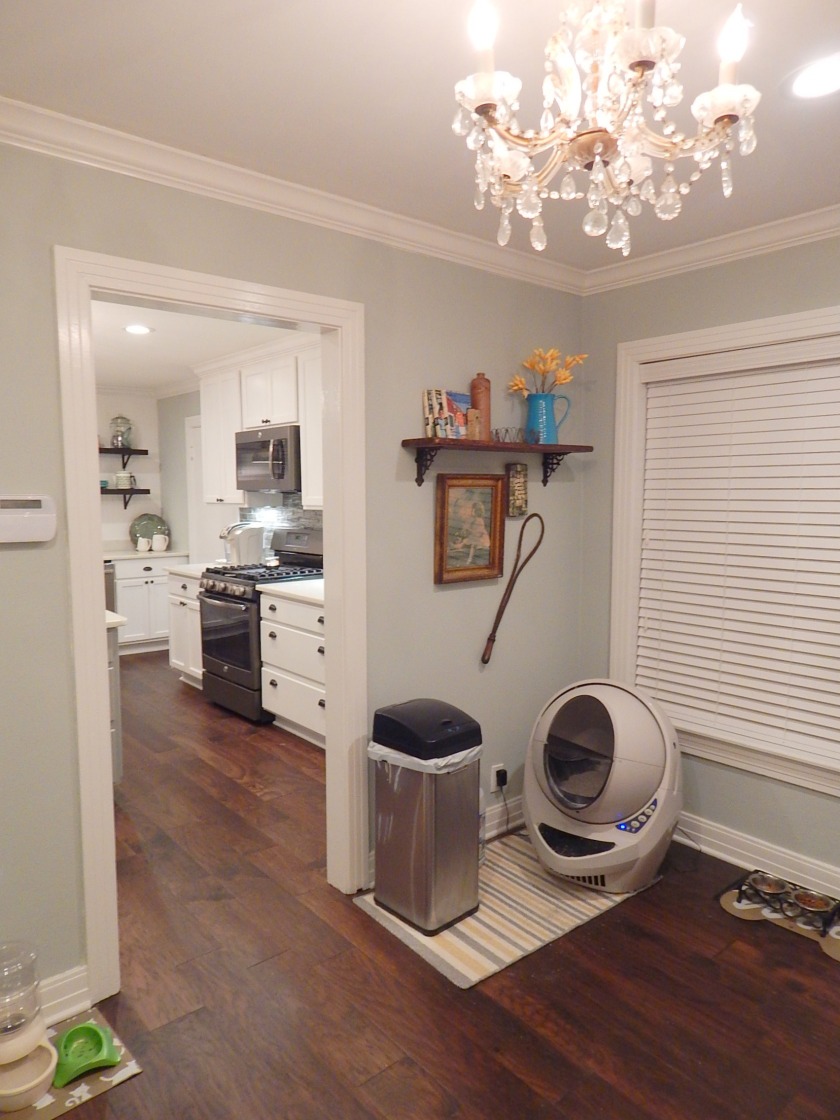
Taken from the kitchen door, looking into the Living room & the Laundry room

(Can’t help myself:  the white doors & shelves for the living room built-ins are in the garage awaiting 2 more coats of paint….& Jose to install them!)

dec kit to lr blog

Here, the kitchen sink is at my back; I’m looking into the Laundry Room, where as you can see, the pantry doors are propped up, but will be mounted as fabulous barn doors soon!  (remember we cut that door in half?)

dec kit to laundry blog

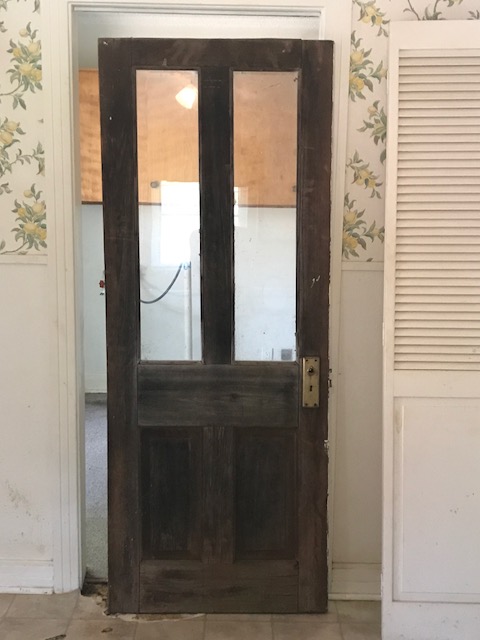
The more astute among you will also remember that my original Canton-found wood door is to be mounted just to the left of the china cupboard, as a swinging door.   Mmmmm I can hardly wait!   Then the 2 original chandeliers will sparkle on either side of the rustic swinging door.  (insert big Nancy smile!)

And…a view of the Laundry  Room (it’s really the PETS’ room!)

laundry pet to kit blog

Living Area

Please let me introduce….Ms Chesterfield adorned in her Sapphire Cotton Velvet!

dec lr best blog

dec lr dr kit blog

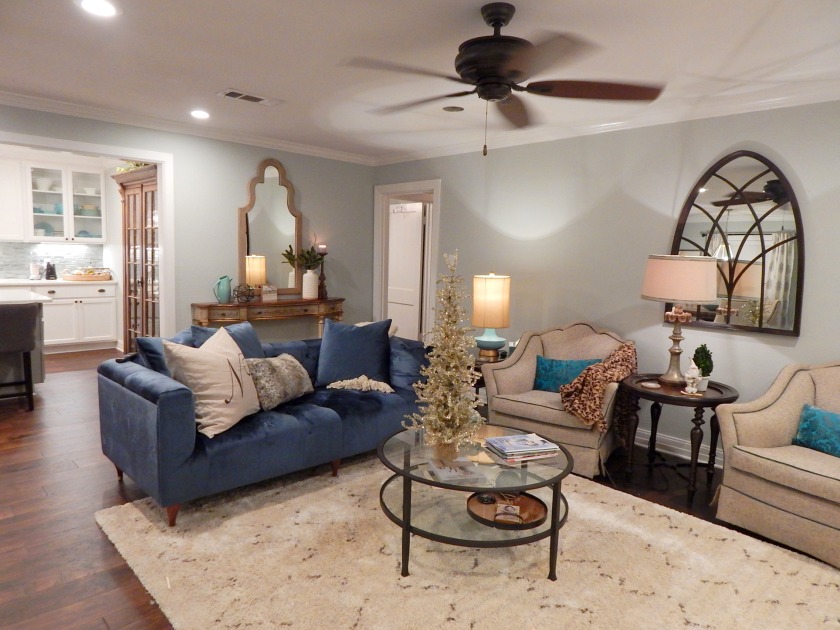
Looking from the hall into the living/dining area
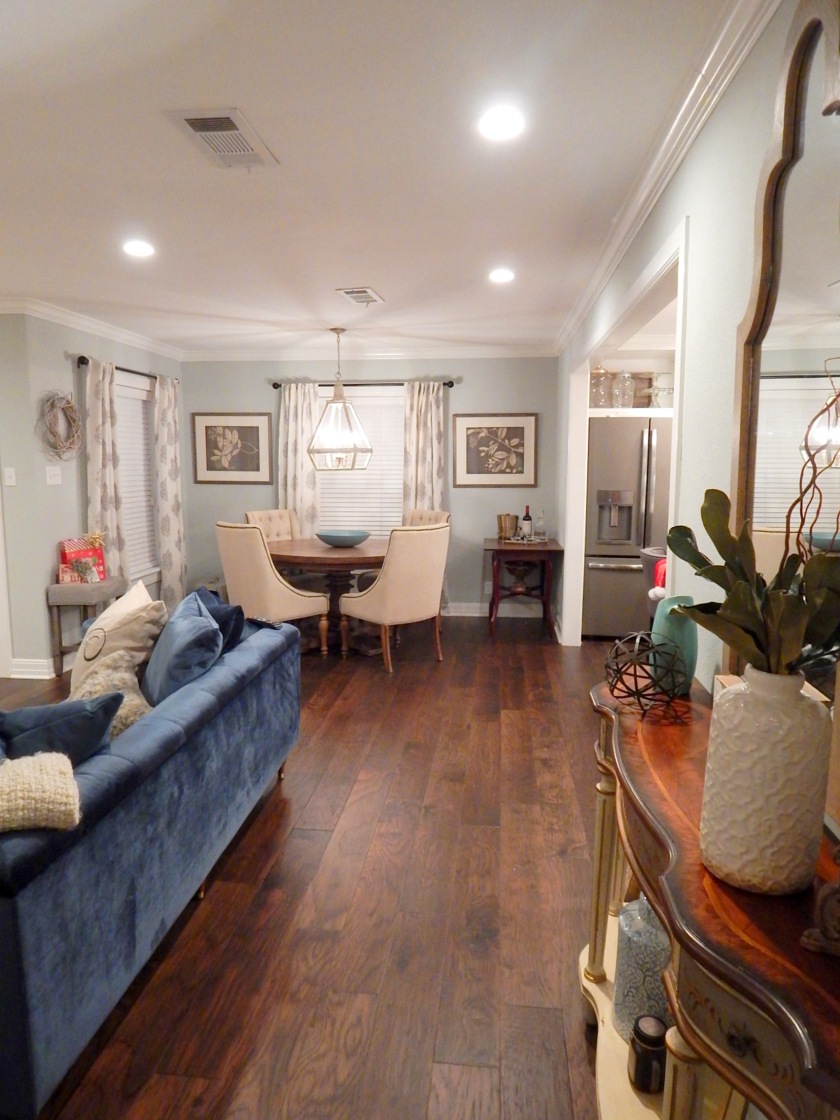
lr from hall blog

Dining Area

din blog

Dec dr to hall blog

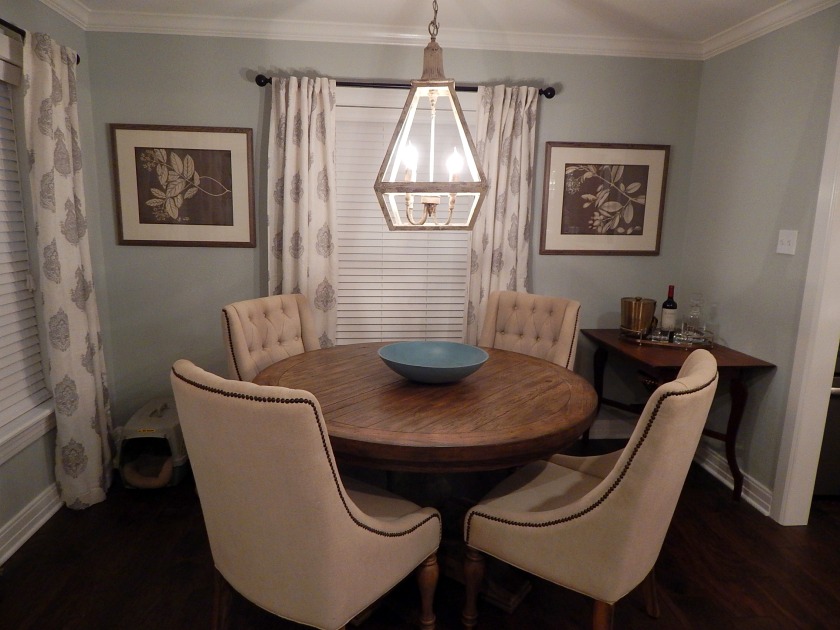
Though I wish the photos were better (I can hardly wait to see what Erica Tamassy will be able to do with this!)….I wanted to give you an idea of how the spaces have transformed from the original layout.  Erika will be doing the professional AFTER pics once we’re truly finished, and then it’ll be fun to compare her super-high-quality BEFORE & AFTER pictures!

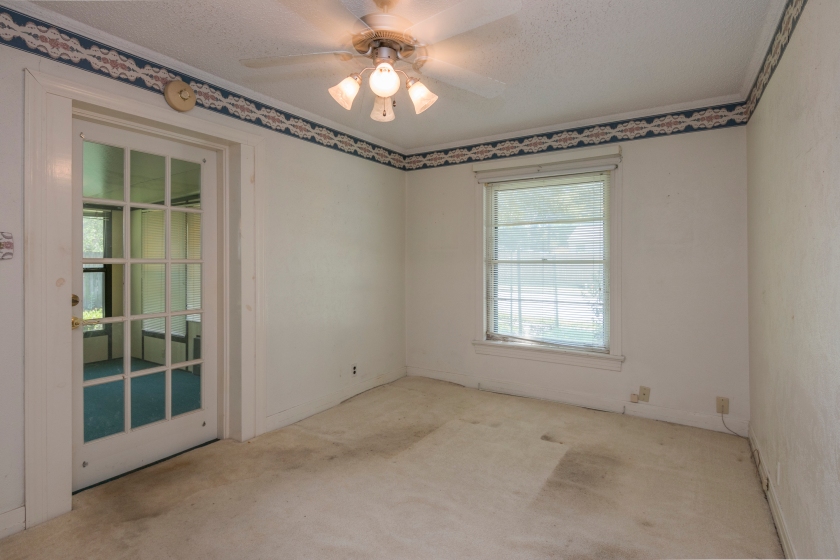
Guest Bedroom (in progress!)

dec guest blog

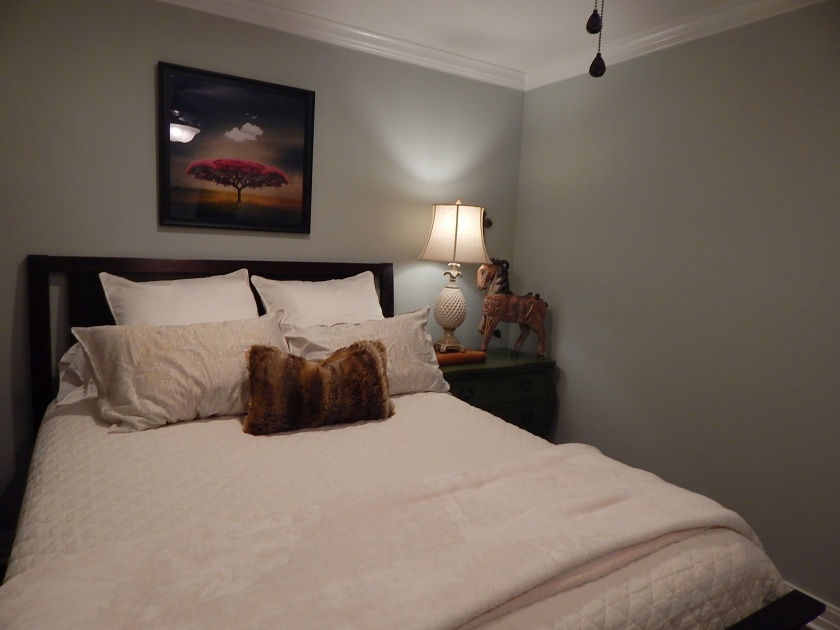
I have more artwork and accessories than I can use in this cottage-sized house, so I’m definitely still moving things around for the best “fit”!  However, this room is being used by guests this month & next, so for now I’ll leave it alone to do it’s job!
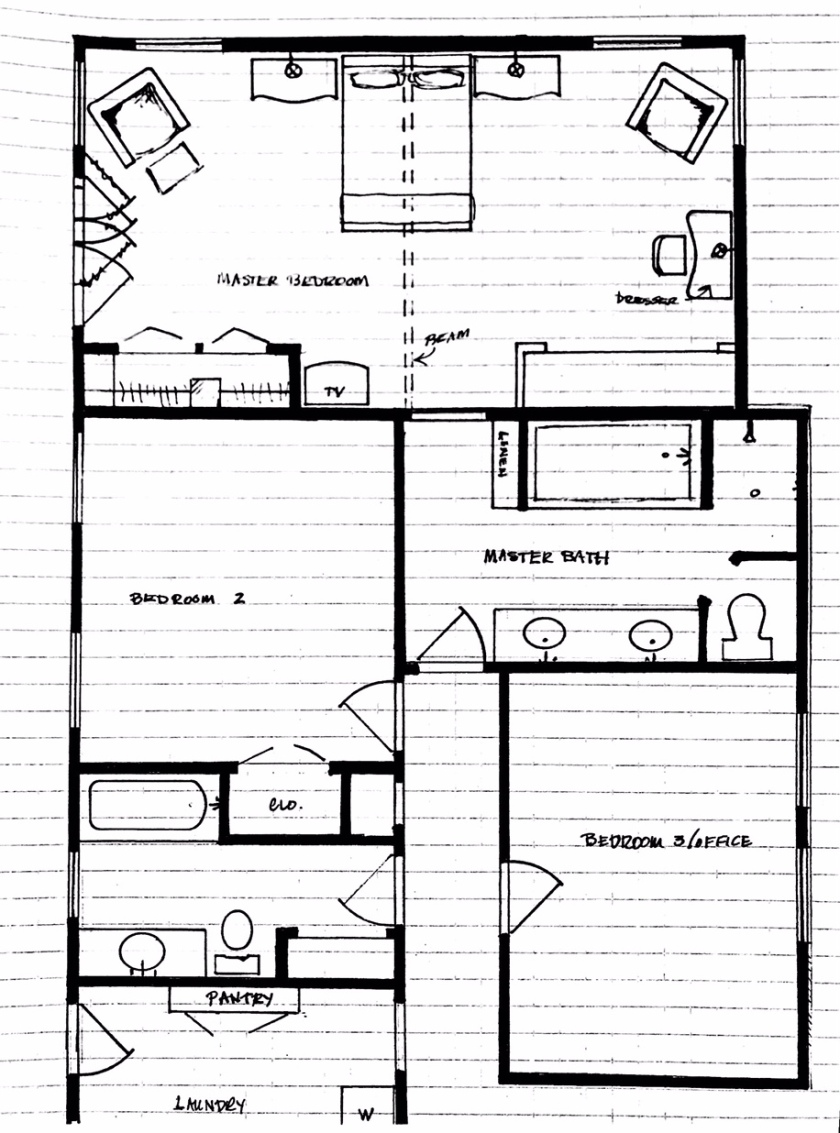
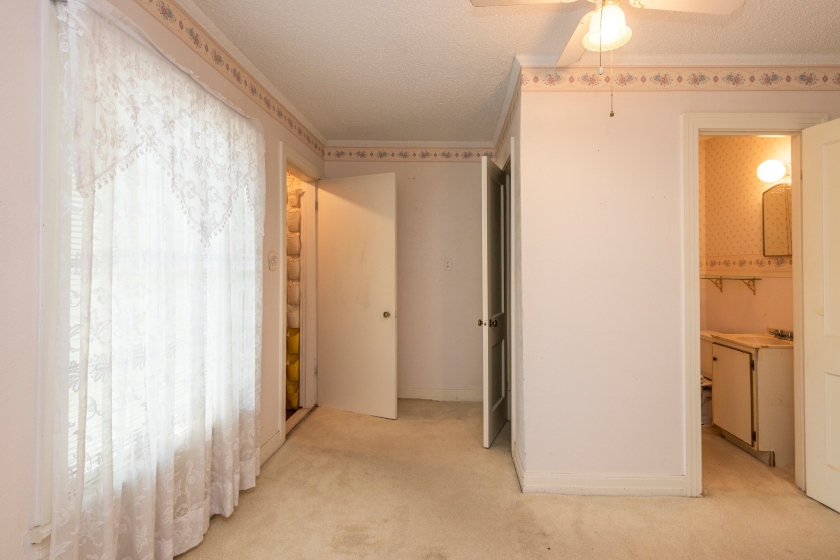
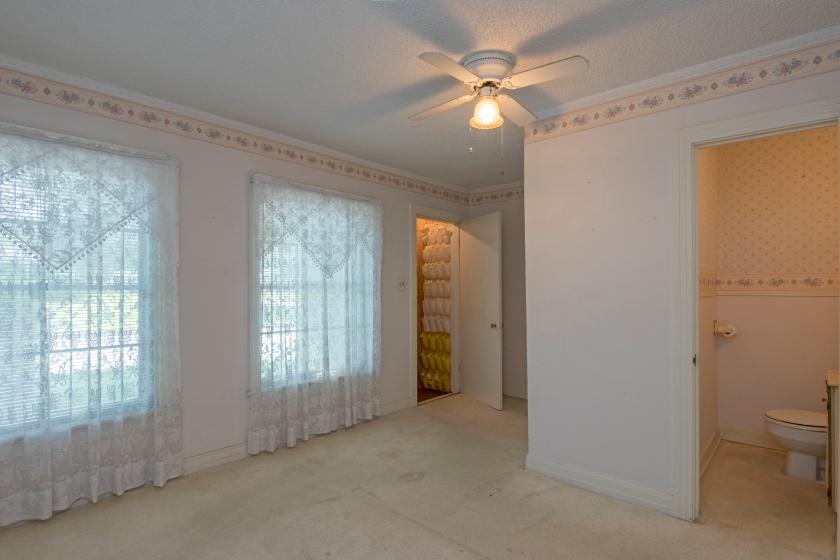
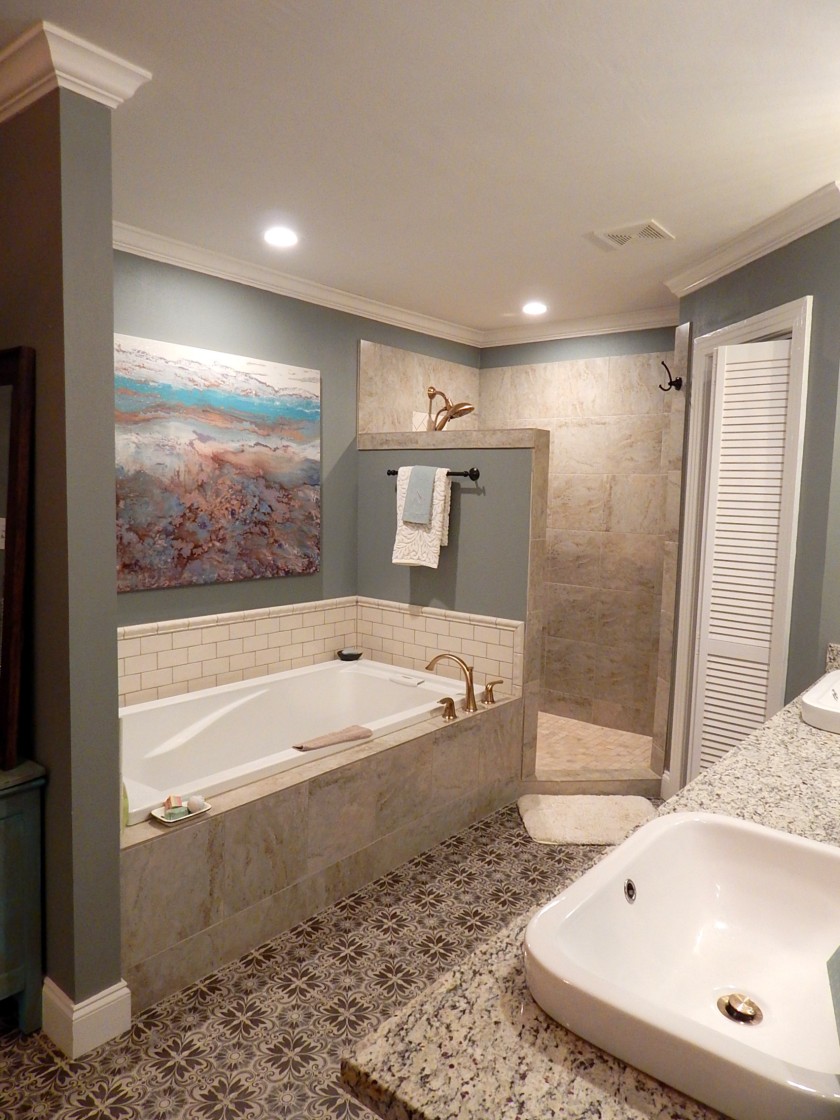
Master Bed & Bath

dec master bath blog

dec br 5

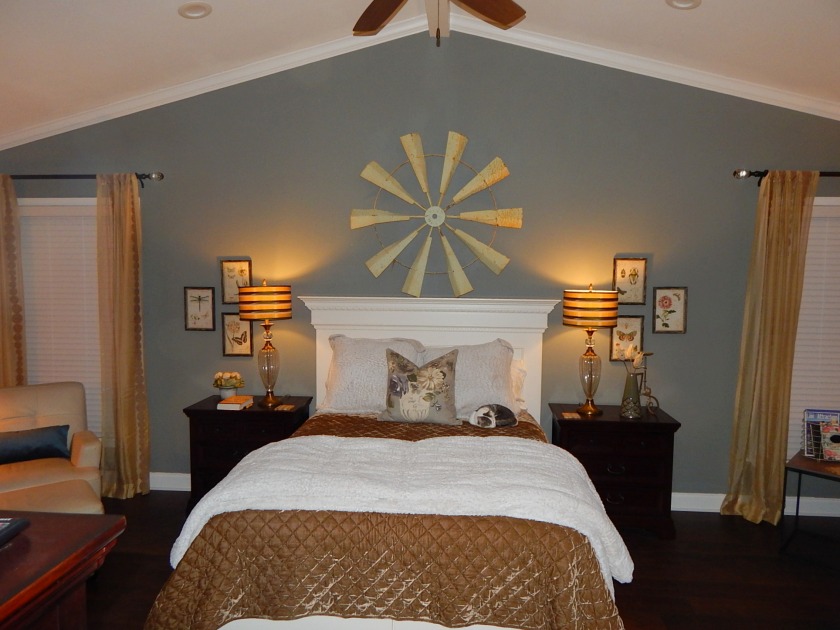
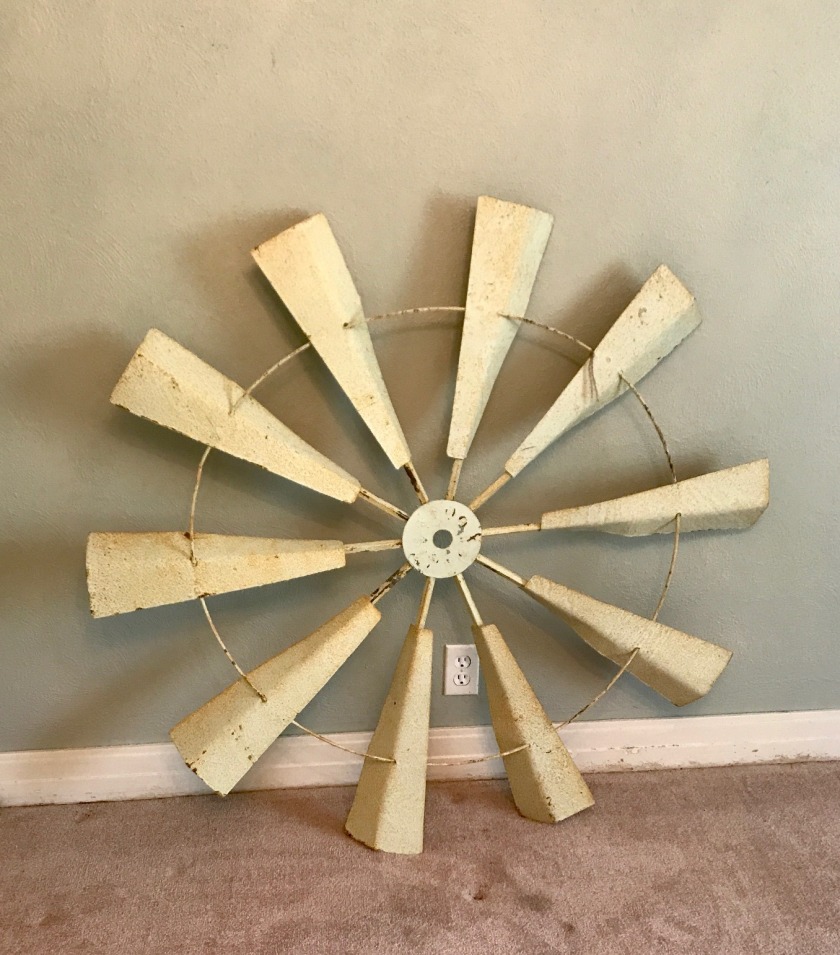
Each house speaks to me in it’s own way; this house consistently calls for symmetry, though I’ve long enjoyed the challenge of an off-center arrangement. The way elements “line up” in this house is a pleasure, and a major player in the design.  (Please know that the windmill vane WILL be mounted as soon as I ponder the best way….for now it’s sits there just fine!)  

The door to the left in the top photo leads to my private porch.  

bed closeup with Sukha

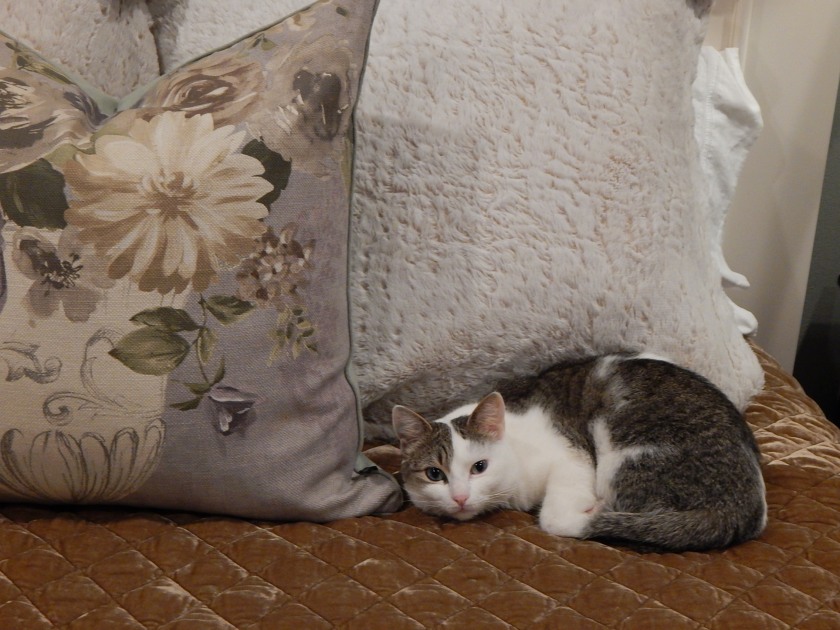
Sukha-Study in contrasting textural interest:  quilted washable silk velvet, natural & synthetic blend faux fur, hand-painted washed Irish linen…..and American cottage house-cat.  <<grin!>>

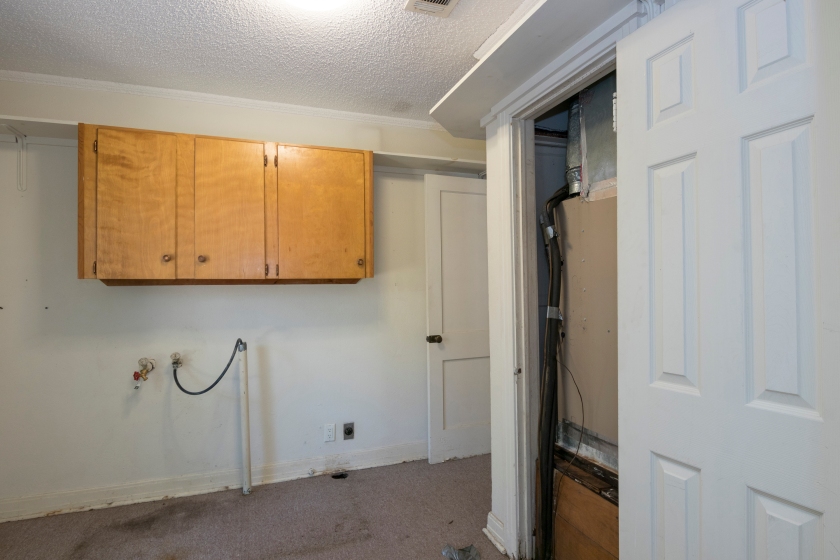
Jose hung these 2 sets of barn doors on the last night of the last day he was here…he was coming down with the awful virus which I managed to catch from him…..and should’ve gone home hours earlier.  But he really wanted to get these up: being the first of the 4 we will have in the house, he knew he’d discover the bugs to be worked out next time.  He did!

These original doors had been stowed in the garage throughout the project, only pulled out on this day for the master closets.  Soooooo they need to be cleaned and painted (though I find the original finish charming).  But once he figured out the barn door hardware, which was harder than it looks, we found the issue we couldn’t have anticipated:  during their life post 1961, some of the doors have been shaved to fit whatever opening they were in .  He couldn’t figure out why they weren’t hanging square with each other, and was looking for a “fix”…..when I noticed the subtle differences.  Anyone who grew up or since lived in an “old house” will relate to the shaving of doors!  When doors & floors swell with the seasons, some do-it-yourself-ers tend to take the easy way out by removing the door from the hinges, carting it out to the ol’ workshop, and shaving the bottom……inevitably at a slight angle.  It is also commonly done when adding carpet to a house with wood floors.  BINGO!  That’s what happened here….and none of them are exactly alike.

Strangely, this hasn’t been bothersome to me, but we will still make adjustments on the next go-around.   We won’t have the same problem with the single slider in the guest bedroom, or the double sliders on the pantry….since we bisected that door ourselves!  

Reusing “old stuff” is always more challenging that starting with all new materials, but I hope  even my slightly fuzzy photos have shown you the extra panache a space carries when old and new are married.  And, as always, I love a good challenge!

DIY-Vintage-Christmas-decor-7

Sending you a little Kilgore Holiday  Cheer!


Friends, please consider adding a family photo or two in comments so we can all enjoy sharing our traditions…..a Christmas story, past or present, will be just as delightful!  I’ve always thought the BEST part of the holidays was to share our joy with others….I would love to hear yours!

merry christmas vintage curl on paper background

Love,

Nancy, Kobe & Sukha

Posted in Design Tips Included!, Finishing!, Nancy's Kilgore Cottage, Uncategorized

Stoned….1 kitchen & 2 baths

Meet Ashleigh, my HERO from Stone Link; she may look young, but Ashleigh is super knowledgeable about all types of stone, quartz, tile, sinks, iron doors….and probably much more I don’t even know about!

Stone Link is located on Highway 80 in Longview, & they have a super extensive showroom and stone yard full of the most impressive displays I’ve seen this side of the Dallas design showrooms….just take a look at the view from their front door:

stone link

Nice, huh?!  This is only a tiny part of the showroom, but the rest you’ll want to explore on your own….

OK, so here’s the story of my urban cottage’s countertops:  I really really wanted to use quartz in the kitchen of this house; I had wanted to use it in a former Lake Cherokee remodel, but alas, that was 2008 and it was quite a bit more expensive than granite…..which always seemed strange since granite has to be formed over thousands of years, in the earth, by pressure, and therefore is a limited resource.  Quartz, on the other hand, is man-made using 8-10% polymers etc, and roughly 90% crushed quartz….which is actually usually crushed or waste granite, marble & natural stone or recycled industrial wastes like ceramic, silica, glass, mirrors, etc.  The pricing on quartz countertops is usually still higher than granite, as demand has continue to drive the price of granite downward….and while quartz started out  ‘trying to look like granite’, the trend now is towards very different-looking quartz material that doesn’t resemble anything nature made!  I see it as a great way to recycle waste material, so it’s a win-win scenario! 

Soooooo, weeks ago I visited Stone Link on a  Saturday; it was D-Day.  I had to know whether or not I could get quartz countertops into the budget, and pick out the granite if not.  I was so lucky to meet Ashleigh, who was totally prepared to answer all my questions, figure estimates based on my kitchen/bath scaled drawings, and was generally all-around encouraging & helpful.  And here is how she made it work for me:

These are 3 pictures of the beautiful PRE-CUT slabs of granite and marble Stone Link has on hand; the selection always varies, and presumably the more desirable slabs sell fastest….though really, aren’t they all beautiful?!    By using pre-cut slabs for both of my bathrooms (thus greatly decreasing the labor involved) we were able to save enough off of my countertop budget to do quartz in the kitchen for just a TAD more….and I decided it was worth it!  So I picked this quartz, which looks a great deal like Carrara marble:

calcutta-grey

And for the two baths, I chose these 2 slabs (honestly I went back and changed one of them a few weeks later, but still chose from the pre-cut slabs)

If you’re wondering why I wanted quartz in the first place, here is a good resource for the comparison between granite, marble & quartz.  But one of the main reasons for me is that granite has to be sealed, & re-sealed yearly, as it is a porous material.  (and most granite owners fail to re-seal….life gets in the way)  For a cook’s kitchen, quartz is actually a harder surface, & easier to keep clean….& it never needs to be sealed.  Also, my vision for this kitchen included white countertops; while there are now more white-based granites available, they are premium-priced & still, more colorful.  Carrara marble is a traditional choice for a cook’s kitchen, but marble is soft & porous….so this beautiful quartz was my favorite choice to give the best of both materials.

I’m happy to say that my lovely countertops were installed last Thursday, and while I’ll give you a tiny peek now….you’ll have to wait a week or two longer to REALLY be awed!  Here’s why:

The house is in serious finish-out phase right now, but that makes it hard to get good pictures of any one thing!  Because we are ‘layering’ the tasks to get me moved in on time (and just because I think that’s the best way), we were still operating this past week without any interior lighting.  The electricians will be back this week to put in the final service panel and install ceiling lights….AFTER the ceilings are painted.  So these pics are going to look really really rough….and you may well not believe the house will be ready for movers in 2…..yes, 2 weeks.  But we do have a plan……stay tuned

island first view

First look at the edge of the 7′ island….

kit ct

First look at one of the countertops (and cabinets!)….

kit sink first view

First look at the stainless one-bowl apron sink…

And….first look at the hall bath counter installation in progress; later that day the undermounted sink was installed beautifully!  But…speaking of sinks…..

The sink issue reminds me to pass on to the uninitiated what can happen the day of countertop installation, in hopes of preparing you to, well….be prepared!

RULE #1:  HAVE ALL YOUR FAUCETS ON-SITE!

Having been through this a gazillion times before, I knew this rule….so Roger made sure the plumbing fixtures were all delivered to the job-site on Tuesday, to be prepared for Thursday.  If you’ve never had stone countertops installed before, it’s crucial to have both the sinks and faucets available.  Often the fabricators will install a standard stainless sink in their workshop, making it necessary to get it  TO them ahead of time – which is also why they often include the sink in the price of the job.  But in my case, the apron sink made it necessary to install on-site, as the cabinet front had to be modified at the same time.  They also elected to install the 3 bathroom sinks on-site, as they were porcelain bowls that could have broken in transit, since they were transporting quite a bit of stone. 

But you also must have your faucets on hand for the installers, as they will need to cut the holes after the countertops are installed.  Some of my clients have been surprised to find out that “faucet holes” are not standard; they each come with a template to be used for cutting the holes, so there is a proper fit when they’re later installed.   And if you think about it,  some sets have a separate hole for the sprayer, lotion or hot water.  (mine has only one hole, as I prefer a pull-out sprayer, and have NEVER ONCE used the lotion, soap or hot water hole effectively)

So I arrived at the house Thursday mid-morning to make sure all the faucets were laid out in the right location in case I couldn’t be there when they needed them.  It was only then that I noticed the kitchen faucet & drain were NOT in the big box of plumbing fixtures that had been delivered!  After a few calls, we determined they had just been left off…..so fortunately  Coburns had the faucet in stock, and I only had to make a quick trip to pick it up and have it available….I was so thankful not to have interfering appointments that day so I could do it!  Then later in the day I returned to the site, knowing they were finally there and working.  Much to my delight, I saw that one bathroom countertop had been installed, and they were working on the master bath!  PROBLEM #2!

RULE #2:  Make sure your plumbing fixtures are measured correctly!


Remember these lovely round porcelain sinks from an earlier blog post?  I just loved the shape, having never seen this exact elegantly curved and perfectly round sink.  And I made sure to pick out a high-arc faucet that would reach over the rim and not splash water outside the bowl.  What Ashleigh and I both missed was actually measuring…..one thing that IS standard is the depth of a bathroom countertop!  As I arrived, the guys were standing there scratching their heads over the master bath slab, with the lovely sink sitting atop it for placement.  What they were trying to do was mark exactly where the hole would be cut; this involves placing both the chosen sink and the faucet on the surface to be marked precisely (and since I have double sinks in that room they needed to match exactly as well).  They not only need to LOOK right on the slab…..they also have to take into consideration the inside edge of the front of the cabinet, and the granite overhang.  They were scratching their heads because I walked right into them realizing this just wasn’t going to work! The sink was too large to possibly fit it onto the countertop, unless I was willing to put the faucet on a side corner…….NOPE!  

A quick call to Ashleigh confirmed that I was in fact the FIRST purchaser of these elegant new sinks…..and nobody yet knew they were too large for a standard installation!  (The way they would work is to have the faucets wall-mounted, but that’s not a modification that can be made this late in the project).  However, this is where flexibility is key to a successful remodel:  we both knew they had just gotten in 2 sinks from the same line which were a softened rectangle shape.  Ashleigh had actually called me to come in earlier in the week to see the new ones and make sure I didn’t want to switch.  So there was the solution!  She immediately sent out the alternate sinks and the job continued.  I’m sure the new shape will grow on me, but on a project this size one really has to be flexible and not sweat the necessary modifications!  Be the end of the day, the installers had finished all of the countertops, sinks, backsplashes and final corner polishing….and they are just beautiful!  Unfortunately, I cannot show you how pretty they are, as this week all the interior painting is taking place….and the countertops are safely protected,  not to be fully unveiled until it’s safe!  However, I DID give you a sneak peek.  Next time  you see them, I hope you love them as much as I do!

I can hardly wait to reveal the gorgeous new kitchen backsplash I switched to this past week!  I changed from a basic greige subway tile to an iridescent subway that pulls in the grays, bronzes and aquas in sight of the kitchen, very very subtly.  Pictures do not do justice to this lovely tile, so just know I’ll show you very soon!

Finally in closing, thanks go to Ashleigh and her crew from Stone Link….your professionalism is much appreciated!  And to Nancy with Coburns, who listened between the lines and made my selections easy, thanks to you as well!  Both companies are a great resource to us in this area; please check our their showrooms next time you’re dreaming up a project at your own house!  

Here’s what is coming up this week:

  • Window trim-out, crown moulding, door facings and base mouldings installed

  • Interior painting

  • Small carpentry ‘fixes’ including the finished step from master bath to bedroom and uneven floor fill-in (where walls were removed)

  • Tile installation

    happy fall!

set your clocks back next Saturday night!

Posted in Uncategorized

Let’s Talk about the Kitchen!

It’s 1961; I’ve just found my dream home, and it has a nice, big open kitchen with those modern laminate cabinets with no visible handles!  Oooohh, I just LOVE the canary yellow laminate countertops, and how the laminate goes all the way up to the cabinets….but my FAVORITE is the cheery wallpaper!

IMG_9158-4

846-02793331

“It’s so nice to have these modern conveniences….making it far easier to cook, clean & take care of the kids in my tight dress, heels and stockings……”


“I’m sure this kitchen is timeless in its modern design!”

have-not-clipart-74166


Alas, I’ve been as guilty as any designer in thinking my designs would be timeless…

…makes me think of all the lovely wallpaper borders we hung as an accent to the room – right over the texture – raise your hand if you’ve ever tried to remove one of those!


Let’s talk about MODERN kitchens, 2017!

01TRUMPFOOD1-master768


Oops…wrong kitchen…ok here’s our beginning point – the Kilgore cottage kitchen today…

IMG_9158-4

PROJECT:  Give this charming 1961 kitchen 2017 style, convenience & panache


CHALLENGE 1:  Do not overpower the intrinsic charm                                    of this lovely cottage with 2017 style

CHALLENGE 2:  Do not overspend the house completely,                                though it’ll be tempting to use the best!

CHALLENGE 3:  Make this the kitchen everyone wants                                    to gather in by creating atmosphere

IMG_9160-4

OK, so first comes the demo; ALL the cabinets will come out (sadly, they’re site-built so cannot be donated)  The appliances WILL be donated; though old, they all work.

I would have left the high wainscoting – love that!  But I can’t see how to save it yet after demo (stay tuned – I’m planning to try)  But that brings up an interesting design dilemma you may want to know about.  Since we’re stuck with 8′ ceilings here, I will have to create the ‘feeling’ of space (aka visual space) by accenting vertical lines, rather than horizontal.  Kitchens have natural horizontal lines, mostly due to the countertops; you can hardly vary the height of them just for visual purposes!

But if you’ve even wondered why you’re drawn to kitchens with varying heights of upper cabinets, now you know why!  It’s not like adding a higher-up cabinet is really of much practical use…..but it keeps from creating yet another strong horizontal line, that being the uniform TOP of the cabinetry!  This CAN be notably different when ALL uppers go to the ceiling…..stay tuned.


These are not finished kitchens, but CAN YOU see the strong horizontal lines in 3 of the pictures, and the way it’s broken up on 2 others?  It’s just one of the tricks when trying to achieve balance and flow….more to come!


Demo Plans!

Kit demo 6

This shows the kitchen facing the living/dining area; this wall will come out, and be replaced by a long shallow arched opening….and a nice big island goes in it’s place!

kit demo 1

To the left of the kitchen sink, I’ll leave enough wall to cover the fridge, and leave enough to lend a “sense of space” to the open dining on the other side….to the right of the sink, I’ll leave OFF the upper cabinets, in favor of some open shelving.  The main kitchen door opens onto this wall of cabinets; things placed in upper cabinets would be rarely accessed!

kit demo 3

Sadly, I’ll need to lose this window in the kitchen; with openings on 3 sides of the room, I need a long wall somewhere to support the main section of cabinetry and the gas range.  It was more important to me that the range be centered on the island than to have this large window…you’ll see what I mean on the plan view.  If there’s one thing I cannot stand to see, it’s kitchens where the various elements do not line up!  The smallest attention to detail is what determines whether or not people are comfortable in that space…most do not know what element makes them uncomfortable, but improper lining up of the elements in a kitchen is a BIGGIE!

Note:  you won’t SEE a washer/dryer from this vantage point remember?  They’re going to be tucked into a space where they’re not visible…AND you’ll be looking through my vintage wooden door with double vertical panes anyway!

1700 s martin kit floor plan (2)

Soon I’ll share the cabinet elevations, along with colors and materials!  That’s the FUN part!  And remember….I always welcome your comments, like, loves & questions!  Thanks for sharing the journey….it’s all the better for sharing!

Just for fun, I’ll leave you with the new Island Lantern, and two crystal chandeliers that were in the house….destination to be determined!  


Until next time, if you know someone wanting to buy or sell real estate anywhere in East Texas, I hope you’ll give us a call, and check out our website here!

Posted in Uncategorized

Believe it or not….

How ugly is this?!  AND it has a window unit…ugh.  There are so many windows that the in-between can hardly hold them up….and how ’bout that astroturf?!

Well, believe it or not…..this will transform into my beautiful master bedroom suite, with wood floors, vaulted ceiling, one brick wall, and all the fantastic-ness one can stand in their private retreat….you’ll have to see it to believe it, so stay with me folks!

IMG_9190-4IMG_9189-4IMG_9188-4

Here it is from the outside view; lovely huh?  Well, sitting under all those windows and aluminum, and yes the metal awning, is something very very useful….a SLAB!  So off it all comes!  We will pull the gabled roof out over a completely new room (thus the vaulted ceiling) and this eyesore becomes my favorite room, overlooking my beloved hydrangeas-to-be!

You may wonder, then….what about a super-cool master bath to go along with that new master bedroom?  Just fyi, the house NOW has 1 1/2 baths….and the 1/2 is more like 1/4, or 1/2 made for wee people….it’s going away on demo day!

IMG_9173-4

Ugly weird bedroom to the rescue!

This strangely-shaped excuse for a bedroom DOES have a french door opening into the now-sunroom (yes the one with the Astroturf).  I’m not sure who ever wanted their bedroom opening to the sunroom with all the windows and a french door, or who wanted anyone using the sunroom and back porch to travel through their bedroom to get there…..but no worries because THIS WILL SOON BE THE MASTER BATH!

Just in case you aren’t foundation-savvy….while plumbing is a BEAR to move around in a slab-built home, it’s very do-able when your home is built on pier-and-beam.  We’re all smiling except the poor plumber who has to crawl around under there…but he knew that when he chose his profession!

You’ll see this transformed into a posh bath with 6′ soaker tub, walk-in shower, double vanities etc etc etc….but alas, I had to give up the window to have the separate shower.  Kinda sad about that, but let’s face it:  the blinds would’ve been closed all the time anyway.  And in case you’re super observant, you’ll see that door move to the left so I don’t have to step through the tub to get into the bedroom.

Here’e the layout to start your imagination lining up with mine:

(slight mess-up, as I moved the doors over – oops!)

floor plan bedrooms

And just for fun, a view of the super tiny, silly, way-too-small, what-were-they-thinking,  stretching-to-call-it-that 1/2 bath, IN the bedroom that’ll become my home office:

(by the way, lest you think I’m selling it short, you cannot see that half of that wall space is a closet!  The bath ends right where the door moulding is)

IMG_9169-4IMG_9168-4

while I’m on a roll with the before pics….here’s the laundry room; if you feel bad about it, I’ll tell you what’s already happened in here:

IMG_9167-4IMG_9166-4

The new AC unit went in last week….IN THE ATTIC! Behind that white door on the right (of the left pic)  sits the water heater, which after much contemplation, I’ve decided to have join the AC in the attic.  Now the washer/dryer will have a nice little tucked in place instead of sitting out in the main walkspace, and looking ugly from the kitchen….which is important because…do you remember………?

Old wood door

Yep…the old wood door I dug around and found at Canton….the laundry room gets the white side,  the kitchen gets the wood side, and it’ll SWING!  But who wants to look through it and see appliances?  Problem solved!

Next time I’ll show you the kitchen and living room; I’m pretty pumped about them!  But I will leave you with my other super-cool find of the week…..I’m thinking I’ll hang this on the brick vaulted wall of my bedroom.  I KNOW it’s almost Joanna-esque cliche’, but I love it!  All designers will agree:  we are ALWAYS on the lookout for a basically round item, architectural item preferably.  And large.  That shape works in so many situations where normal artwork would not do the trick.  A vaulted-ceiling wall is a perfect example; over a mantle is another.

windmill

…….sooo when I ran across this windmill in the weathered almost-green and aqua shades I favor, I just couldn’t pass it up……cliche or not!  (my old go-to was a starburst mirror…but that’s now a bit 2005’s ya’ know!) By the way, the colors are soooooo subtle on this weathered windmill that they really don’t show up in the picture…take my word for it – it’ll be amazing in the “AFTERS”!

Thanks for joining me ~ it may be obvious by now, but taking a house apart and putting it back together, better, is play-time for me!  It’s further joy for me to share it with you!