Posted in 50's House in the Woods, Demo!

Deconstruction 201

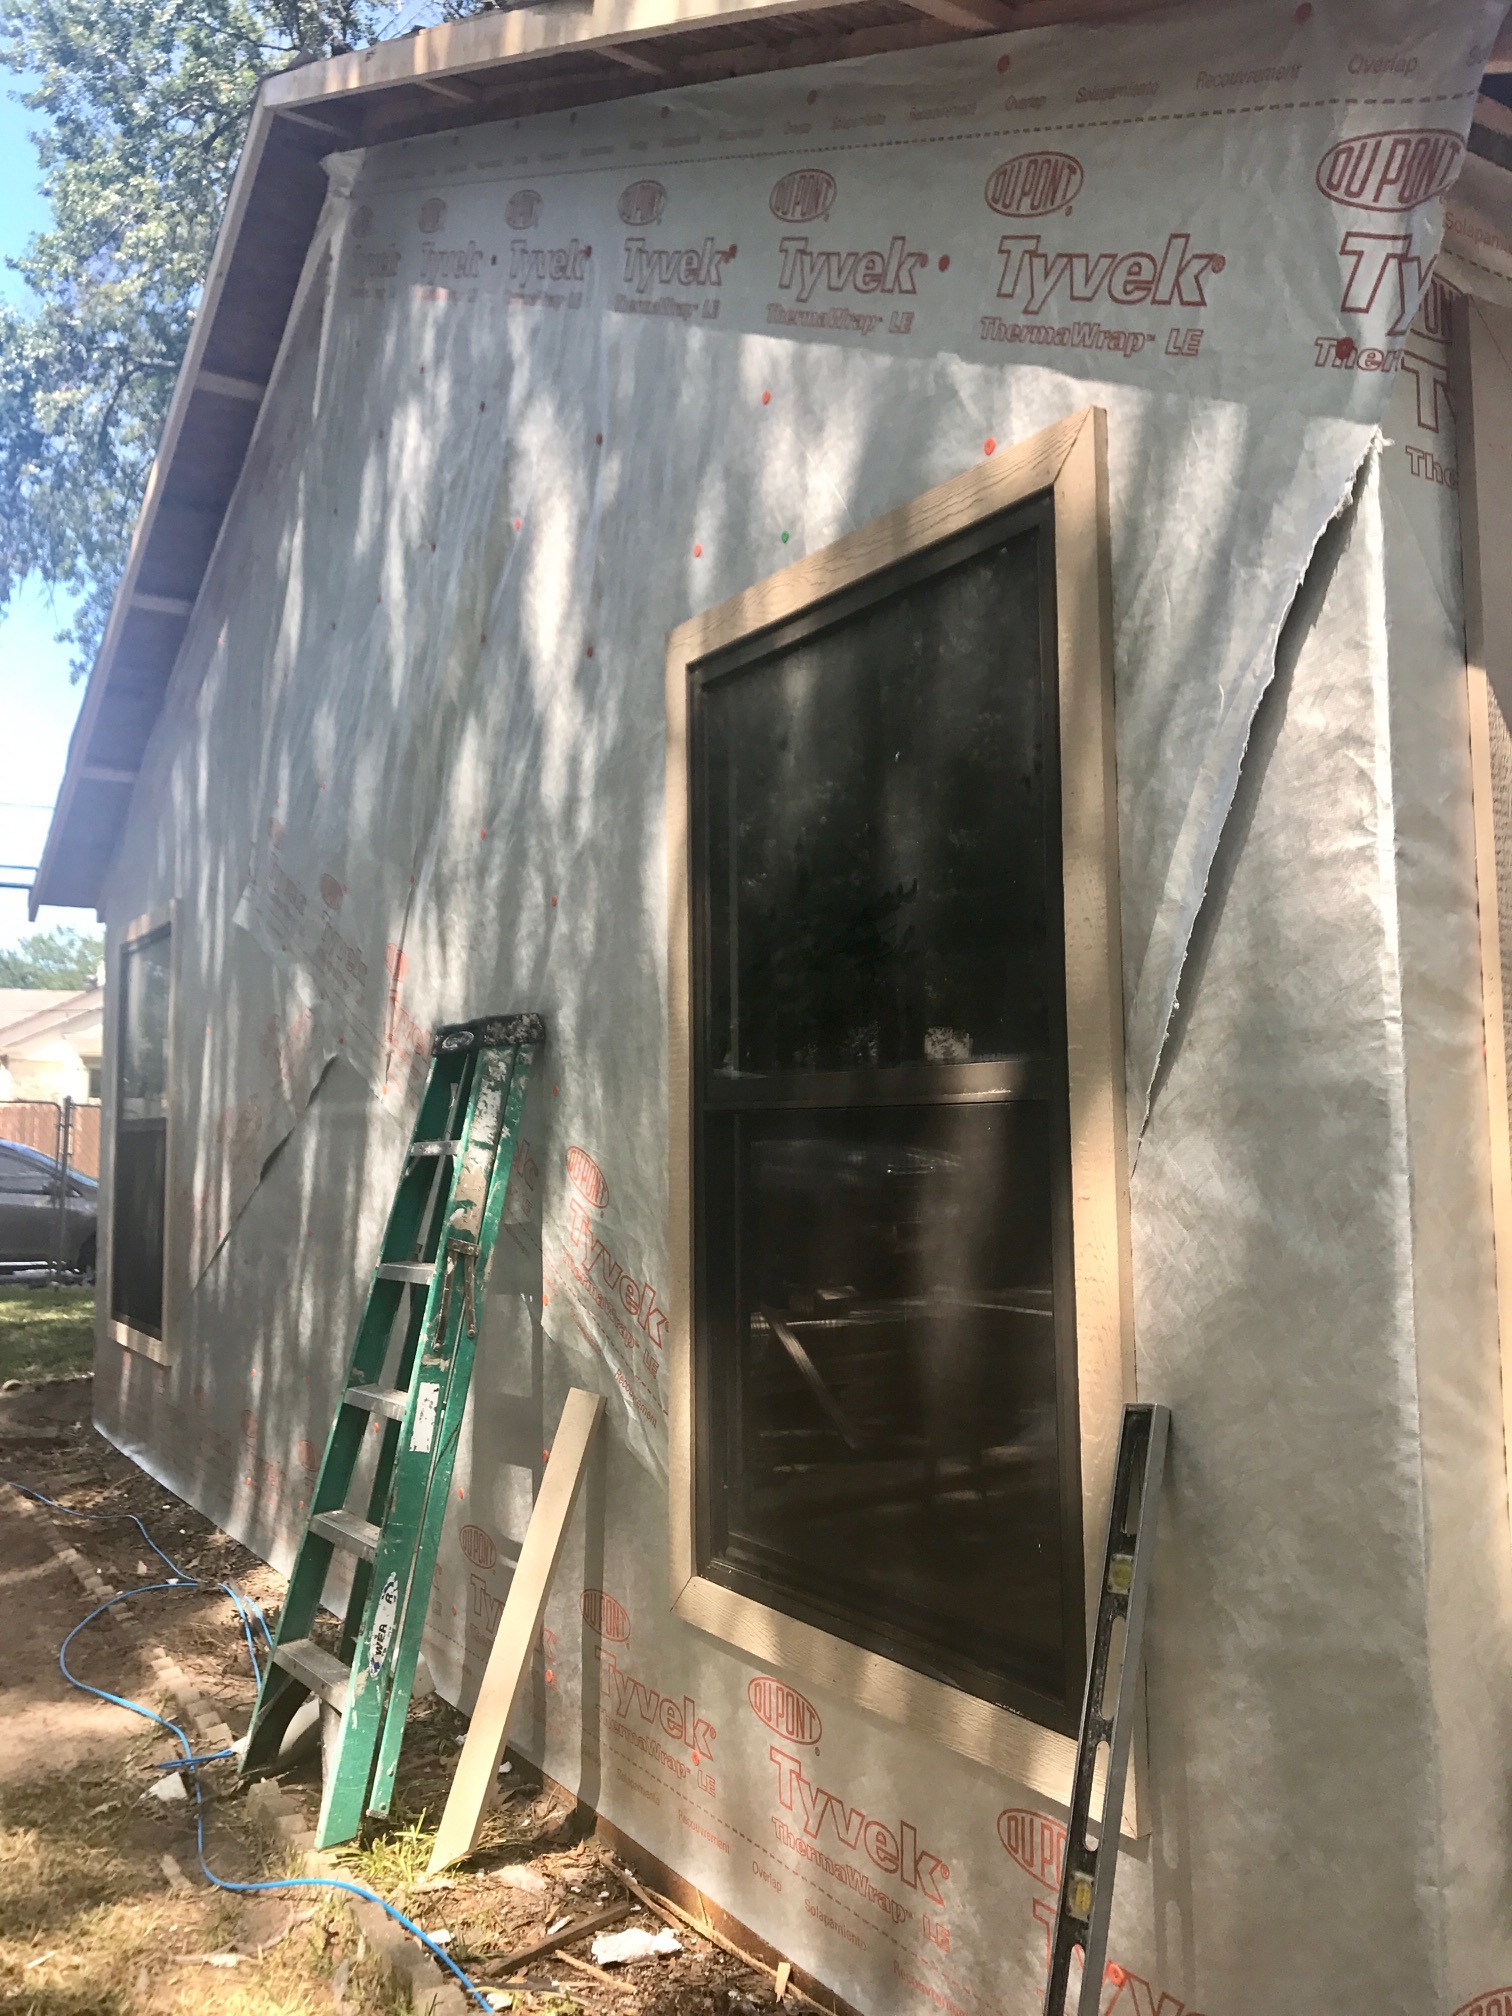
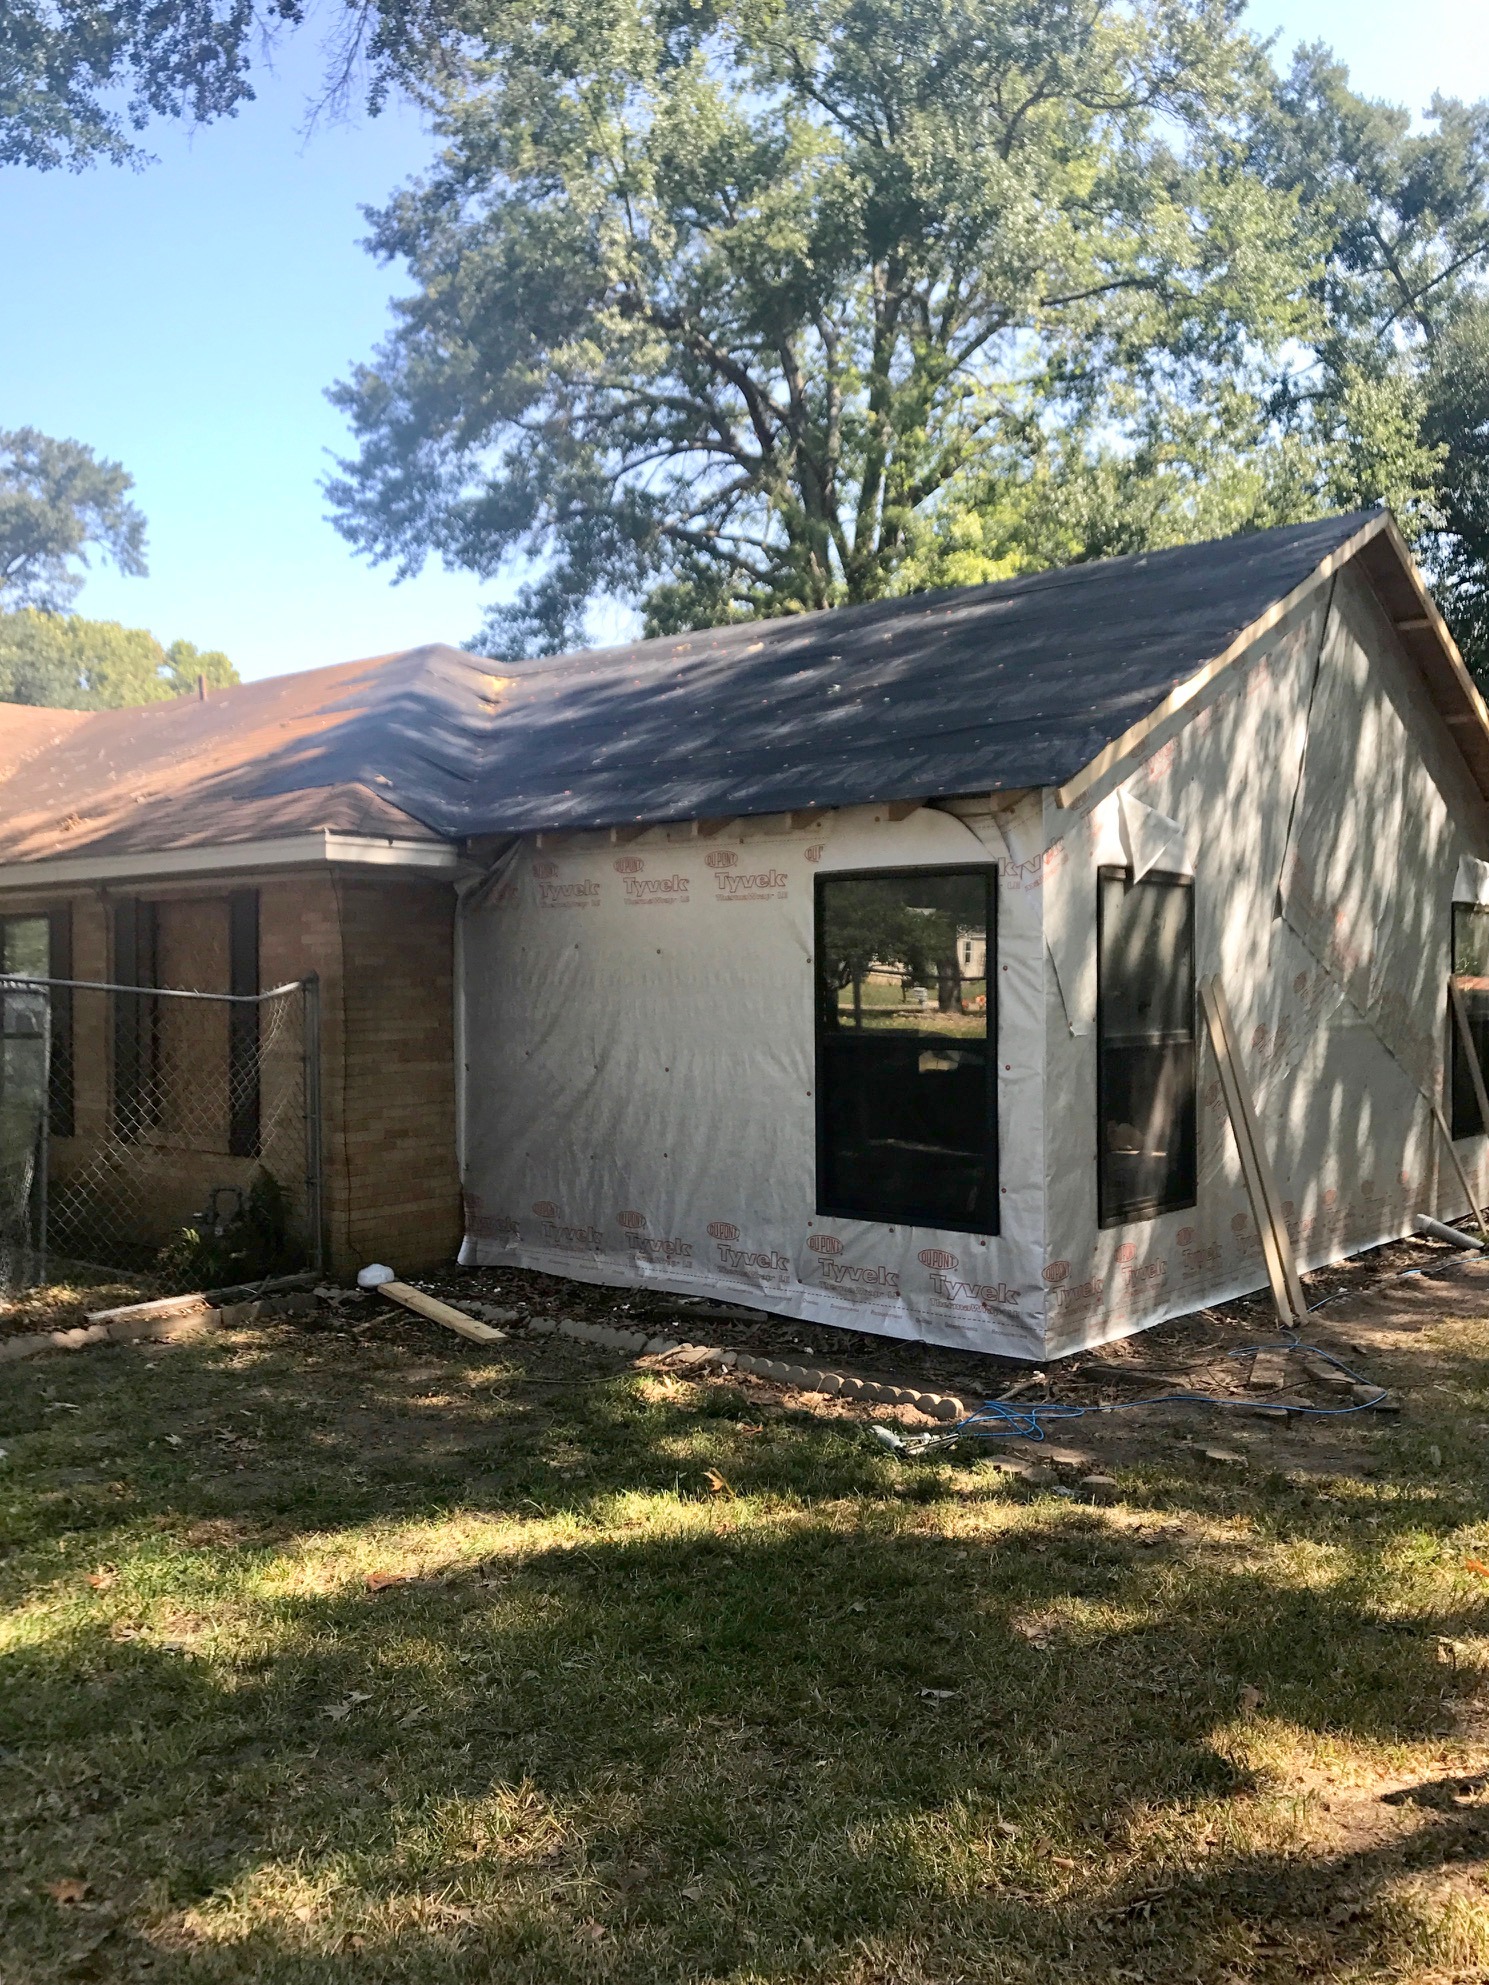
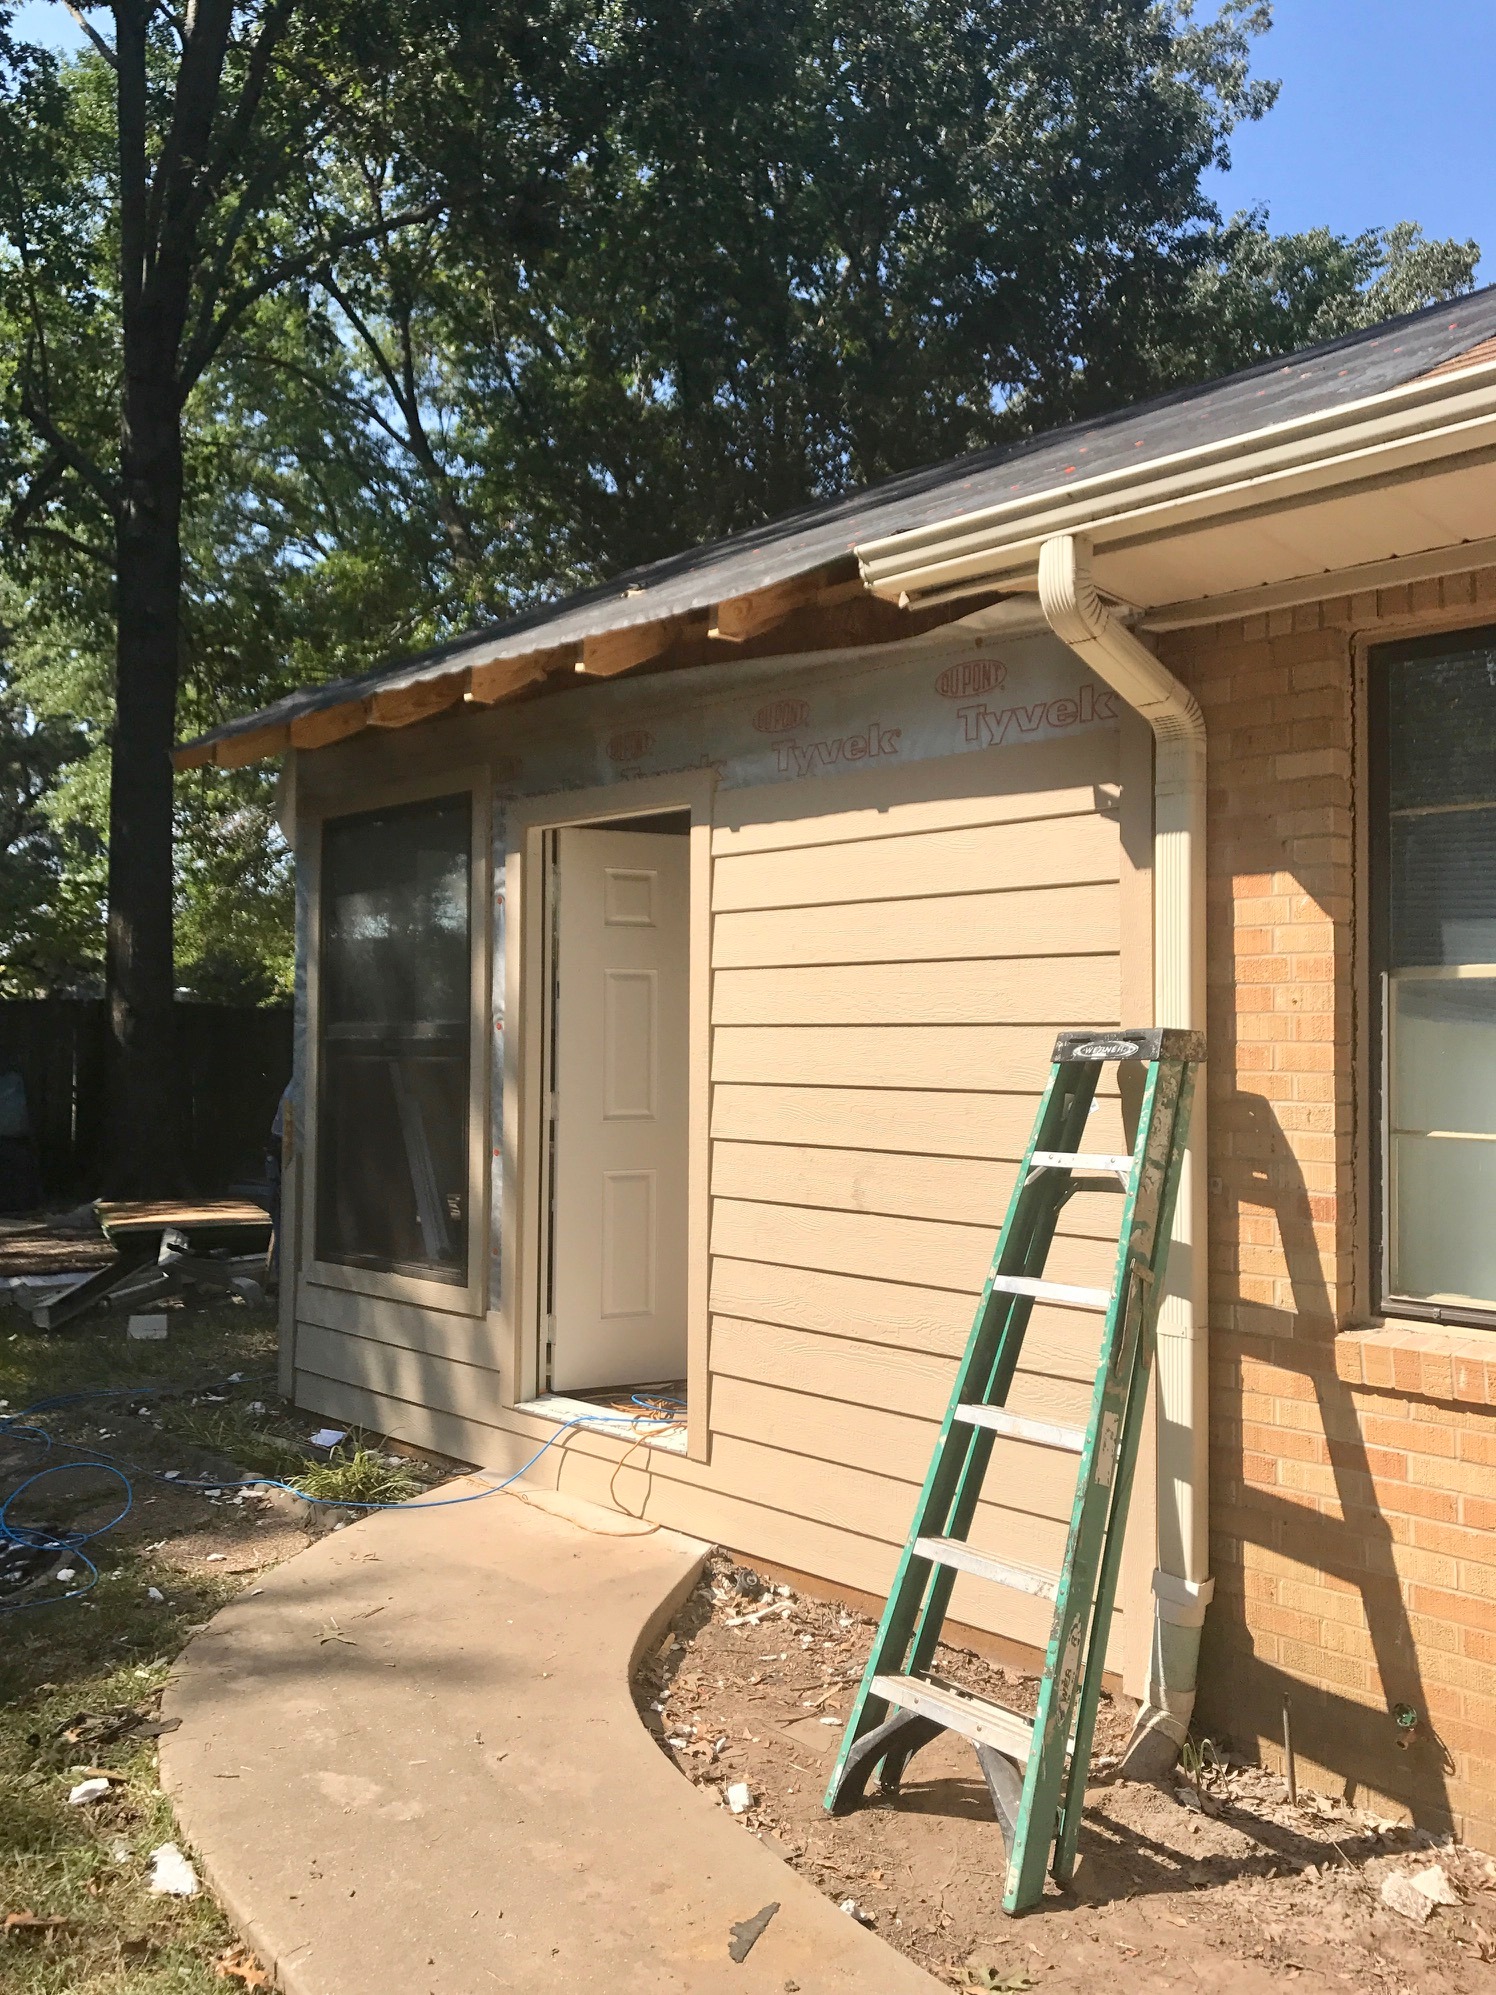
Just a quick update for you this week, on the 50’s House in the Woods project! This coming week we finally get to start putting things back together, as the framing crew redraws the lines of the whole structure: first they’ll frame the outline of the new addition, then completely reframe the roof over the “old” part of the house, the new wing and the patio. I can hardly wait to see how they tie the roofs together!

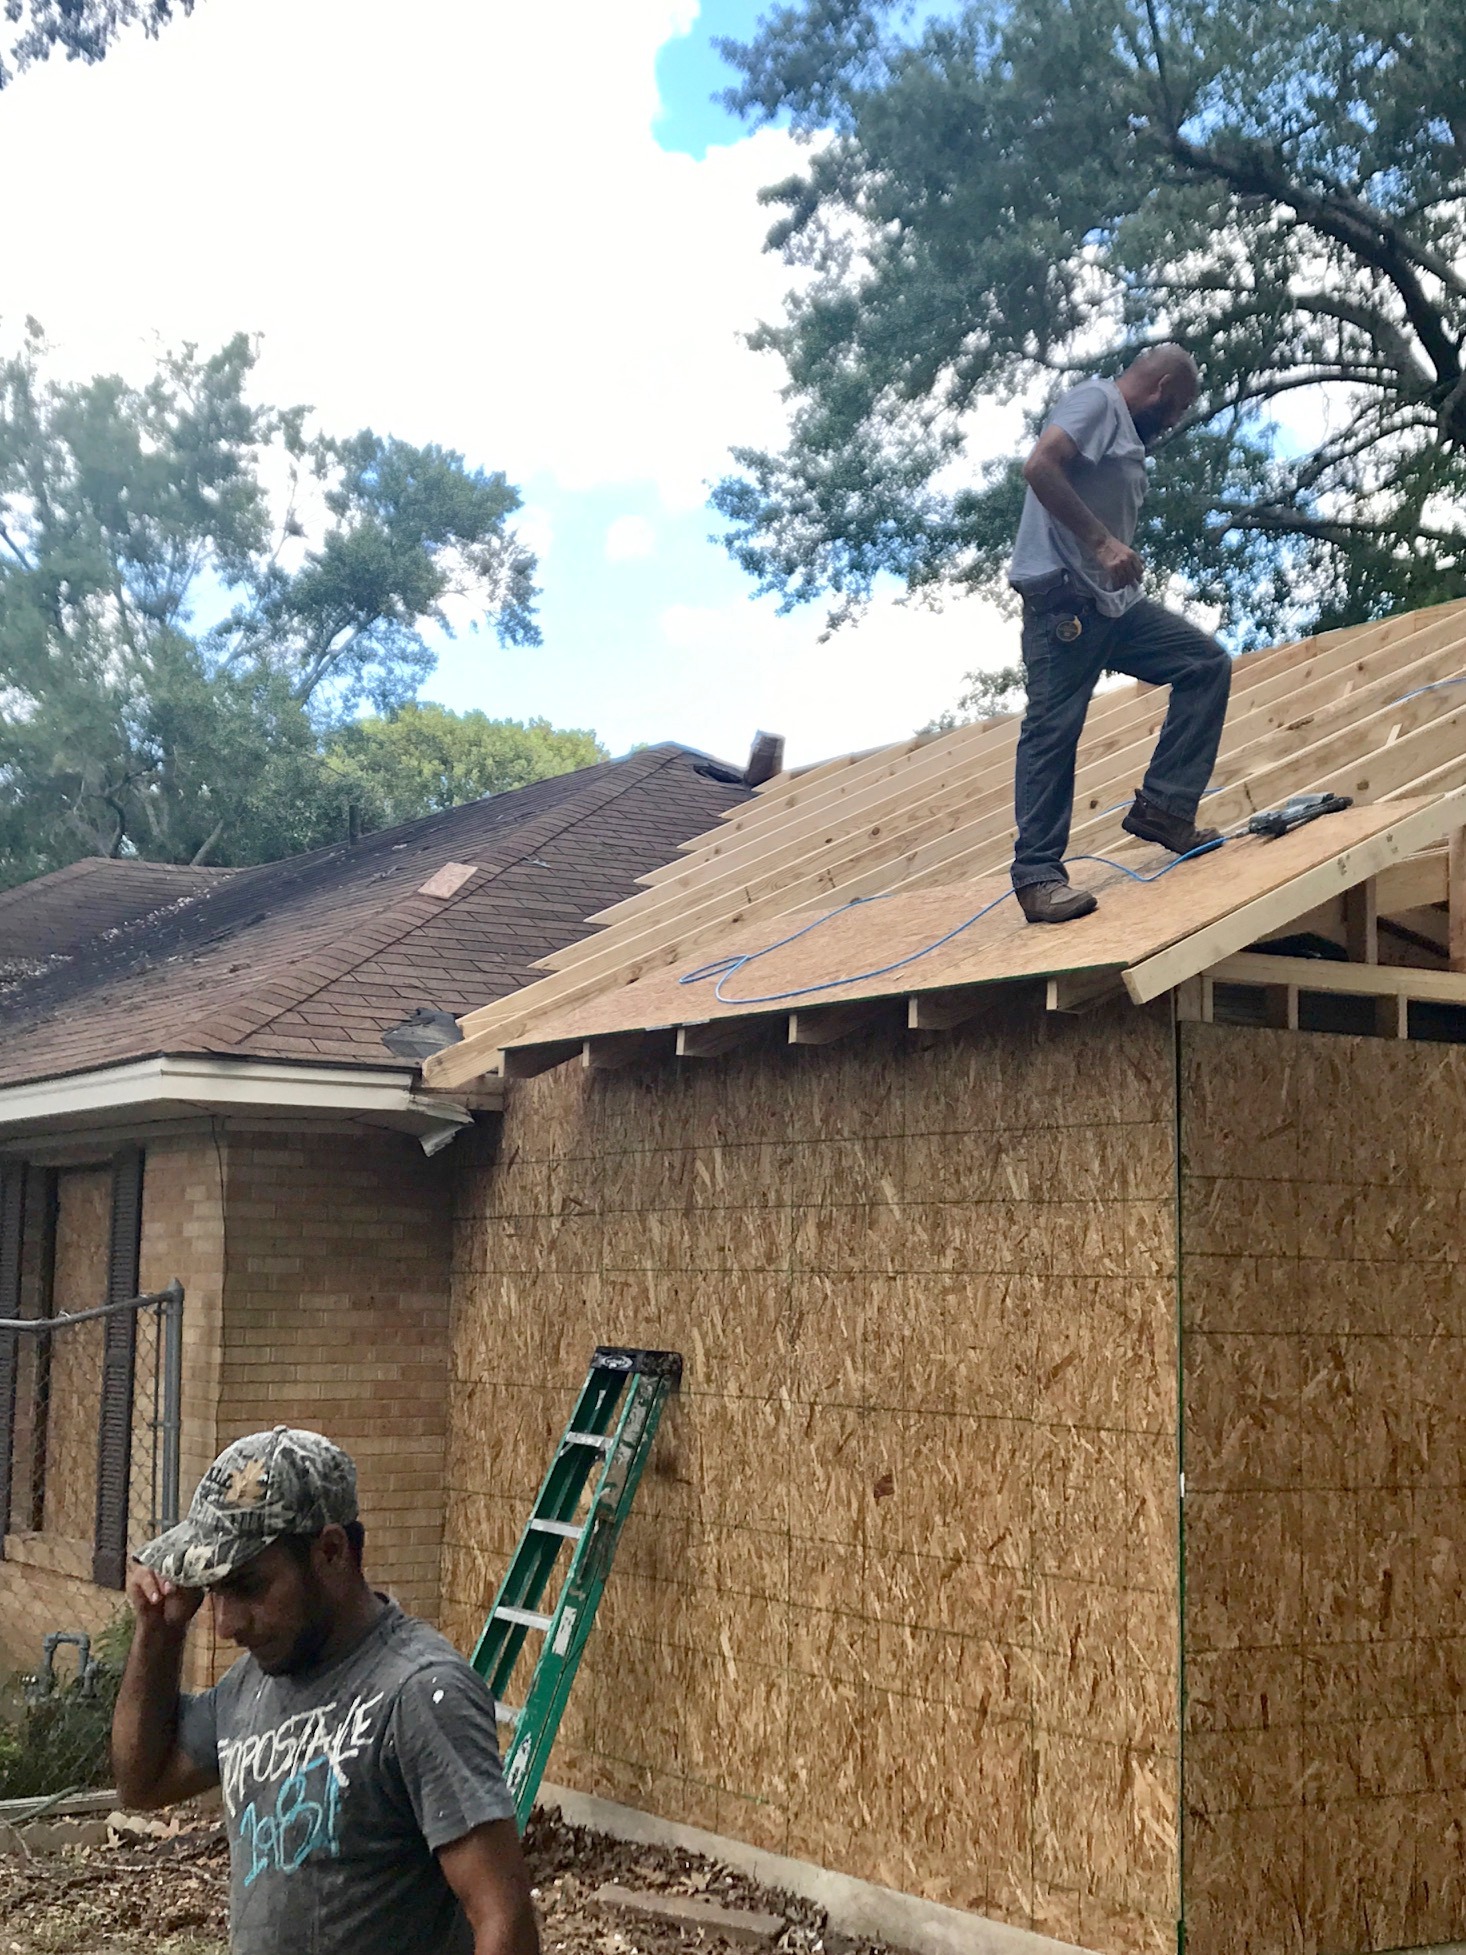
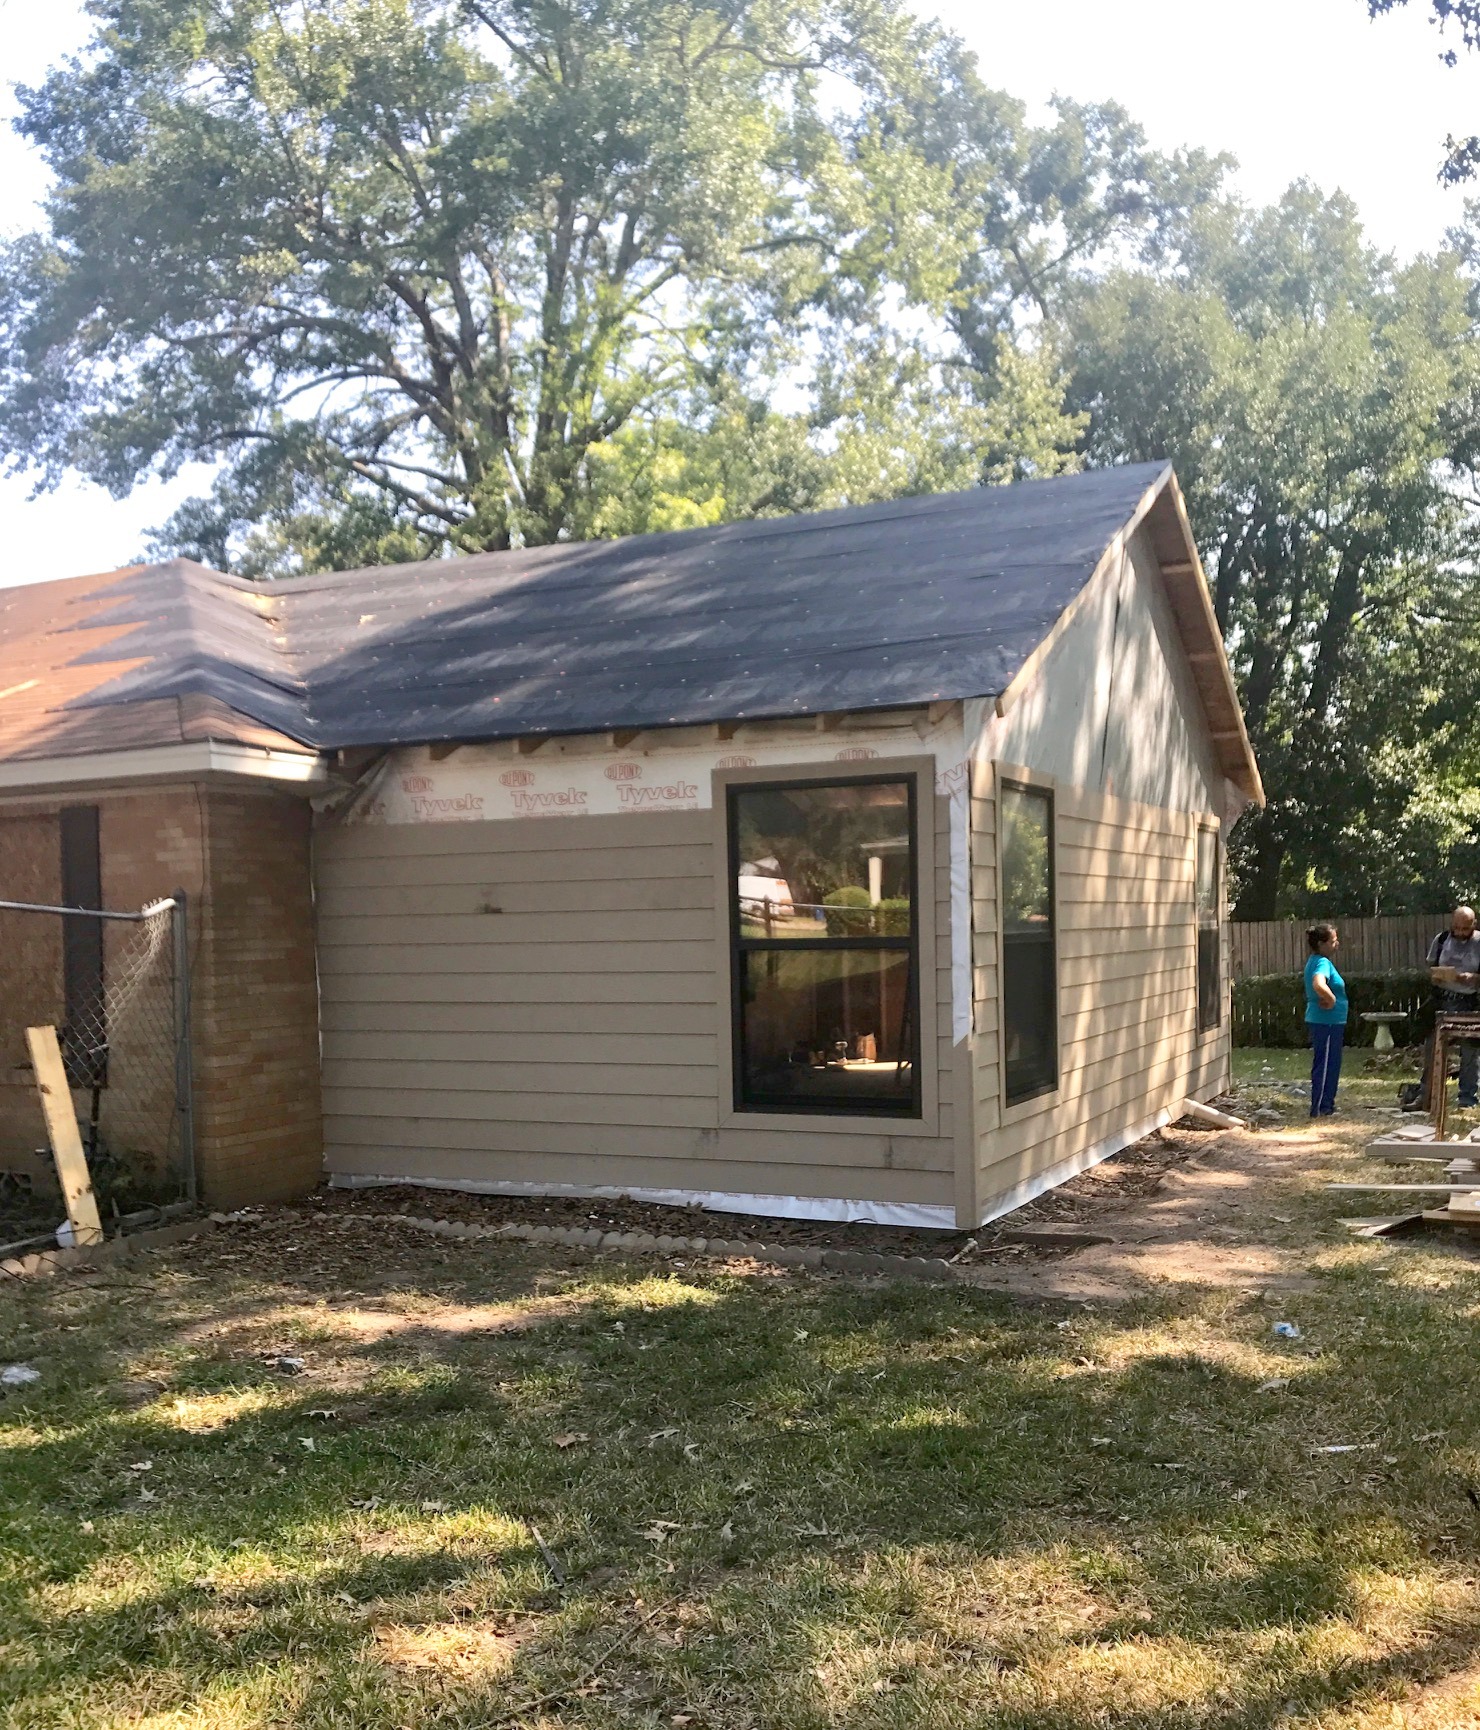
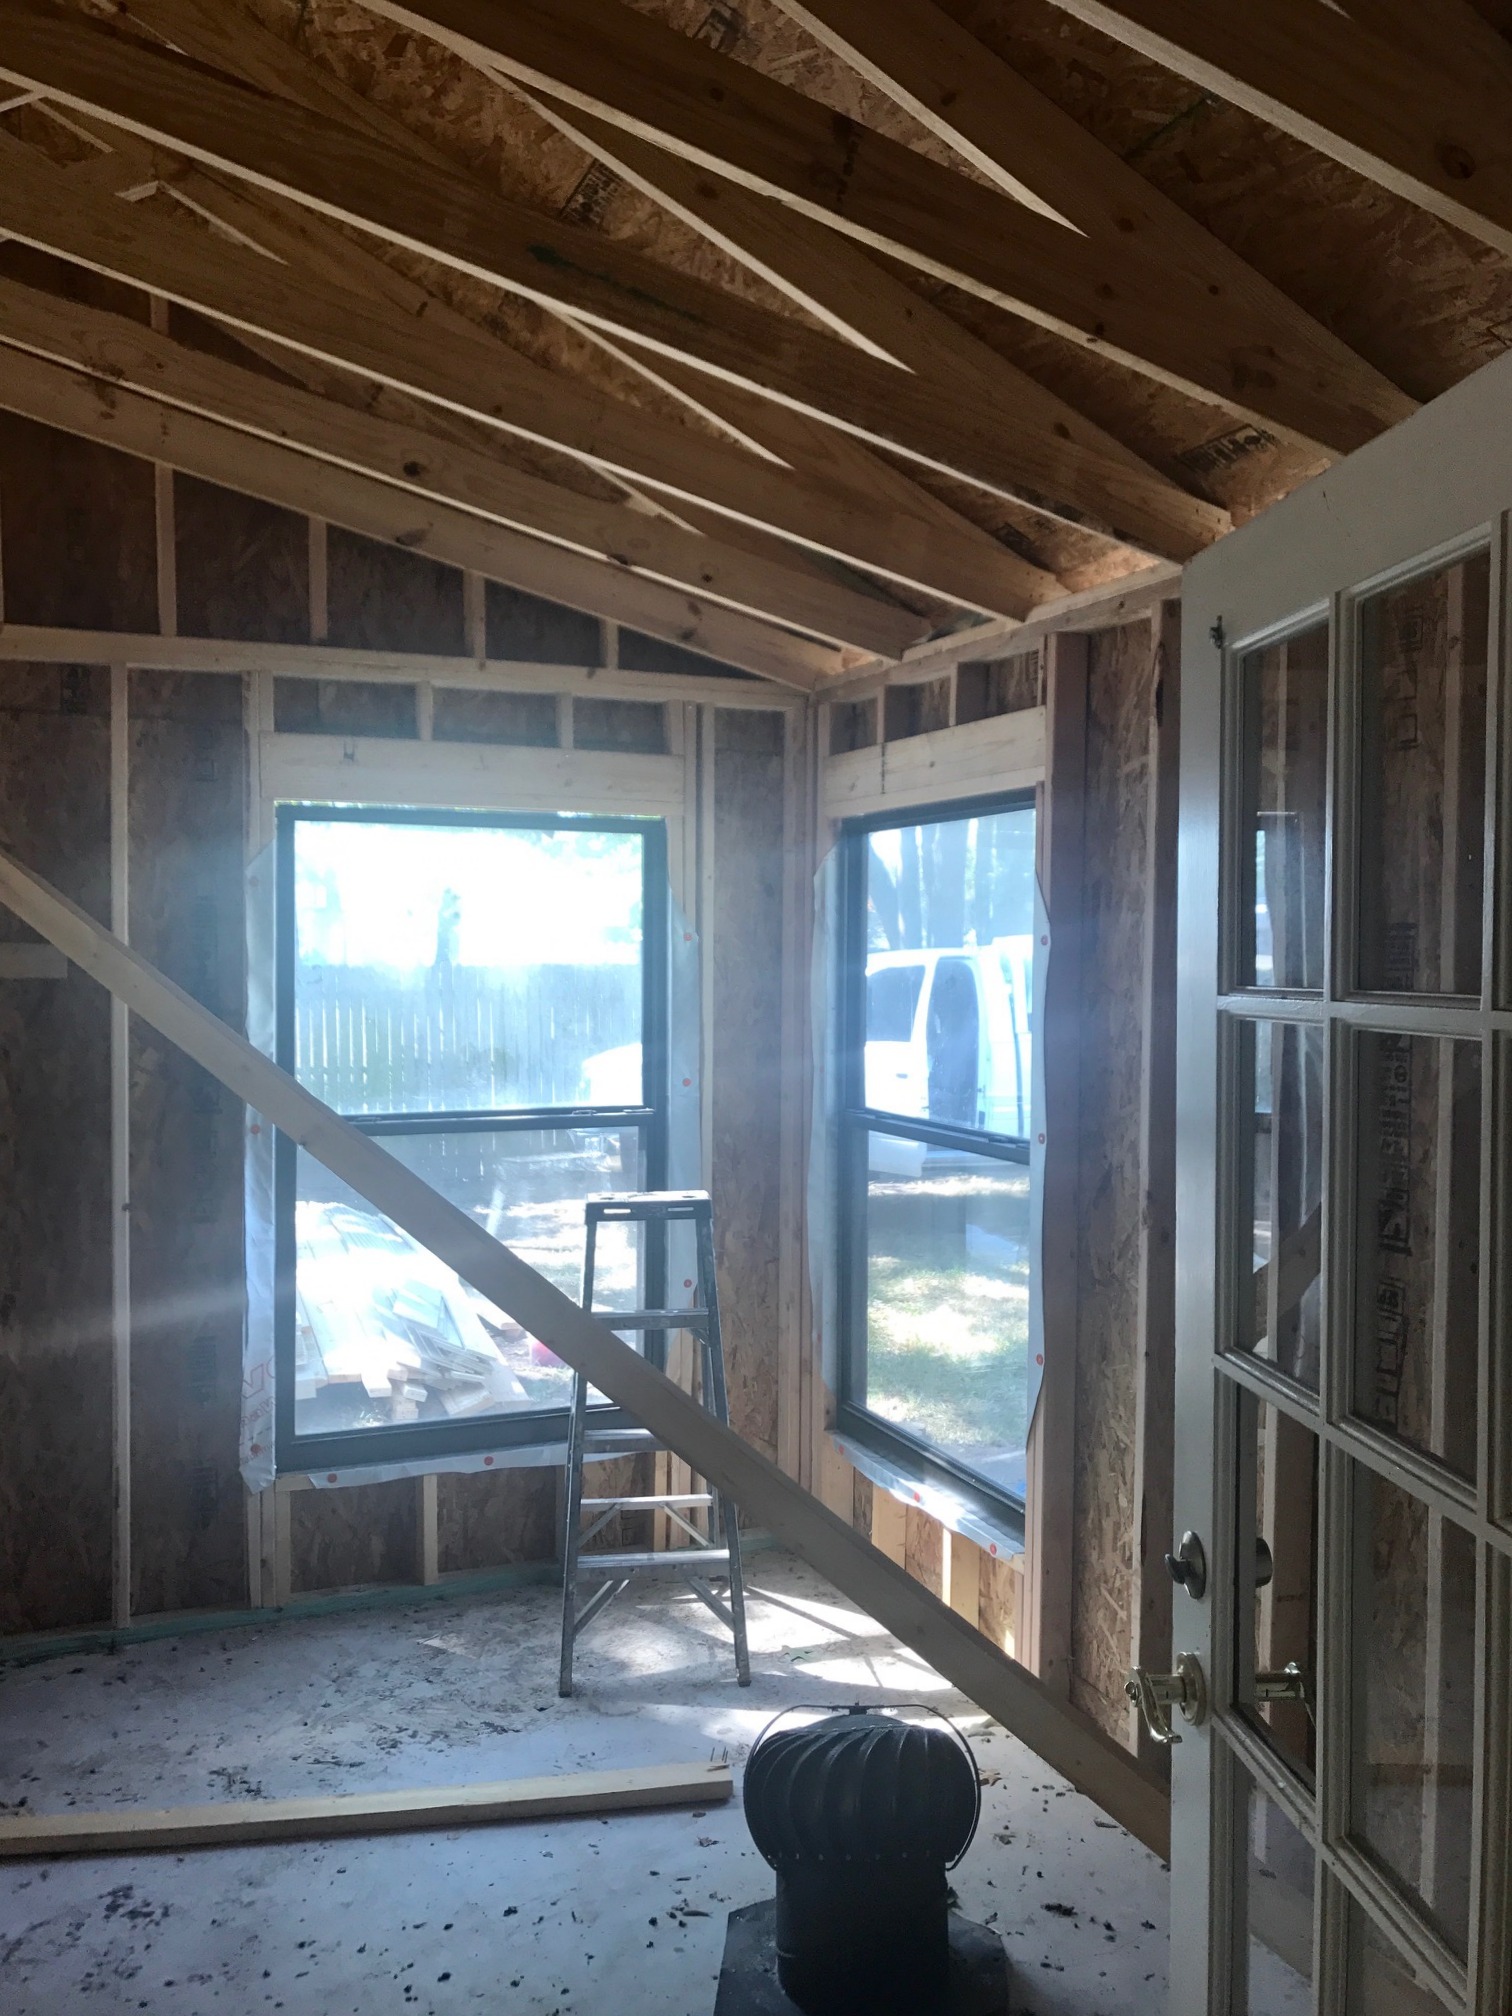
Since I’m NOT going up on the roof to show you how it looks while being deconstructed, here is an idea of the back (from the ground!) with only about 75% of the rafters remaining. The guys basically peeled the roof like an onion, one layer at a time. After all the shingles and tar paper, they had to remove decking boards one by one; when this house was built, decking was not 4 x 8 sheets of OSB, but single boards. They literally had their work cut out for them this past week!

Question: how do you make it rain in Texas in July???

Answer: start removing the roof decking on a house!

Yes, the day before work on the decking was to begin, the forecast showing a solid 2 weeks of 102-105 degree weather. I quipped, “Just watch, as soon as we remove the decking it’ll rain!” Haha, but never did I think it really would! Sure enough, the next morning when I walked out to open up the job site, it was dark and cloudy – and, within 30 minutes, it was pouring rain! We scrambled to get tarps up there and to cover what was below, but we just weren’t prepared. Since it was ‘supposed’ to rain again that afternoon, I went out and bought heavy-duty roof tarps so we could properly cover the next time. Do you think it rained that afternoon??? Nope!

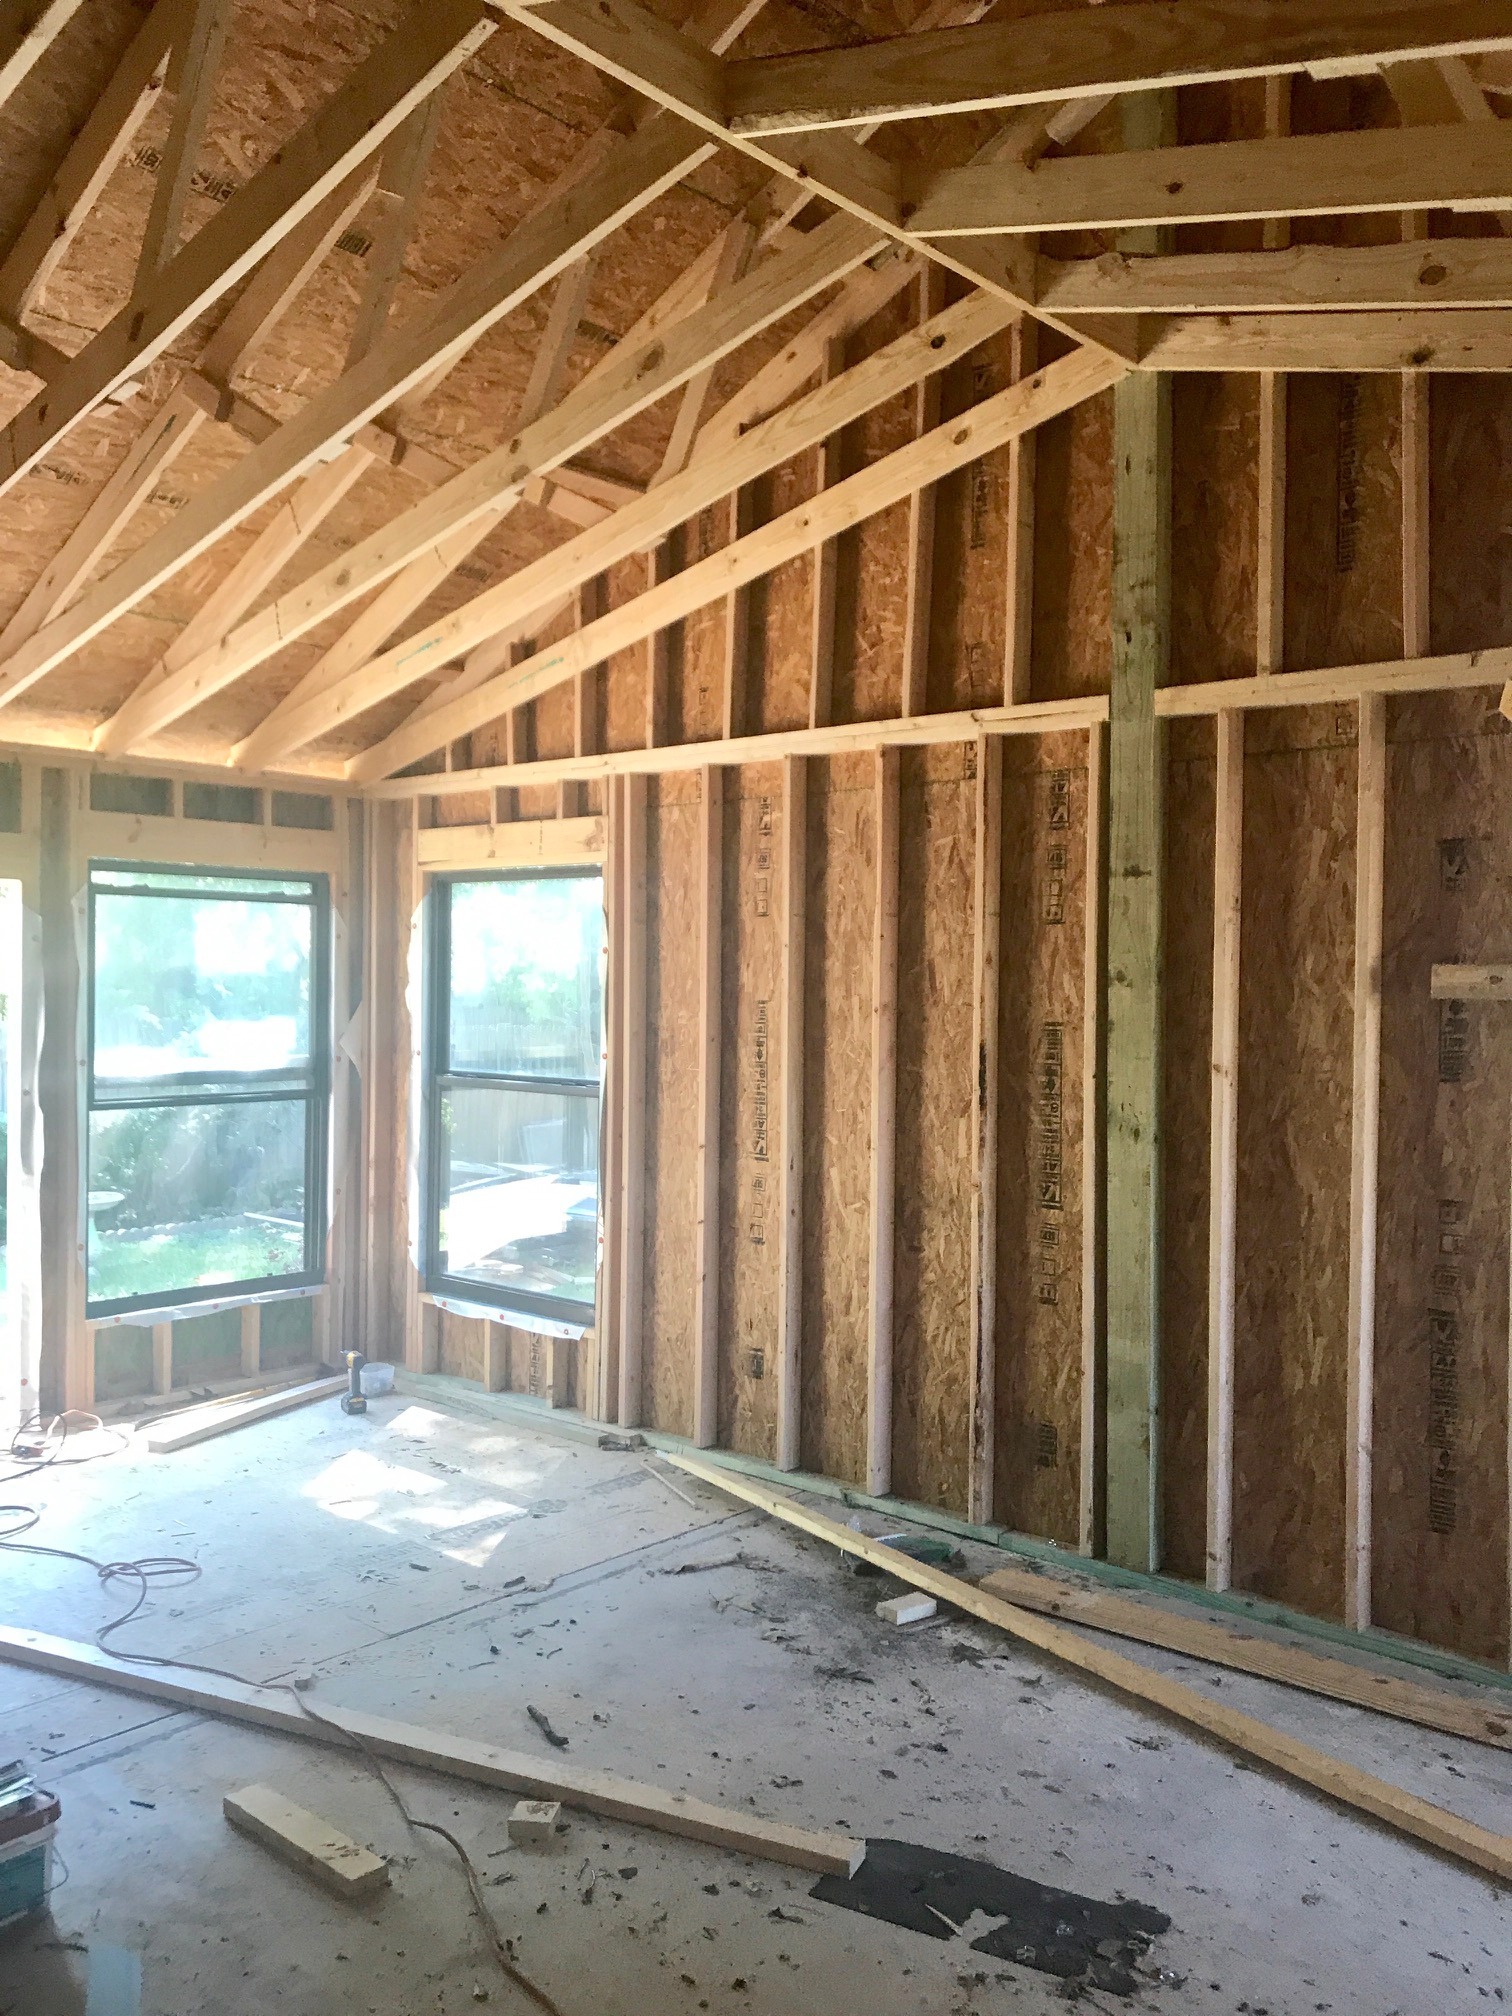
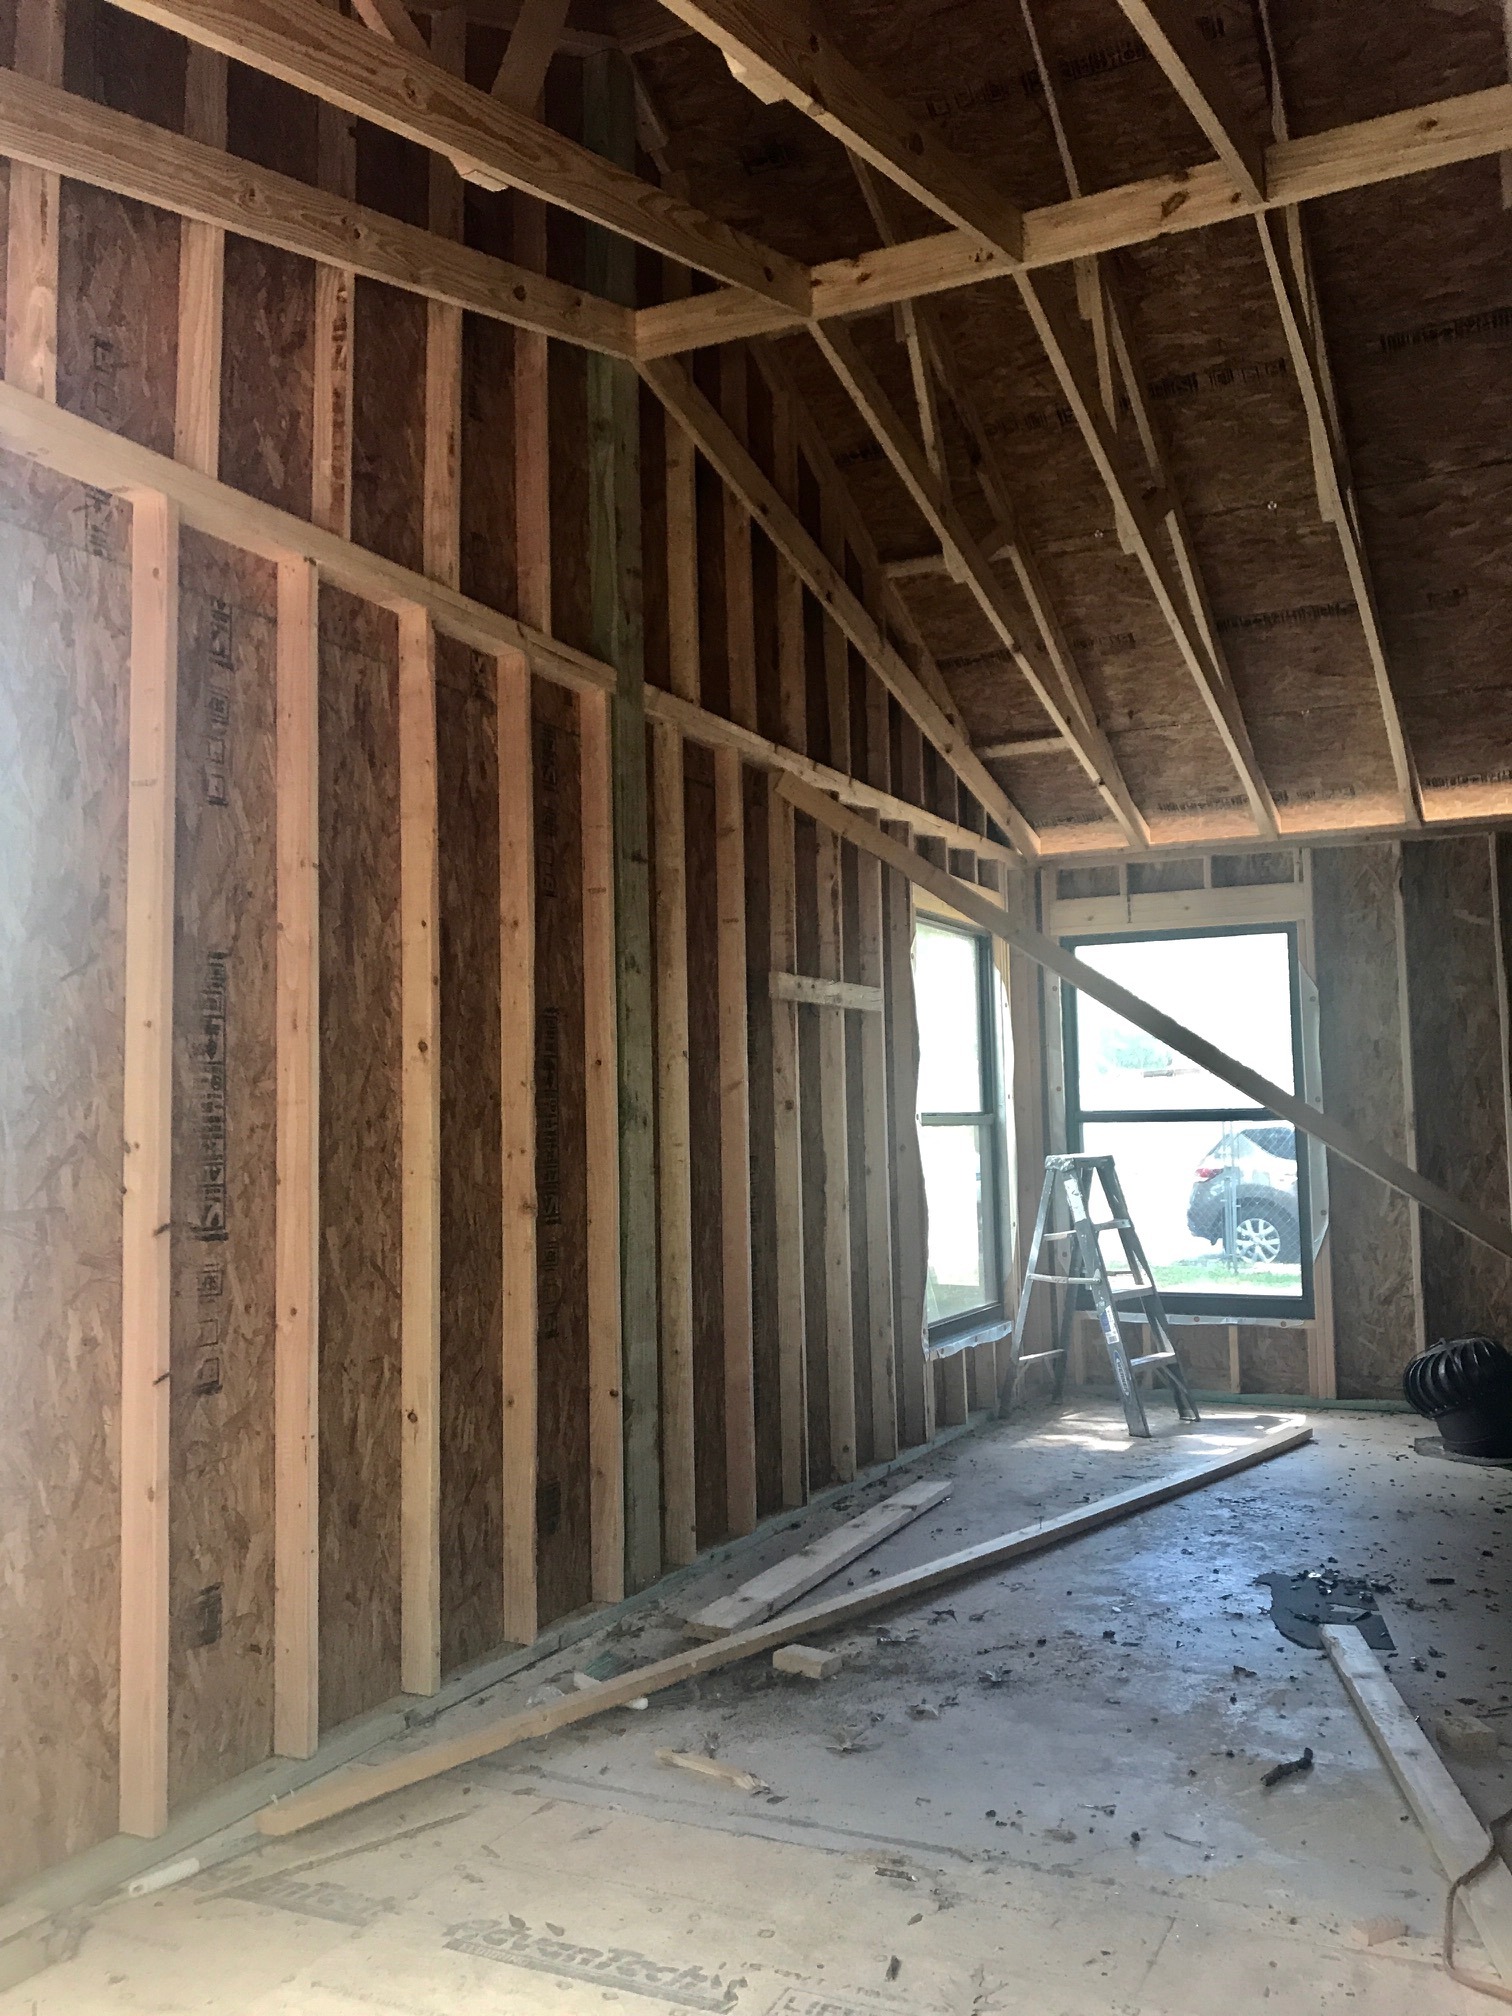
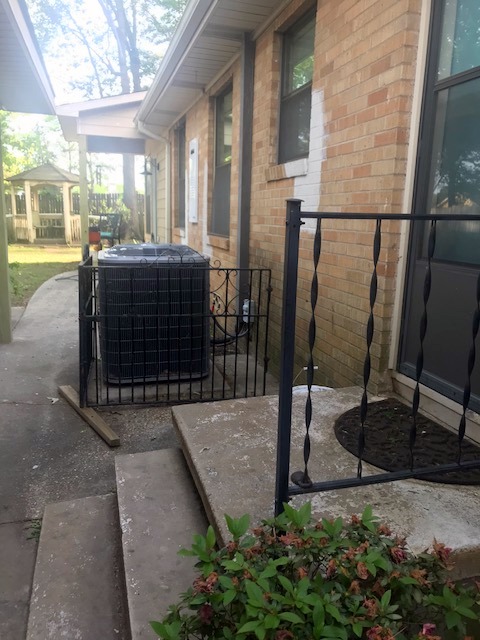
Just now I was walking the site with the AC guy, discussing pros and cons of keeping the old ductwork or starting over, when I was struck by how interesting the house looked with only rafters overhead…the whole house is a loggia! Here, see what you think:

Someone asked this past week why we didn’t just tear the house down and build a new one; you may be wondering as well, since you cannot really “see” the house and the site. First, deconstruction is very expensive; well-built older homes do not fall apart easily. Well-built older homes are also, well, just that: WELL BUILT! This home was custom built in the late 1950’s, one of the best eras in modern America for home construction. While we are taking advantage of modern technological advances by replacing all windows and doors, using energy-efficient appliances and systems, and insulating throughout with foam, the structure itself, and the foundation it was built on, are very sound. In an area of East Texas where slab-built homes regularly settle and foundations crack, this 1950’s pier & beam foundation is solid and the floors are level. By taking advantage of quality construction, adding new energy-efficient features, and imbuing it all with a bit of modern style, we are creating a beautiful, sound home that will last for many more years. Perhaps the BEST part is the serene park-like setting this home sits on, surrounded by numerous mature oak trees not only in this yard, but the entire neighborhood.

This past week, two trucks brought building materials for the construction ahead; this being a small neighborhood with a narrow street ending in a culdesac , large-truck deliveries can be interesting, to say the least! Between the sagging overhead powerlines, narrow lane, and bicycle-darting kids across the street, I was just a tad stressed getting this all done! My stress, though, was nothing compared to the fantastic driver, who had to figure out how he could get close enough in his big rig to shuttle all the materials to the back yard, navigating through a maze of oaks the whole way! After weighing all the options, he decided to “straddle the drainage ditch”, which I admit I didn’t understand, until he actually did it: take a look!

Straddling the ditch!

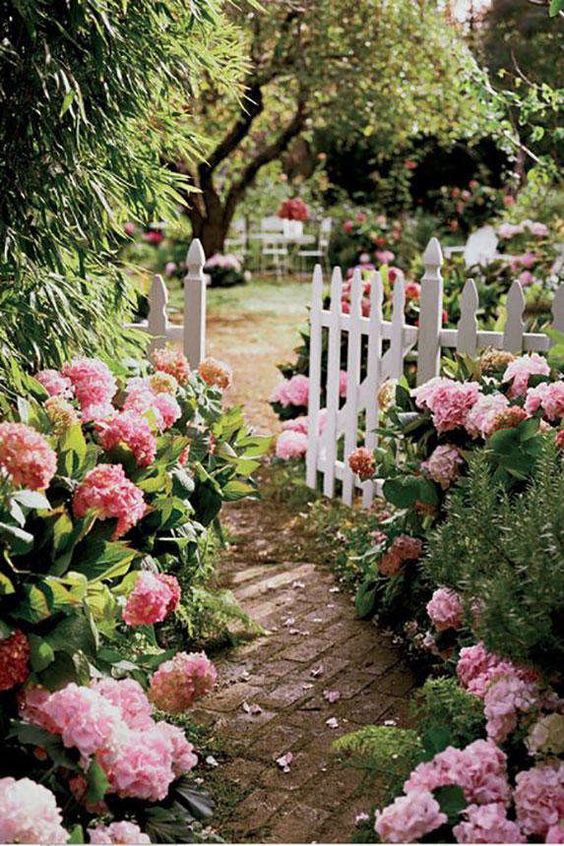
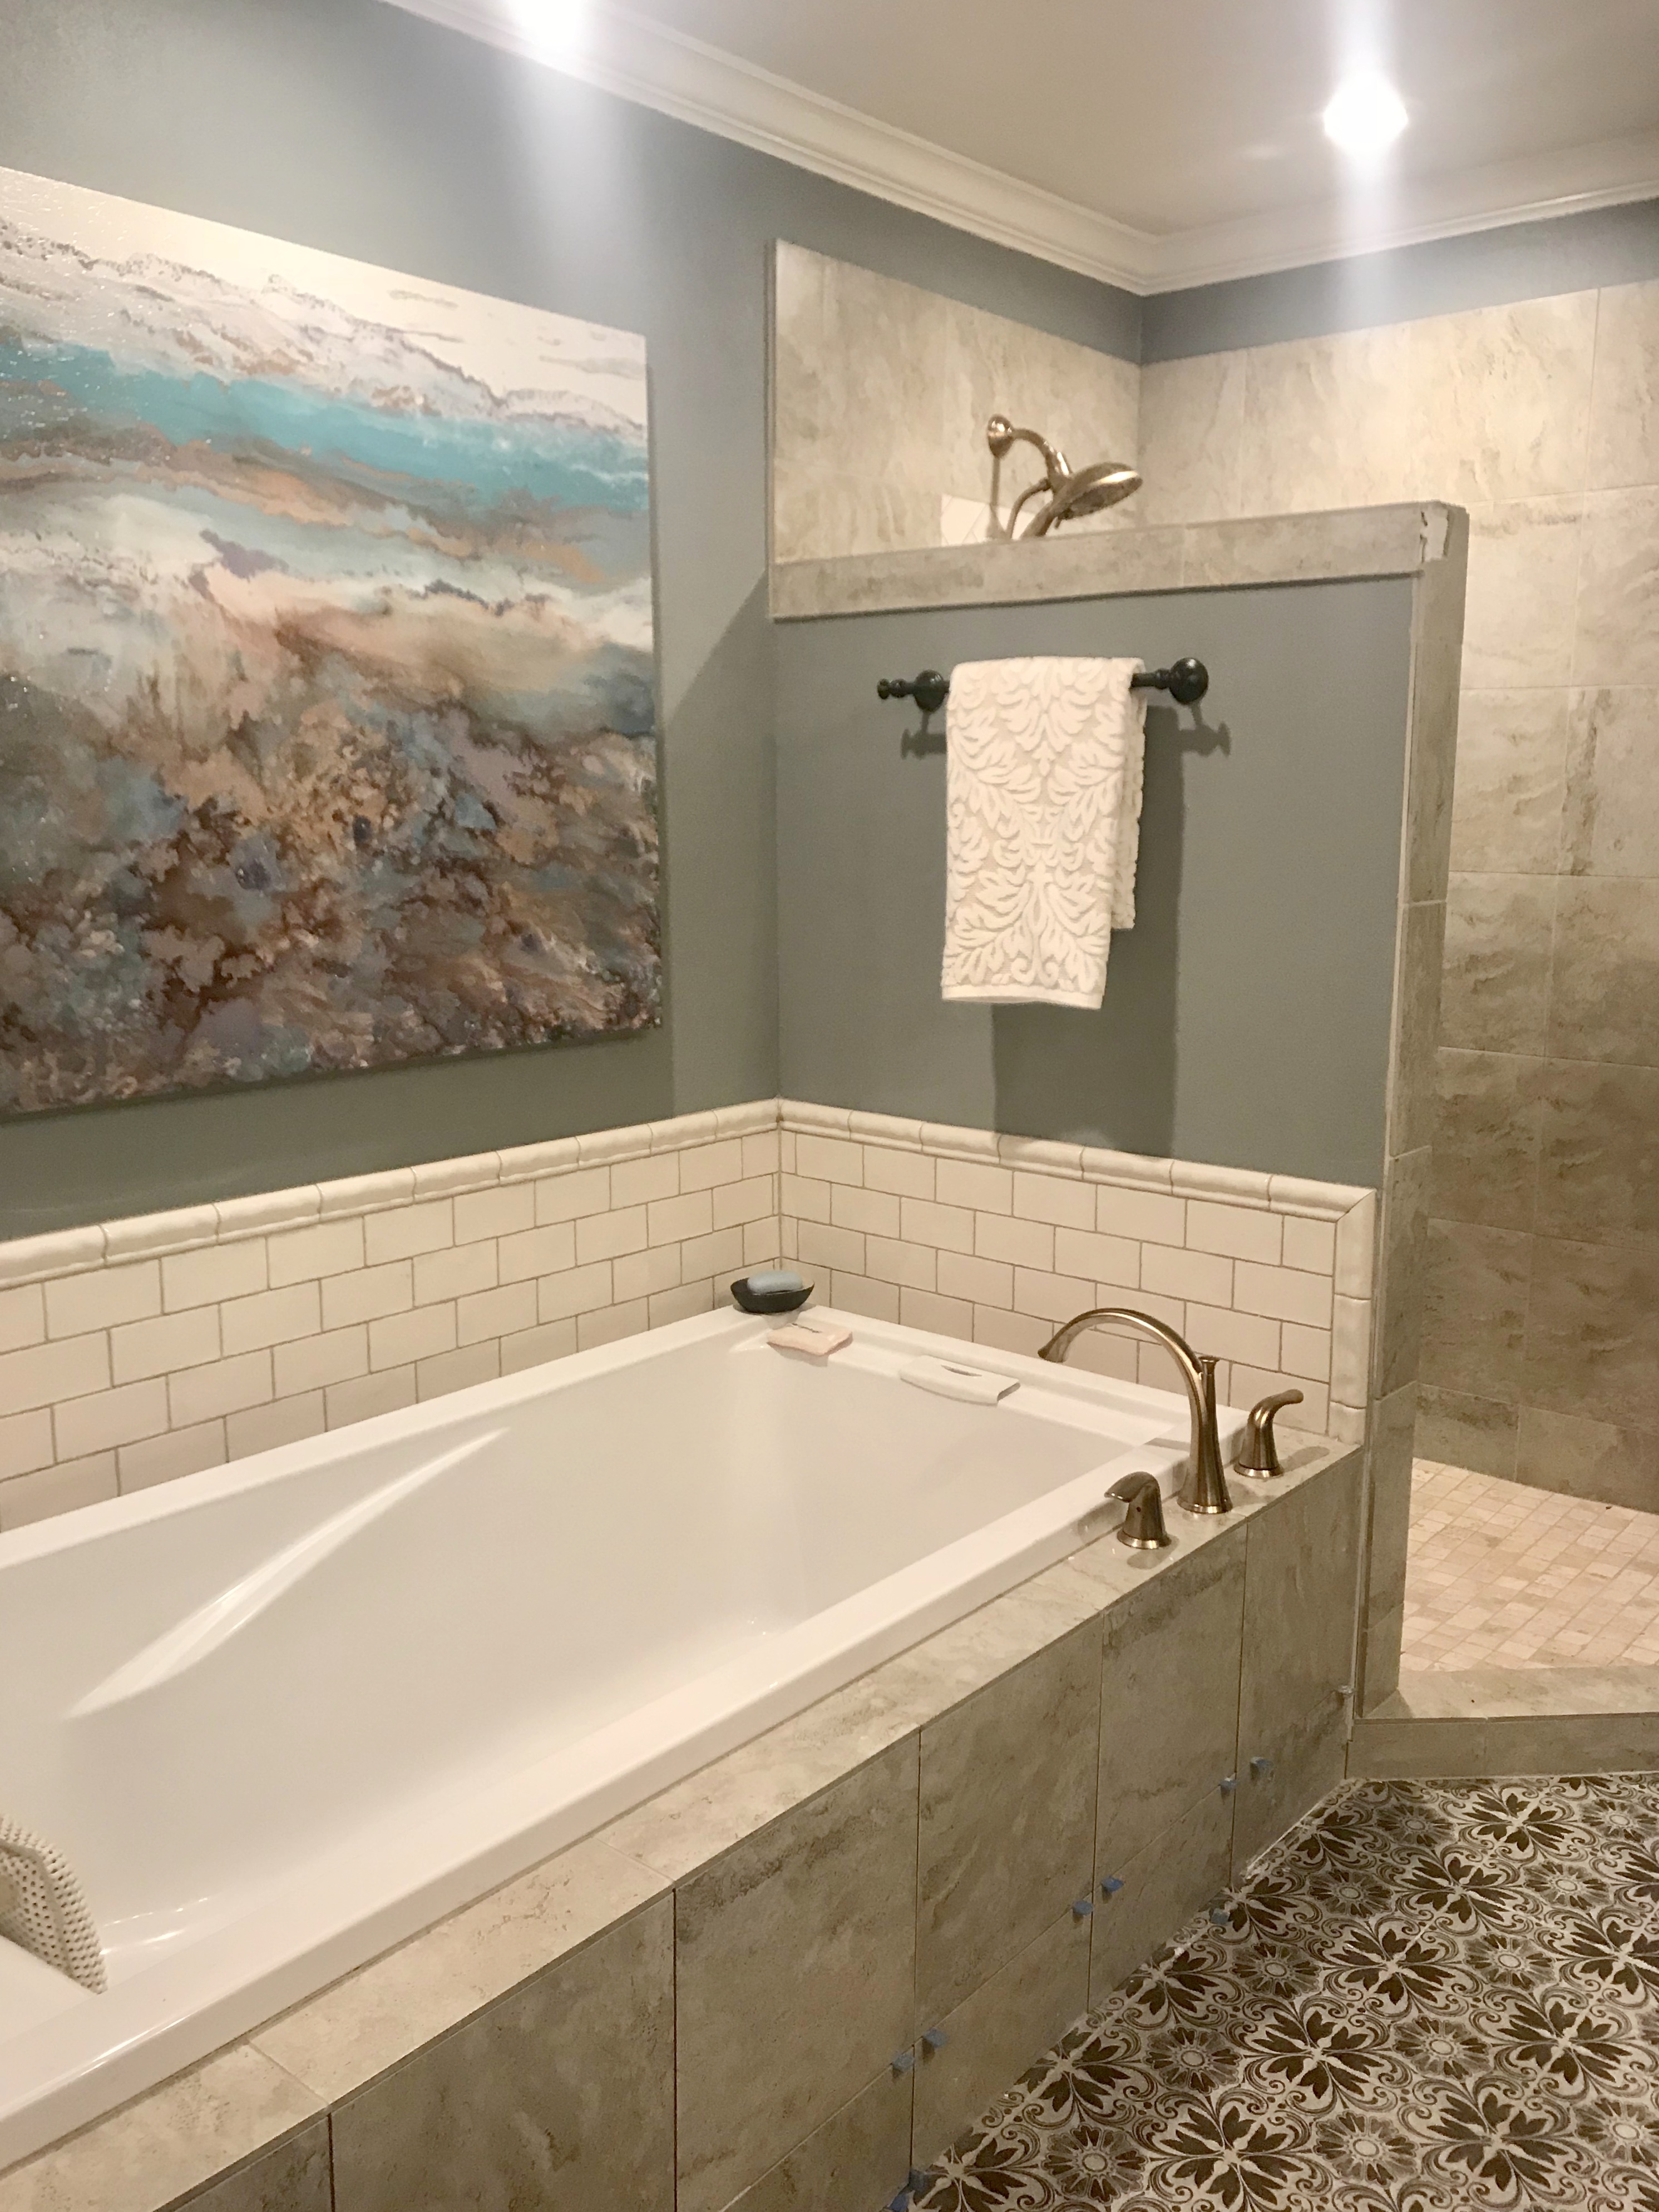
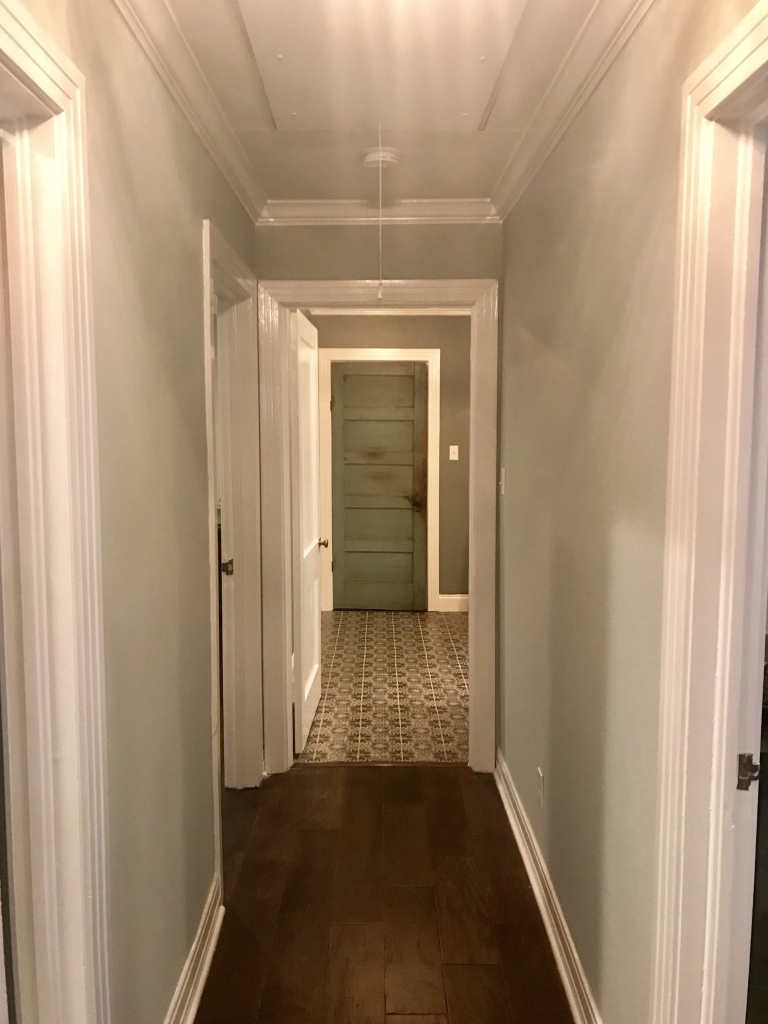
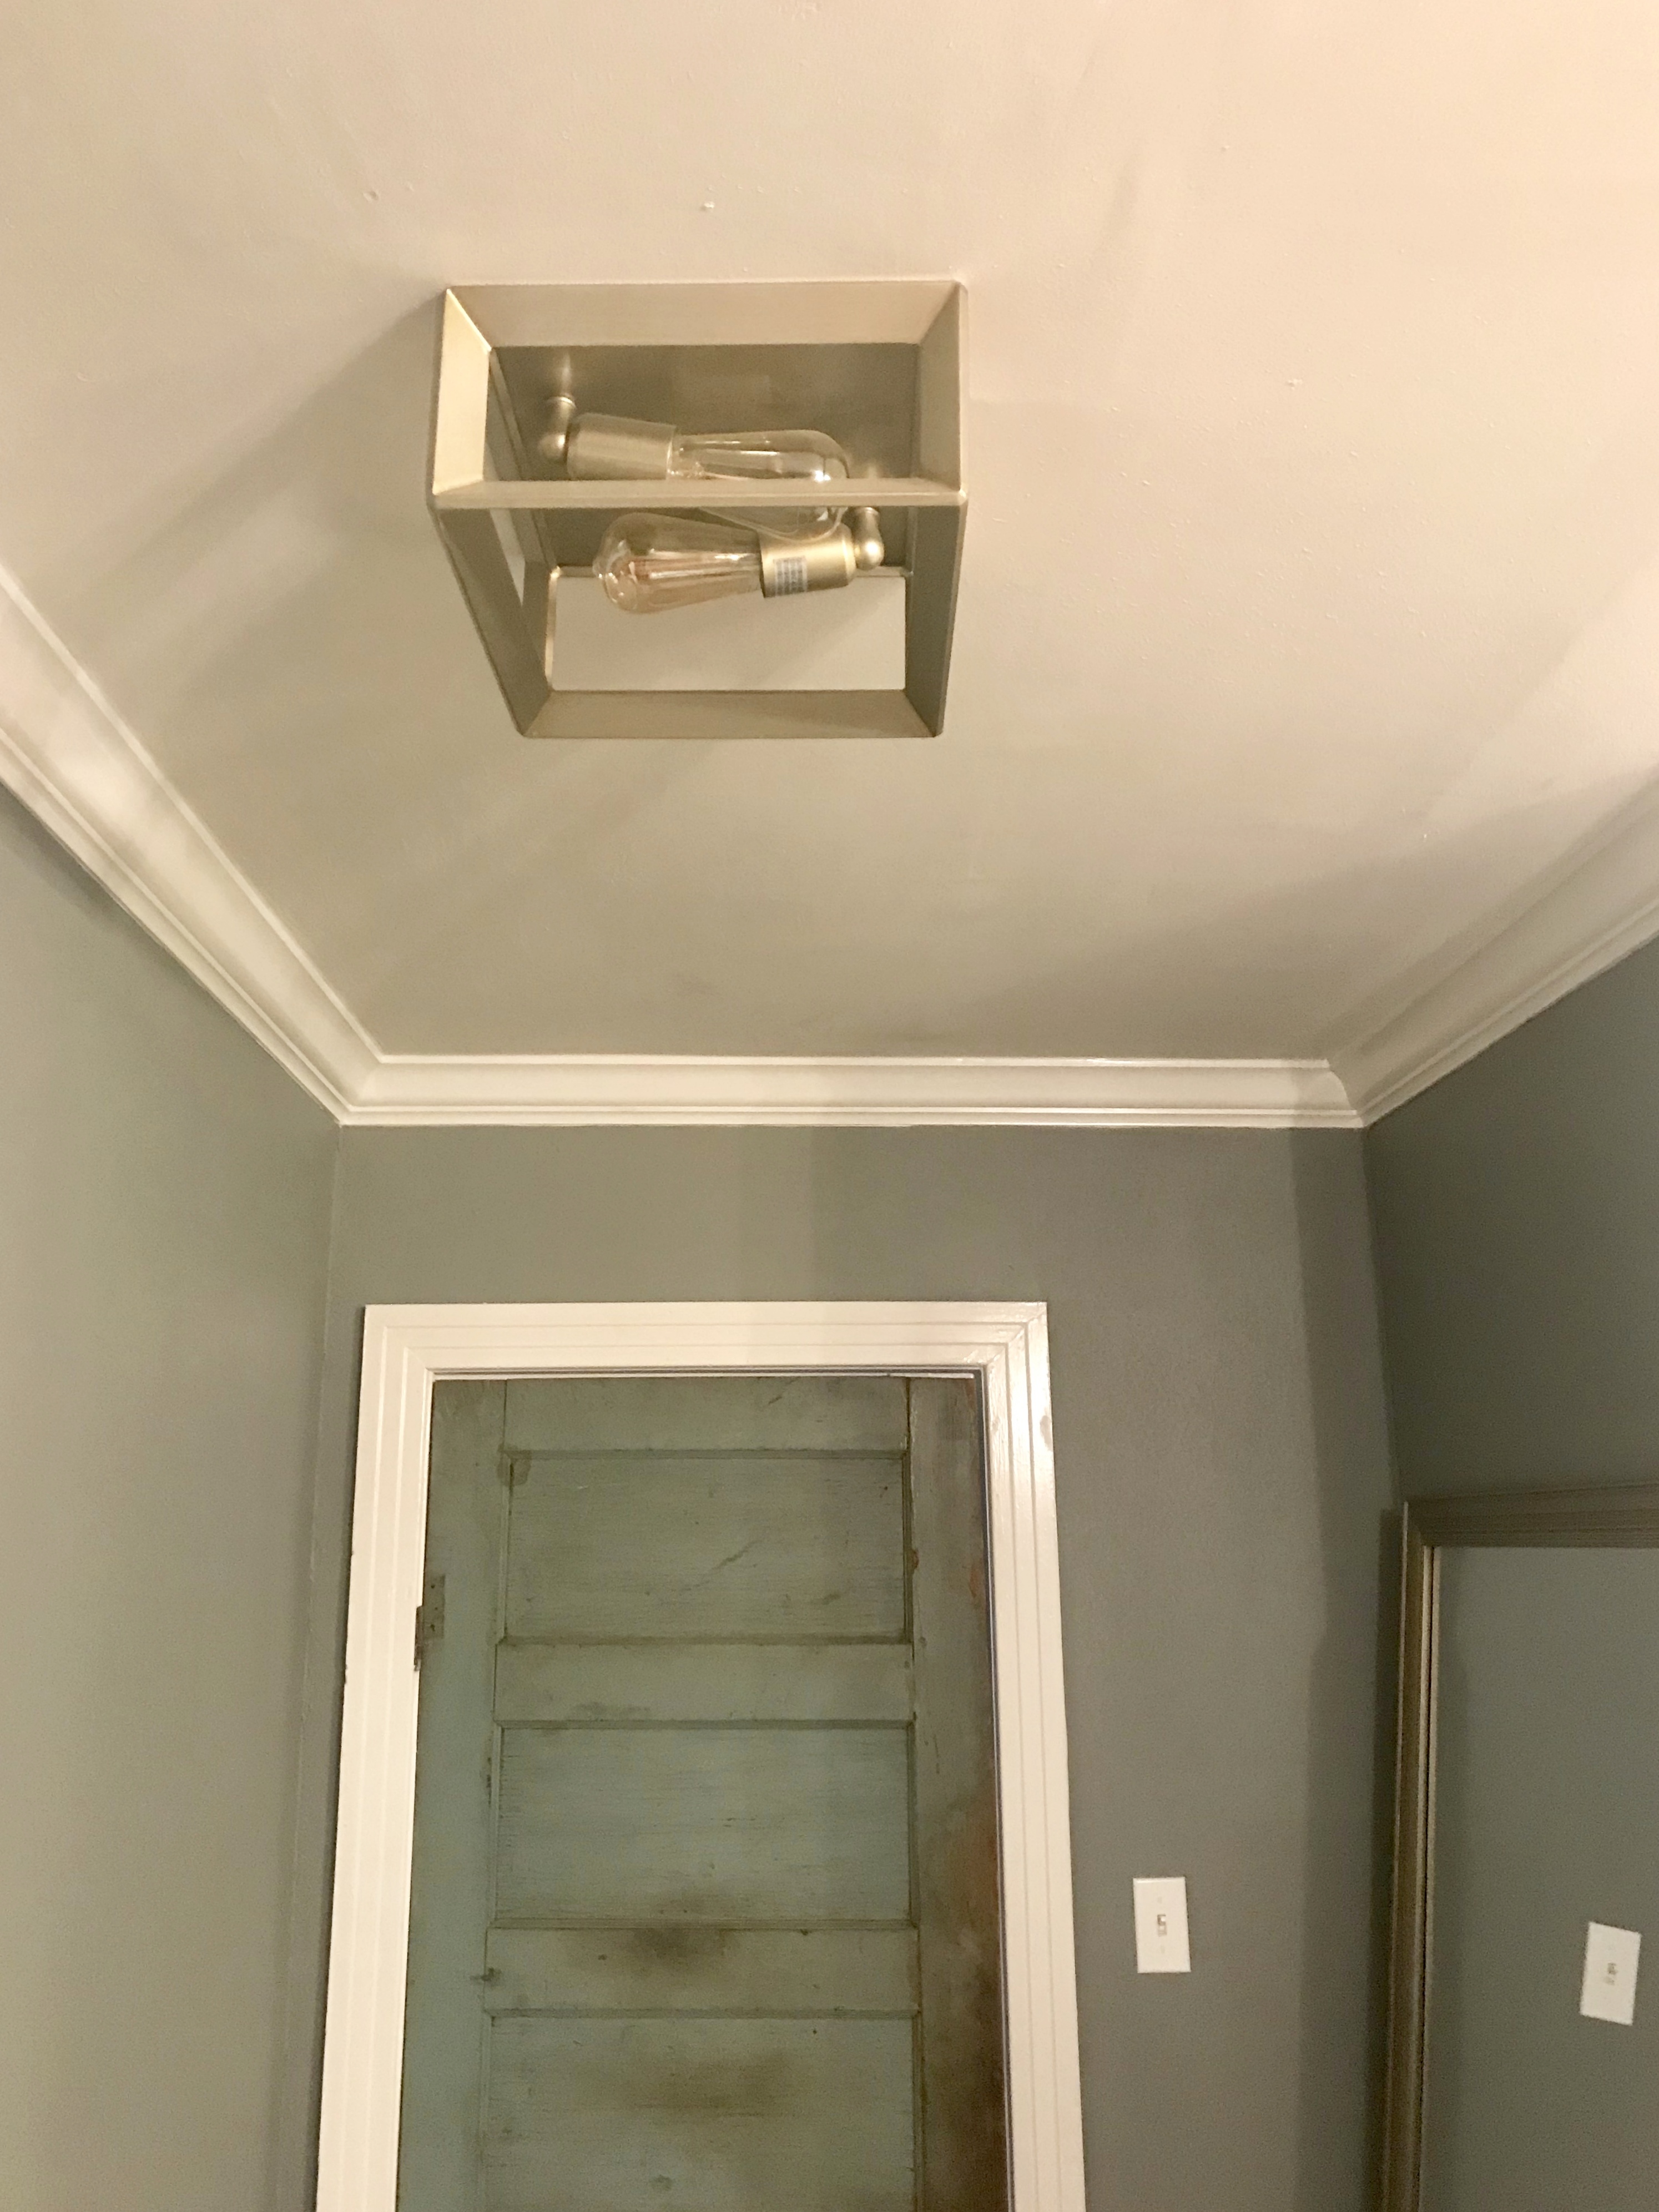
Next week I’ll show you the newly-framed structure, and the finished shape will begin to emerge! My client is making some big final decisions as we speak, notably whether to go with a bronze metal roof or stay with standard shingles. You’ll be seeing the results of all the big decisions soon, and I can hardly wait to share! So just for fun, here’s a sneak peek at one of the great design elements coming to this house….

The Front Door

Have a great week, stay cool in this July heat, and come back next time for fun updates!

Posted in Demo!, Design Tips Included!

Meet the “50’s House in the Woods”!

Hello again! I took 3 years off to move to Colorado and “do life” with my daughters, Kiki & Lynzee, but alas, Texas called me back and here I am, in my hometown of Greenville, and jumping right back into real estate & remodeling!

I pretty much love ‘ALL things houses’, so both matching them up with new owners and giving old ones new life are my passions. I feel so fortunate to have the opportunity to do what I love so much….and right now I am blessed with 2 very exciting remodeling projects right here in Greenville! Today I’d like to introduce you to the one I’m calling the “50’s House in the Woods”…

50’s House in the Woods ~ after interior/exterior demo

This house sits in a small neighborhood of mostly mid-century modern homes constructed in the 1950’s and early 60’s. As a child, Oak Village was one of our favorite destinations when driving around looking at Christmas lights! There is one house in the bend of this dead-end street that looks EXACTLY the same as it did when I was growing up! Most of the others have been updated, several paying close attention to the MCM architecture. Now it’s time to give this home with ‘excellent bones’ a new lease on life!

This house is the classic late 50’s ranch, but with a forward-thinking layout. Clearly built as a custom home, it has so many elements that were “the best” at the time….however, progress and innovations in home design can lend a hand to make it much more livable today. So….here we go!

Exterior prepped for remodel

Today I’m going to highlight demo and prep work to the EXTERIOR of the home only (next time I’ll show you what it means to go “down to the studs” inside!)

We tend to think of “demo” as only interior, but this house is truly getting a complete reset, so the outside is just as important. The 50’s bricks were originally pink, as you may have seen on other homes of that era. While I’d love to design around the original brick color, the house has been painted at least once – so it will get a new coat of paint once the bricks are thoroughly power-washed. We are also adding 700 sq ft to the rear of the home, so we will want the new siding color to match the brick color.

50’s pink brick showing around old garden

For a peek at the original pink brick, just follow the arrow; you can see they painted around existing gardens before – which is why we are now removing all vegetation and the built-in planter around the foundation – a few “before” pics follow…

front before landscape clean-out
East side overgrown with vines

Poison oak and ivy had prevented maintenance on the east side for some time, so a brave and very professional landscape crew cleaned it all out and put down black landscape cloth covered with mulch to kill off the roots and keep the area clear while windows are changed/moved and the house eventually painted. New landscape is in the future for this newly-lovely area!

In the back, there was an old pin oak tree right in the way of the new master bedroom/bath addition, so it had to go (no easy task!). Speedy Tree Services lived up to it’s name, however, removing ALL traces of the tree and surrounding vegetation in one long day’s work, complete with an impressive array of heavy equipment! See before and after pics, plus the further step of having removed the bricks from the section that lived behind the tree, but will soon be attached to the new wing;

Taking down the pin oak
The pin oak is gone!
The brick is removed!
The semi-circular steps removed!

The semi-circular back steps were so nice, but the door they fronted will be removed to make way for the new music room, so they had to go too. Breaking up concrete seems impossible to me, but here you see, it’s done!

Bricks reserved

Not only did the guys remove the bricks, but they stacked them neatly for reuse. Several windows will be moved in this remodel, so we will need original brick to replace the spots where old windows were. Here you can really see the original pink of the 50’s brick!

I’m going to leave you today with a view of the backyard of this home; surrounded by mature oak trees which extend to several acres behind it, this whole area has a park-like quality which will only improve over the next few months. It’s a beautiful, peaceful place where one can hear birdsong all day, everyday. It’s lovely ~ it’s well worth the investment to update this home for another few decades of living well.

Park-like back yard
“long and low”

One last thing: my nickname for ranch-style homes used to be “long and low”. Having grown up in an old 2-story stucco house myself, I did not yet have an appreciation for ranch style, though I did think that’s where the ‘rich folks’ lived! Once I became a Realtor in Longview, however, I became very familiar with ranch style, the major style built there prior to the 90’s. I gained a new appreciation for these well-built homes during that time; they were often well-thought-out for family life, but not too large to be comfortable for just one or two. Though the floor plan is now “old school”, ranch style homes are relatively easy to update.

I hope you’ll follow along as we update this one; I can promise you it will be spectacular!

Nancy Chapmon, Real Estate Broker/Interior Designer

Posted in Before & Afters!, Nancy's Kilgore Cottage

Before & After…Kilgore Cottage, all grown up!

Welcome Home!

Hello to all my friends who have traveled the journey of this fun transformation along with me! Life has once again intervened, convincing me to leave my beloved Kilgore Cottage…. passing it on to its new caretakers, as I go off to more adventures in the beautiful mountains of Colorado!

Before closing this chapter, I wanted to share the final reveal with you….and how better to celebrate transformation than with BEFORE & AFTER photos! I hope you’ll enjoy reliving the “before” & celebrating the new life for this special abode!

LET’S START WITH THE EXTERIOR:

The front, corner & side were mostly cosmetic, though we did open up this bedroom entrance, where it had been closed off to make a nonsensical interior closet!

But I really loved tearing off the unsightly, smelly, inefficient enclosure between the garage and the house ~ to create an inviting breezeway…which has made me smile EVERY day I’ve come home to it! See what you think:

Then there is the scary LOW-ceiling-ed shed behind the garage that transformed into a lovely covered outdoor living area + the icky enclosed patio that became an inviting deck off the new master bedroom:

Even the gazebo got a facelift, and the rickety fence was replaced with a new one:

So…..(drumroll!) Who wants to see what happened with this 60’s-era kitchen?! First I’ll show you a few views, then some shots taken from the same spot:

This is the view from the front door, living & dining area
Remember that old door we cut in half vertically? (and the dining room chandelier?)

Here’s the hall bath before…and after!

Design note: if you’ll remember, I picked up the black bookcase from a resale shop, then added the base with the cubbies (to elevate it) and new shelves – voile’! A linen cabinet that still opens up the space!

I’d like to show “before and after” of the master bath, but since it wasn’t even a bath, but just a strange pass-through room to the “sunroom”….I’ll just show the spa bath we carved out of a useless room!

We had to remove an exterior window to create the walk-in shower and make this room possible
If you don’t think I’ll miss this 6′ long deep soaker tub…..ahhh it was so nice!
Well, ok: here’s the exact view above….BEFORE!
The master bedroom add-on, built on the slab of the tired, icky sunroom & enclosed porch

Just a quick view of the other 2 bedrooms – now there really are 3!

To this….This bedroom has been the perfect home office for me – but a bedroom it is!
And this! The 3rd bedroom

I hope you’ve enjoyed seeing what became of this little cottage that needed some attention & tlc – it has been restored to new life, and has provided me a welcomed & safe haven from life, while providing a fun & stimulating project!

Lastly, I’ll leave you with a few pictures of the main living area, and a challenge: go, create a living space that you love & that loves you right back…whether it’s the home or apartment you have now, or the next one to come, whether you tear it down to the studs as I did, or simply add a few touches…..make it a reflection of your soul, and a place that welcomes you home daily. Humans can survive and thrive pretty much anywhere, but one must not underestimate the value of a joyous environment!

Decorating & design is not just a plaything, and it’s not for the wealthy: good design is a matter of thought & reflection, and can be achieved literally at any price. Create order & beauty in your spaces: simplify, sell/donate/toss excess, clean, create. Allow yourself to revel in the blessing of whatever abode you have, and make it truly yours.

New living area
New dining area
Home…from mine to yours, I sincerely appreciate you sharing my journey!
~I wish you blessings & a joyous place to call YOUR home~

(stay tuned for adventures ahead ~ the adventures & misadventures of picking up stakes & relocating to the Rocky Mountains…& daily life surrounded by intense beauty)

Posted in Design Tips Included!, Nancy's Kilgore Cottage

A Texas Cottage Garden Comes to Life!

dreamy cottage garden

Ah…..yes, some of the things that dreams are made of….


or, at least MY dreams of a luscious landscape around my cottage, a place to ponder, reflect & just be happy to be alive.

It’s finally springtime in Texas!  (that time of year when all Texans rush to the garden centers, eager to load up on flowers, bushes, soil, seeds, tomatoes, birdbaths….because it’s so pleasant outside and we simply cannot retain the knowledge that our precious little plants will be withering in the hot Texas sun in July)   Oh sorry, I digress!  Well, I’m just itching to be right there with the rest of you, but I’ve been held back a bit…

Why, you ask?  Well, remember that Jose is not available to paint my bricks, trim, etc until JUNE!  I cannot plant any perimeter gardens until the painting is complete; I also must wait for my privacy fence to be replaced before I can plant anything next to the fenceline!  UGH!!!

So far, I have visited the garden center for large bags of fertilizer & ant killer; I wouldn’t usually do that, but my entire side yard filled up with little mounds at the first sign of warmer weather, and there were so many they were actually continuous!  Fire ants are not my friend, so the lawn guys spread that and weed ‘n feed this week.  I did buy a cute hose-holder and a nice sturdy water hose; the sprinkler system in my yard is just as ‘vintage’ as the house, so it’ll need an overhaul too!

I also got a good start on my raised herb garden….and I’m  sprouting dill, cilantro and basil to be planted soon…


So, in my frustration over having to WAIT for my hydrangeas, hostas, caladiums and the sort….I ran across a great article on Houzz about growing trees in containers!  Now I’m excited all over again….here it is for you to read as well:


It makes perfect sense to put my yearnings to work on container gardening for now!  I absolutely love the idea of growing a dwarf Japanese Maple in a huge pot, as a way to further diguise my huge AC unit….

ac pic

The pot can sit between the steps and the garden gate we’ll be securing around two sides of the unit; the pot will be a nice filler to pull your eye away from steel, and the shape & color of the foliage will fill that gap nicely!  (how I wish I’d photographed this, and all of my azaleas before they finished blooming!

If you photographed yours, please share them with us in the comments below!  Azaleas are nature’s works of art, to be enjoyed briefly and shared…


OK, so while I’m dreaming, just look at this picture:  I think I have a real shot at making my gazebo look like this one day!

(I have already planted hollyhocks bulbs around it, but not too close since it has to be painted also….see what an optimist I am?!)


My friends, I really cannot complain about having to wait for some things….each afternoon when I arrive home, I take Kobe out to run around a bit while I relax on my new covered patio, enjoying the breeze and the tinkling of the windchimes, with sounds of kids playing basketball down the street, and distant sounds of the families, kids and coaches gathering for the games we’ll pass on our evening walk…T-ball, softball, baseball, track, this time of the year….and I smile, remembering how far we’ve come in transforming this cottage that has so graciously  become my home this year….and I am filled with gratitude for it all….yes, even the waiting.  


garden qu ote

Posted in Design Tips Included!, Finishing!, Nancy's Kilgore Cottage

Turquoise Front Doors…& more

For as long as I can remember, turquoise has been my favorite color! 

(What’s yours?) 

Just for fun, I Googled the word “turquoise”, and look what I found!  I love the map of ‘usage’, showing the use of the word turquoise first peaked  around the time I was born…..maybe that’s why I love it!

tur·quoise
ˈtərˌk(w)oiz/
noun
noun: turquoise
  1. 1.
    a greenish-blue color.
    “the turquoise waters of the bay”
  2. 2.
    a semiprecious stone, typically opaque and of a greenish-blue or sky-blue color, consisting of a hydrated hydroxyl phosphate of copper and aluminum.
Origin
late Middle English: from Old French turqueise ‘Turkish (stone).’
 turquoise use over time
 
Use over time for: turquoise

OK, so anyway it’s defined as “a greenish blue color”

Really?? To the kid (yours truly) who knew the name of each color in a box of 128 Crayolas, that just isn’t quite good enough!  After all, couldn’t you also define aqua or teal the same way?

Yes!  And I’ve been asked that more than a few times in all the years I’ve made color my vocation, as well as avocation!

OK, in a moment I’ll show you why this is coming up today, but just let me say that color IS somewhat subjective, especially with tertiary colors (comprised of a primary + secondary color, ie blue-green).  In the 80’s TEAL was all the rage ; that teal tended to have more of a green cast than blue.  Aqua has long been a favorite of mine too, but it tends to have more of a \ blue cast.  Turquoise, at least to me, is the perfect blend of blue and green!  It can be intense and bright, or soft and light…..that’s what makes it fun to decorate with:  the fun is in LAYERING more than one shade and varying the texture…but I’m getting ahead of myself.

teal fabric

Just a quick note about this sample of TEAL fabric, above:  when I was working with couples to decorate their homes, my presentations often included samples of fabric, wallpaper, paint etc.  Teal WAS popular then, of course, so it was part of many color schemes  (and I’ve always used shades of blue-green)  But to a person, EVERY SINGLE time I showed a sample that included teal, the female would call it BLUE & the male would call it GREEN!  It NEVER failed!  (Now keep in mind that color rendition online depends greatly on your screen resolution, so we may not ALL be seeing the same thing!)  

Besides the screen resolution, and the fact that color is subjective and teal has both blue and green tones…..there is the fact that most men are colorblind, at least to some degree:

“Men are much more likely to be colorblind than women because the genes responsible for the most common, inherited color blindness are on the X chromosome. Males only have one X chromosome, while females have two X chromosomes.”


Aqua umbrellas by Douglas Fisher

Ahhhhhh….back to what brought me here today….but first, this wonderful photograph by Douglas Fisher just makes me so happy!  Isn’t it delightful?!

So…yesterday was the first sunny Saturday we’ve had in East Texas in such a long time, & I happened not to be showing any houses either; on top of that the temperature was in the 70’s!  Not only is that just an ahhhhh moment all by itself, it is also perfect painting weather!  As you know, I’m waiting for the perfect convergence of weather conditions & contractor timing to get the exterior of my cottage painted!  (I’d like to say I’m PATIENTLY waiting, but that might be a stretch…!)  So yesterday I cheered myself up by painting 3 of my exterior doors – yay!  I don’t want to  paint the 2 that face the street until the brick is the right color, but the doors I use daily – to my kitchen, master bedroom, and laundry room are mainly just seen by me; I decided they were ready for color!

Now when I come home, I’ll be greeted by my lovely turquoise doors, and maybe that’ll help me wait for the white brick!

Vintage Vessel SW9050 doors

This is a color chip of Sherwin Williams Vintage Vessel, my exterior door choice from the beginning.  For one thing, I bet you don’t think it looks very TURQUOISE here…..am I right?!

Here’s why:  if the color chip itself looked like my desired door color, it would look awful actually painted ON the door!  The science of WHY is more than we can go into here, but suffice it to say that the color is affected by everything around it, as well as the sheen, amount and quality of natural light it will be exposed to, and the surface it’s painted on.  The funniest example of this principal is the wall colors we see used so often in kids’ rooms:  you can tell when the parents let them pick out the color,  & they picked one they just loved on the chip…..but painted on the walls it often looks like a giant popsicle!  Even worse, when the parents choose a semi-gloss finish (for cleanability they say) the reflection magnifies the brightness!  

Now, since I got the wild hair to paint on the weekend, I had this chip color-matched and mixed  up in a Behr exterior latex at Home Depot.  They did a fabulous job with the match; I couldn’t be happier with the color!  I chose an eggshell finish, more in keeping with the cottage style I’m creating; keep in mind that while semi-gloss is more authentic to the 50’s era turquoise so many love, the reflection would have changed the color significantly in an exterior application where sunlight is a huge factor.  Also, I AM looking for subtlety…when the exterior is finished there will be quite a bit of white brick, and 5 exterior doors:  if the shade and sheen of turquoise was too bright, the effect would be garish!

Ta-dah!  See what you think:

kit with painted door 2

I LOVE the subtle turquoise shade combined with the original vintage door!  I’m only showing you the interior for now because I want to save the reveal with the white brick and gray shutters for when that project is completed!

kit with painted door 3

When we do the exterior, we’ll move the full-glass-panel storm door from the front to this door; then you’ll have a beautiful view of the arched iron gate from the door.

So now you’ve seen one of my 3 new turquoise doors!  I thought it might be fun to see a few of my favorite turquoise/aqua/teal pretties….the color is repeated throughout my interiors, in varying textures.

backsplash tile

Backsplash:  glass subway tile


Pottery, glass & metal; vintage & artisan-made

(those are old Fiesta plates; I can’t put them in the microwave!)


favorite cushy chair 2

Cushy rocking chair

window seat spring 3

Sunny window seat

gray chairs

Chairs with teal velvet piping & pillows

pottery bowl and sofa

Cozy seating…(and a favorite pottery bowl)

favorite blue wood bowl

Favorite wood bowl

favorite italian vase

Favorite hand-made pottery vase bought in Italy (I love the one beside it too)


What is your favorite color to decorate with?  I  hope you’ll tell us in the comments below…in case you can’t tell, I love the subject of COLOR!

Thanks for helping me celebrate all things turquoise….

may your joy


Have a wonderful early spring week….and remember, if you or someone you know needs to buy or sell a house, please consider calling on Blue Sky Group Realty to help!

Posted in Design Tips Included!, Finishing!, Nancy's Kilgore Cottage, Uncategorized

Nancy’s #Urban Cottage, Holiday Edition

To all my loyal  blog readers, I want to sincerely wish for you Happiness & Joy this Christmas, as well as a NEW YEAR full of laughter, smiles, prosperity of soul & spirit….oh, & plenty of money in the bank so you can live & give!   ♥♥♥

I just love a fresh start, don’t you?

I’m already looking forward to 2018, and all the goals I’d like to achieve in the next, fresh new year….not the least of which is finishing some details inside my little cottage! I’m also looking forward to tackling the fun of face-lifting the facade in the spring!  But before I leave this year behind, I thought I’d give you a visual progress report of where we are now……I hope you’ll enjoy a pictorial snapshot of December 22nd, 2017, as you settle in to enjoy your own Christmas traditions, whatever they may be! (consider sharing pics or traditions with us in the comments below!)

Oh….one last thing:  DISCLAIMERS!!!  This is not complete, and the photography is not professional!  There came a day when Jose really needed to move on to projects/clients who had patiently been waiting for his magic touch, and that coincided with the day I needed a break, to just settle in, unpack, take care of things with my business life, etc.  Suffice it to say we ALL needed a break!  Jose will be back to finish off interior projects soon, then when the weather warms in the spring, we’ll paint the exterior, put up a new privacy fence & redo landscaping & gardens.  For now, ’tis the season of rest….and my cottage is the perfect cozy resting place I knew it would be!  So YES, you’ll see details that need tending to, and I’ll struggle not to point them out…..but I wanted to leave you this December with a feeling of where we are today……enjoy!

Kitchen

Full frontal (& a little fuzzy) view of the kitchen!

dec kit blog

Appliances are GE Adora, Slate

dec kit from china blog

Looking towards the Dining Area…

dec kit to dr blog

Taken from the kitchen door, looking into the Living room & the Laundry room

(Can’t help myself:  the white doors & shelves for the living room built-ins are in the garage awaiting 2 more coats of paint….& Jose to install them!)

dec kit to lr blog

Here, the kitchen sink is at my back; I’m looking into the Laundry Room, where as you can see, the pantry doors are propped up, but will be mounted as fabulous barn doors soon!  (remember we cut that door in half?)

dec kit to laundry blog

The more astute among you will also remember that my original Canton-found wood door is to be mounted just to the left of the china cupboard, as a swinging door.   Mmmmm I can hardly wait!   Then the 2 original chandeliers will sparkle on either side of the rustic swinging door.  (insert big Nancy smile!)

And…a view of the Laundry  Room (it’s really the PETS’ room!)

laundry pet to kit blog

Living Area

Please let me introduce….Ms Chesterfield adorned in her Sapphire Cotton Velvet!

dec lr best blog

dec lr dr kit blog

Looking from the hall into the living/dining area

lr from hall blog

Dining Area

din blog

Dec dr to hall blog

Though I wish the photos were better (I can hardly wait to see what Erica Tamassy will be able to do with this!)….I wanted to give you an idea of how the spaces have transformed from the original layout.  Erika will be doing the professional AFTER pics once we’re truly finished, and then it’ll be fun to compare her super-high-quality BEFORE & AFTER pictures!

Guest Bedroom (in progress!)

dec guest blog

I have more artwork and accessories than I can use in this cottage-sized house, so I’m definitely still moving things around for the best “fit”!  However, this room is being used by guests this month & next, so for now I’ll leave it alone to do it’s job!

Master Bed & Bath

dec master bath blog

dec br 5

Each house speaks to me in it’s own way; this house consistently calls for symmetry, though I’ve long enjoyed the challenge of an off-center arrangement. The way elements “line up” in this house is a pleasure, and a major player in the design.  (Please know that the windmill vane WILL be mounted as soon as I ponder the best way….for now it’s sits there just fine!)  

The door to the left in the top photo leads to my private porch.  

bed closeup with Sukha

Sukha-Study in contrasting textural interest:  quilted washable silk velvet, natural & synthetic blend faux fur, hand-painted washed Irish linen…..and American cottage house-cat.  <<grin!>>

Jose hung these 2 sets of barn doors on the last night of the last day he was here…he was coming down with the awful virus which I managed to catch from him…..and should’ve gone home hours earlier.  But he really wanted to get these up: being the first of the 4 we will have in the house, he knew he’d discover the bugs to be worked out next time.  He did!

These original doors had been stowed in the garage throughout the project, only pulled out on this day for the master closets.  Soooooo they need to be cleaned and painted (though I find the original finish charming).  But once he figured out the barn door hardware, which was harder than it looks, we found the issue we couldn’t have anticipated:  during their life post 1961, some of the doors have been shaved to fit whatever opening they were in .  He couldn’t figure out why they weren’t hanging square with each other, and was looking for a “fix”…..when I noticed the subtle differences.  Anyone who grew up or since lived in an “old house” will relate to the shaving of doors!  When doors & floors swell with the seasons, some do-it-yourself-ers tend to take the easy way out by removing the door from the hinges, carting it out to the ol’ workshop, and shaving the bottom……inevitably at a slight angle.  It is also commonly done when adding carpet to a house with wood floors.  BINGO!  That’s what happened here….and none of them are exactly alike.

Strangely, this hasn’t been bothersome to me, but we will still make adjustments on the next go-around.   We won’t have the same problem with the single slider in the guest bedroom, or the double sliders on the pantry….since we bisected that door ourselves!  

Reusing “old stuff” is always more challenging that starting with all new materials, but I hope  even my slightly fuzzy photos have shown you the extra panache a space carries when old and new are married.  And, as always, I love a good challenge!

DIY-Vintage-Christmas-decor-7

Sending you a little Kilgore Holiday  Cheer!


Friends, please consider adding a family photo or two in comments so we can all enjoy sharing our traditions…..a Christmas story, past or present, will be just as delightful!  I’ve always thought the BEST part of the holidays was to share our joy with others….I would love to hear yours!

merry christmas vintage curl on paper background

Love,

Nancy, Kobe & Sukha

Posted in Before & Afters!, Design Tips Included!, Finishing!, Nancy's Kilgore Cottage

Sneak Peeks Week!

I’ve moved in to the cottage!

…and here I sit, among the barrage of boxes…

moving gif

Seriously, this hasn’t been the smoothest move of my life, but that’s usually the case when DOWNSIZING is involved!  I DO like “my stuff”……

(interesting side note….it’s not unusual for clients to come to me, planning to downsize….but I’d estimate that 90% of the time, they reject EVERY house we see that would fulfill those wishes….people (including yours truly) do NOT like to go backwards in most things in life, including square footage, storage & stuff!)

grid 3

So, for the last 3 weeks our wonderful crew has been in a race to the finish, pending my moving day!    They all worked so hard to get the messiest, ickiest, and stinkiest jobs handled before I had to spend the night here……and by stinkiest, I mean the oil-based paint we had to use on all the woodwork!

By way of explanation for those not ‘in the know’, the world of paint finishes is now blessed to have perfectly good  water-based (latex or acrylic) finishes for wood; however, if one is painting OVER existing woodwork that was originally painted with oil-based paint, one must use oil-based paint again.  (and many of us old-timers swear it’s a superior finish anyway)  WHAT IF YOU DON’T??  Well, I can speak from first-house experience on that subject:  back in the 80’s my young and energetic self painstakingly painted the kitchen cabinets in our first home a lovely white; since I had little children, I was concerned about the fumes (off-gassing) from oil -based paint, so I used the new latex enamel!  Oh, I was so  proud of myself….oh nountil the paint started peeling off in sheets a few months later.

So here’s the rule:  you can paint over water-based paint with oil-based paint, but NEVER the reverse!  You might say that ” oil trumps water” when it comes to paint.   

OK, one more woodwork detail, then I’ll show you some pictures….I’m aware that’s why you’re still here!  When we started this  fixer upper, my wonderful carpenter/builder extraordinaire, Jose Chavarrio,  quietly made the decision to  save and reuse all of the original workwork, to the extent that was possible.  Since we were doing such extensive work, that meant he had to REMOVE most of the base and  facings (the crown had been sprayed along with the ceiling when some earlier remodeler decided that popcorn ceilings would be nice !)  So he removed and stored  trim….and later removed all the old nails in the trim.  And when the day came to finally trim out the newly-remodeled rooms, he re-installled the old woodwork in all the main rooms, leaving new woodwork for the entirely new master bedroom only.   What a heroic effort that was…..and the payoff is that most of my little cottage has original woodwork, recoated with fresh oil-based paint!    (OK, just ONE MORE detail; for those inquiring minds in the crowd, we DID NOT remove the previously-popcorned crown mouldings….we simply installed a larger crown over them!)

So…disclaimers first!  None of the pictures you’re about to see are true “after” pics!  I am still solidly stuck in the unpacking phase.  But little by little, the beauty of this cottage is being revealed, and I know many of you are eager to SEE!  So that’s why I’m calling these “Sneak Peeks!”  Just know you’ll see more completely finished-out rooms soon!

kit after 1

Many of you saw this on Facebook….it was night, I was  too tired to unpack another box….and I just couldn’t resist!  Behind those counter stools is a MOUNTAIN of UHaul and Home Depot boxes!

  • As a reminder, the chandelier was originally in the living room

  • What’s missing?  The swinging old-door-from-Canton (had to move in the  washer/dryer first)

  • I had just  FINALLY removed the  plastic covering from the quartz countertops for the first time minutes before…this lovely 7′ island had been a handy horizontal surface for tools, caulk, sandpaper, stray mouldings, etc….for weeks!

  • The flowers?  YES, I DID move on my 60th birthday!  Thanks, my friend!

    And just a quick reminder of where this view started…

    kit before after

          Here’s a current view of the hall bath…

hall bath aft

And a reminder of what we started with…

IMG_9170-4

I’m loving my new home office!  And look!  I haven’t even had time to mess up the desk yet!

office 3office 1office 2 kobe

(Something tells me Ballard Designs didn’t have a dog bed in mind for that particular cabinet, but Kobe claimed it long ago; he keeps watch while I work!)


A few scenes from the new Master Bath….

master bath aft 2

     And once again, a reminder from whence it came:

IMG_9173-4

  • The window was removed; the walk-in shower is now in that corner

  • The door was moved to the left a few feet; the tub-to-die-for now sits there

  • Everything….EVERYTHING else about this room….changed!

Now I want to share a detail that is hard to illustrate (due to the difficulty of photographing a light fixture while it’s ON!)

This hall light fixture is original to the house; we changed nothing about it, unless you want to count using LED bulbs so I never ever have to bother changing them:

When you look down the hall from the living room towards the master bedroom….

hall 1hall 2

….you see a consistency of light…but it’s not until you enter the master bath that you see why…..I LOVE this new fixture mirroring the old!

master bath door light det

OK, so…about that old blue door I love so so much….first, would you even believe me if I told you that I bought the interior paint WEEKS before I finally found “the door” to use between the master bath and bedroom?!  It’s true!  (I can hardly wait to show you the bedroom side of this door, and another synchronicity of design that was totally unplanned!)

So, here is the door in the form it came to us:

blue bathroom door

I would be embarrassed to say how much I pored and pondered over what to actually DO to clean and preserve this, as well as the 2 other old doors I bought for the house.  My goal was to clean off the dirt, but preserve as much as possible of  the peely-paint, patina, and patchiness of the old doors.  After all, if I destroyed the character, what would be the point of using them in the first place?  But most treatments would, indeed, destroy what I loved about these re-purposed beauties.  Entirely true to my personality, I came up with the solution literally the night before the day I HAD to do something to the doors.   (if any of my old teachers were reading this, they’d be seriously rolling their eyes right now; I have ALWAYS tackled important projects just prior to the deadline! )

Harsh detergents would wash off the paint; a wire brush or sandpaper would remove the crazing and certainly any about-to-peel patches; sandpaper would leave fine particles in the ridges created by old joints and slight peels; any ‘clear coat’ would yellow or buckle, and shine too much (even if matte finish).

doors 
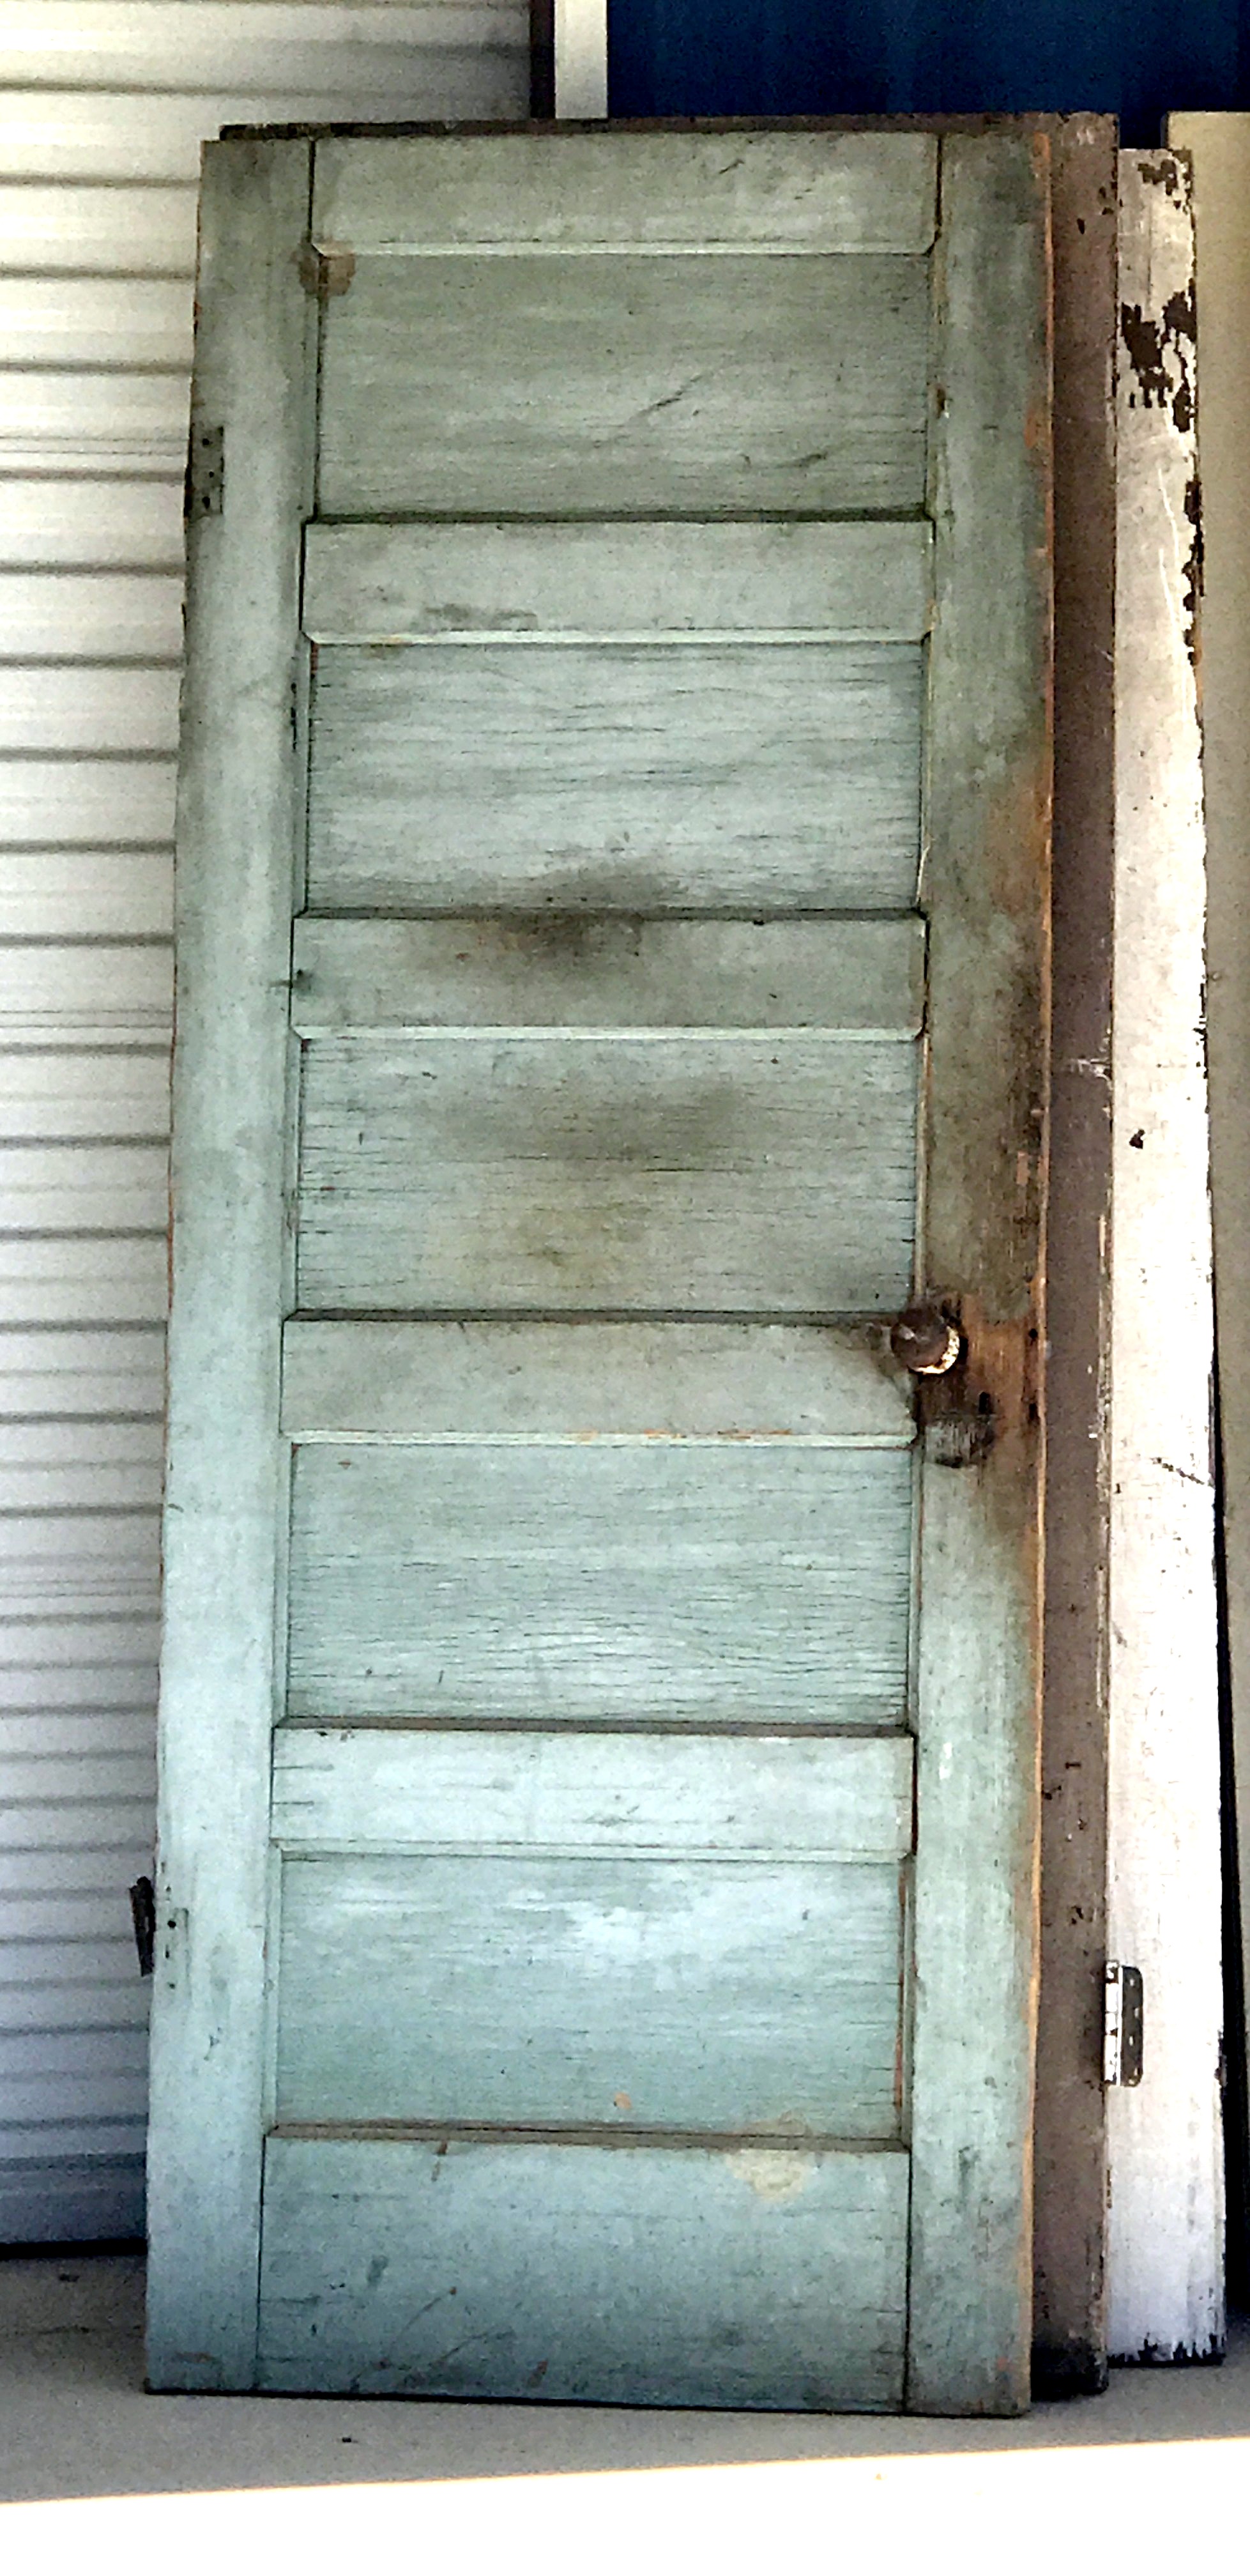
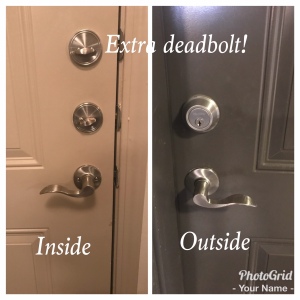
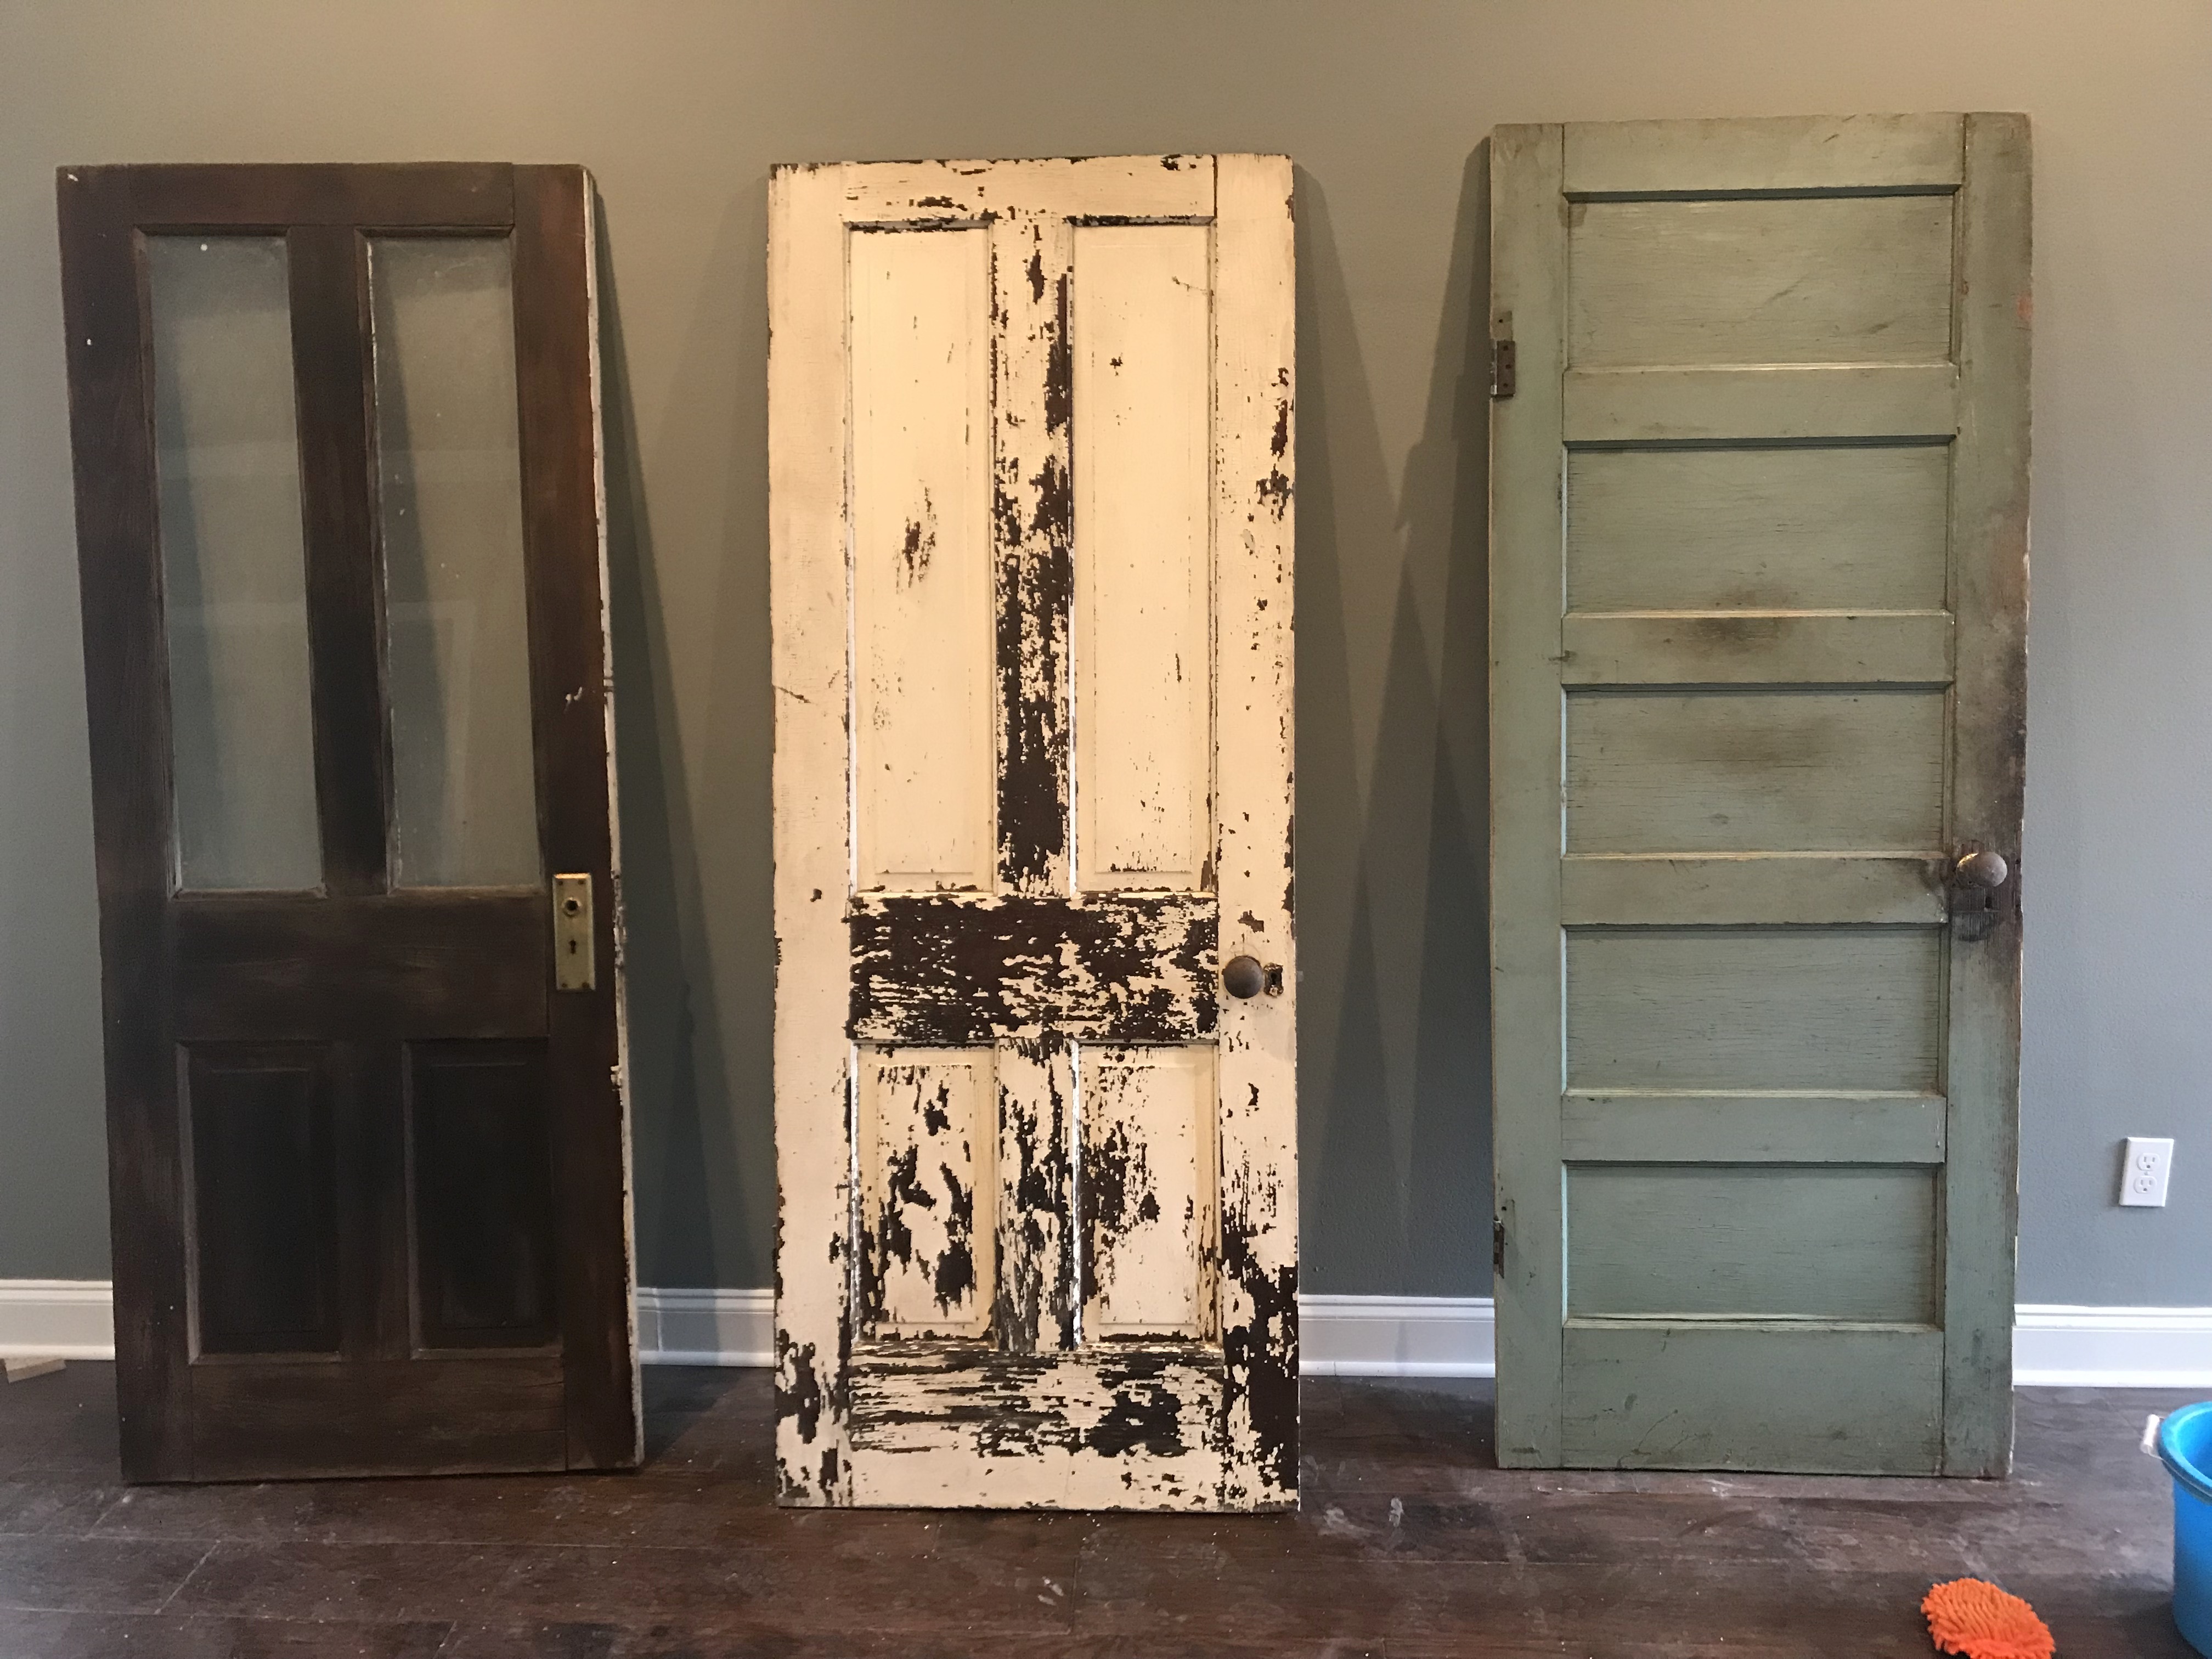
So here are the 3 doors AFTER treatment (wish I’d thought to photograph the reverse sides too!)  And here is what I did:

I brushed down each door, both sides, with a lint-free soft mop-like hand brush (think feather duster with fat dust-resistant soft fabric loops)  That removed loose dust.

Then I gently washed each with a soft sponge and a solution of mild dish detergent in a bucket of water.  I was super-pleased with how much dirt I was able to remove without harming the finishes!)

Next I used a soft white cloth to rub in a mixture of orange oil and beeswax; it was painstaking work, as I had to be sure every inch of each door was “nourished” with the mixture.  The oil soaked into the dry, thirsty wood, then the soft beeswax sealed in the moisture.  The difference was subtle, but certainly noticeable!  There is a natural sheen now that the wood is nourished.

Now, the door in the middle is a little different.  There is obviously much more peeling paint on this one; given the age, it is likely to be lead-based paint chipping off.  I don’t have little ones toddling around, eager to eat cute little paint chips….but nonetheless I don’t want that door regularly ‘raining chips’.  I removed all that were loose, but since this will be the sliding door on my pantry, it’s going to be moved daily.  I am therefore going to spray a coat of clear matte sealer on this door.  I was so opposed to this, but having faced the fact that more chips are inevitable, I have decided it’s the best coarse of action.  To remind you, Jose is going to slice this door vertically, and hang ‘barn door’ style as pantry doors.  That should happen this week, and I’ll spray the finish afterwards.  

That brings me to the status of the project, which you may be wondering about:  we are all weary of the work and in need of a break in the action!  And now that I live here, I’m not crazy about having guys show up in the morning and throughout the day to “fix” something.  So all but Jose are off to other projects for now; he is staying with me this week to finish up details on the inside, such as hanging the barn doors, hanging curtain rods, installing new door hardware & keying the locks alike, finishing up the shelves for the living room built-ins, and building the 2′ “box” for the base of the black bathroom cabinet.  There are many little  details he and I will handle this week…..then Jose, too, will move on to other projects for awhile.

It is now too cool and damp to paint the exterior brick and siding; this is so disappointing, as I’m eager to have it sporting it’s new white finish!  But we really need a consistent week of warm, dry weather, and it’s just not predictably going to happen for awhile.  So, we will regroup and attack the exterior of the house in February or March, including landscaping.  The new garage door should be arriving any time now, so we’ll get that done, but otherwise we’re all ready for a renovation rest!

I’ll be back with more blog posts, though, as the interior gets photo-ready!  There are so many details, how-to’s and hints I’d like to share with you, so keep watching for posts!  In the meantime, please leave comments letting me know what type of posts/info/pictures you enjoy the most:  I aim to please!  

Now, as we all turn our thoughts to family, friends, food & fellowship, I want to thank each of you for sharing in my fixer upper journey; many of you have touched my life in ways you do not know….I wish for you all the happiness you can stand in the coming holidays & afterwards into 2018! 

happy Thanksgiving


please don’t forget to leave me your comments below…and remember…….I’m never too busy to help your real estate referrals; I will treat each with the highest level of service!

Posted in Design Tips Included!, Finishing!, Nancy's Kilgore Cottage, Uncategorized

Stoned….1 kitchen & 2 baths

Meet Ashleigh, my HERO from Stone Link; she may look young, but Ashleigh is super knowledgeable about all types of stone, quartz, tile, sinks, iron doors….and probably much more I don’t even know about!

Stone Link is located on Highway 80 in Longview, & they have a super extensive showroom and stone yard full of the most impressive displays I’ve seen this side of the Dallas design showrooms….just take a look at the view from their front door:

stone link

Nice, huh?!  This is only a tiny part of the showroom, but the rest you’ll want to explore on your own….

OK, so here’s the story of my urban cottage’s countertops:  I really really wanted to use quartz in the kitchen of this house; I had wanted to use it in a former Lake Cherokee remodel, but alas, that was 2008 and it was quite a bit more expensive than granite…..which always seemed strange since granite has to be formed over thousands of years, in the earth, by pressure, and therefore is a limited resource.  Quartz, on the other hand, is man-made using 8-10% polymers etc, and roughly 90% crushed quartz….which is actually usually crushed or waste granite, marble & natural stone or recycled industrial wastes like ceramic, silica, glass, mirrors, etc.  The pricing on quartz countertops is usually still higher than granite, as demand has continue to drive the price of granite downward….and while quartz started out  ‘trying to look like granite’, the trend now is towards very different-looking quartz material that doesn’t resemble anything nature made!  I see it as a great way to recycle waste material, so it’s a win-win scenario! 

Soooooo, weeks ago I visited Stone Link on a  Saturday; it was D-Day.  I had to know whether or not I could get quartz countertops into the budget, and pick out the granite if not.  I was so lucky to meet Ashleigh, who was totally prepared to answer all my questions, figure estimates based on my kitchen/bath scaled drawings, and was generally all-around encouraging & helpful.  And here is how she made it work for me:

These are 3 pictures of the beautiful PRE-CUT slabs of granite and marble Stone Link has on hand; the selection always varies, and presumably the more desirable slabs sell fastest….though really, aren’t they all beautiful?!    By using pre-cut slabs for both of my bathrooms (thus greatly decreasing the labor involved) we were able to save enough off of my countertop budget to do quartz in the kitchen for just a TAD more….and I decided it was worth it!  So I picked this quartz, which looks a great deal like Carrara marble:

calcutta-grey

And for the two baths, I chose these 2 slabs (honestly I went back and changed one of them a few weeks later, but still chose from the pre-cut slabs)

If you’re wondering why I wanted quartz in the first place, here is a good resource for the comparison between granite, marble & quartz.  But one of the main reasons for me is that granite has to be sealed, & re-sealed yearly, as it is a porous material.  (and most granite owners fail to re-seal….life gets in the way)  For a cook’s kitchen, quartz is actually a harder surface, & easier to keep clean….& it never needs to be sealed.  Also, my vision for this kitchen included white countertops; while there are now more white-based granites available, they are premium-priced & still, more colorful.  Carrara marble is a traditional choice for a cook’s kitchen, but marble is soft & porous….so this beautiful quartz was my favorite choice to give the best of both materials.

I’m happy to say that my lovely countertops were installed last Thursday, and while I’ll give you a tiny peek now….you’ll have to wait a week or two longer to REALLY be awed!  Here’s why:

The house is in serious finish-out phase right now, but that makes it hard to get good pictures of any one thing!  Because we are ‘layering’ the tasks to get me moved in on time (and just because I think that’s the best way), we were still operating this past week without any interior lighting.  The electricians will be back this week to put in the final service panel and install ceiling lights….AFTER the ceilings are painted.  So these pics are going to look really really rough….and you may well not believe the house will be ready for movers in 2…..yes, 2 weeks.  But we do have a plan……stay tuned

island first view

First look at the edge of the 7′ island….

kit ct

First look at one of the countertops (and cabinets!)….

kit sink first view

First look at the stainless one-bowl apron sink…

And….first look at the hall bath counter installation in progress; later that day the undermounted sink was installed beautifully!  But…speaking of sinks…..

The sink issue reminds me to pass on to the uninitiated what can happen the day of countertop installation, in hopes of preparing you to, well….be prepared!

RULE #1:  HAVE ALL YOUR FAUCETS ON-SITE!

Having been through this a gazillion times before, I knew this rule….so Roger made sure the plumbing fixtures were all delivered to the job-site on Tuesday, to be prepared for Thursday.  If you’ve never had stone countertops installed before, it’s crucial to have both the sinks and faucets available.  Often the fabricators will install a standard stainless sink in their workshop, making it necessary to get it  TO them ahead of time – which is also why they often include the sink in the price of the job.  But in my case, the apron sink made it necessary to install on-site, as the cabinet front had to be modified at the same time.  They also elected to install the 3 bathroom sinks on-site, as they were porcelain bowls that could have broken in transit, since they were transporting quite a bit of stone. 

But you also must have your faucets on hand for the installers, as they will need to cut the holes after the countertops are installed.  Some of my clients have been surprised to find out that “faucet holes” are not standard; they each come with a template to be used for cutting the holes, so there is a proper fit when they’re later installed.   And if you think about it,  some sets have a separate hole for the sprayer, lotion or hot water.  (mine has only one hole, as I prefer a pull-out sprayer, and have NEVER ONCE used the lotion, soap or hot water hole effectively)

So I arrived at the house Thursday mid-morning to make sure all the faucets were laid out in the right location in case I couldn’t be there when they needed them.  It was only then that I noticed the kitchen faucet & drain were NOT in the big box of plumbing fixtures that had been delivered!  After a few calls, we determined they had just been left off…..so fortunately  Coburns had the faucet in stock, and I only had to make a quick trip to pick it up and have it available….I was so thankful not to have interfering appointments that day so I could do it!  Then later in the day I returned to the site, knowing they were finally there and working.  Much to my delight, I saw that one bathroom countertop had been installed, and they were working on the master bath!  PROBLEM #2!

RULE #2:  Make sure your plumbing fixtures are measured correctly!


Remember these lovely round porcelain sinks from an earlier blog post?  I just loved the shape, having never seen this exact elegantly curved and perfectly round sink.  And I made sure to pick out a high-arc faucet that would reach over the rim and not splash water outside the bowl.  What Ashleigh and I both missed was actually measuring…..one thing that IS standard is the depth of a bathroom countertop!  As I arrived, the guys were standing there scratching their heads over the master bath slab, with the lovely sink sitting atop it for placement.  What they were trying to do was mark exactly where the hole would be cut; this involves placing both the chosen sink and the faucet on the surface to be marked precisely (and since I have double sinks in that room they needed to match exactly as well).  They not only need to LOOK right on the slab…..they also have to take into consideration the inside edge of the front of the cabinet, and the granite overhang.  They were scratching their heads because I walked right into them realizing this just wasn’t going to work! The sink was too large to possibly fit it onto the countertop, unless I was willing to put the faucet on a side corner…….NOPE!  

A quick call to Ashleigh confirmed that I was in fact the FIRST purchaser of these elegant new sinks…..and nobody yet knew they were too large for a standard installation!  (The way they would work is to have the faucets wall-mounted, but that’s not a modification that can be made this late in the project).  However, this is where flexibility is key to a successful remodel:  we both knew they had just gotten in 2 sinks from the same line which were a softened rectangle shape.  Ashleigh had actually called me to come in earlier in the week to see the new ones and make sure I didn’t want to switch.  So there was the solution!  She immediately sent out the alternate sinks and the job continued.  I’m sure the new shape will grow on me, but on a project this size one really has to be flexible and not sweat the necessary modifications!  Be the end of the day, the installers had finished all of the countertops, sinks, backsplashes and final corner polishing….and they are just beautiful!  Unfortunately, I cannot show you how pretty they are, as this week all the interior painting is taking place….and the countertops are safely protected,  not to be fully unveiled until it’s safe!  However, I DID give you a sneak peek.  Next time  you see them, I hope you love them as much as I do!

I can hardly wait to reveal the gorgeous new kitchen backsplash I switched to this past week!  I changed from a basic greige subway tile to an iridescent subway that pulls in the grays, bronzes and aquas in sight of the kitchen, very very subtly.  Pictures do not do justice to this lovely tile, so just know I’ll show you very soon!

Finally in closing, thanks go to Ashleigh and her crew from Stone Link….your professionalism is much appreciated!  And to Nancy with Coburns, who listened between the lines and made my selections easy, thanks to you as well!  Both companies are a great resource to us in this area; please check our their showrooms next time you’re dreaming up a project at your own house!  

Here’s what is coming up this week:

  • Window trim-out, crown moulding, door facings and base mouldings installed

  • Interior painting

  • Small carpentry ‘fixes’ including the finished step from master bath to bedroom and uneven floor fill-in (where walls were removed)

  • Tile installation

    happy fall!

set your clocks back next Saturday night!

Posted in Design Tips Included!, Finishing!, Nancy's Kilgore Cottage

Kilgore, TX: Home of my cottage and…

Hello Friends!  I hope you all  had a great week; I can tell you that things are looking ‘very up’ at my little Kilgore project!  The guys have officially moved inside to start the finishing (aka, they’re finally going to make it pretty!)  A little more about this later…..

the guys

but since the house is in a transitional stage, I thought I’d take a few moments to show off Kilgore itself, my soon-to-be new home!

logo


Some of you may know more about Kilgore than I do, but for those who know little or nothing, here are a few highlights;

“The World’s Richest Acre”

One cannot talk about Kilgore Texas without talking about oil!  Not only is it the heritage, and still the major industry in the area, but the evidence is PROMINENT!

So…if you’re from Texas, anywhere in Texas, chances are you pass pump-jacks daily…you may even live where there are wells operating noisily…you almost certainly ARE or know people who are oil-field workers….in one of the many industries related to and in support of the oil fields.   BUT IF YOU LIVE IN KILGORE, this scene is what you see everyday… DOWNTOWN!  It was…and it is, still today.

A little history from Wikipedia (I hate to copy/paste, but how could I say it better?! )

Kilgore was founded in 1872 when the International–Great Northern Railroad completed the initial phase of rail line between Palestine and Longview. The rail company chose to bypass New Danville, a small community about 10 miles (16 km) southeast of Longview, in lieu of a new townsite platted on 174 acres (0.70 km2) sold to the railroad by Constantine Buckley Kilgore, the town’s namesake. That way the railroad gained the profits from sale and development of these lands.

The new town received a post office in 1873 and, with a station and transportation for getting commodity crops to market, soon began to draw residents and businesses away from New Danville. By 1885, the population had reached 250, and the community had two cotton gins, a church, and its own school. The racially segregated Kilgore Independent School District was organized in 1910. By 1914 the town had two banks, several businesses, and a reported population of 700. The 1920s showed continued steady growth, and by 1929 Kilgore was home to an estimated 1,000 residents.

Prosperity came to a halt, however, when Kilgore was dealt severe blows by a steep decline in cotton prices (on which most of the town’s economy was still based), and the effects of the Great Depression. Businesses began to close and, by the middle of 1930, the population had fallen to 500; the community appeared destined to become a ghost town. Black people joined the Great Migration out of the South to northern, midwestern, and western cities for work.

Kilgore’s fortunes changed dramatically on October 3, 1930, when wildcatter Columbus M. “Dad” Joiner struck oil near the neighboring town of Henderson. This well, known as the Daisy Bradford #3, marked the discovery of the vast East Texas Oil Field. Seemingly overnight Kilgore was transformed from a small farming town on the decline into a bustling boomtown. The Daisy Bradford #3 was subsequently followed by the Lou Della Crim No. 1 and many others.[5] By 1936, the population had increased to more than 12,000, and Kilgore’s skyline was crowded with oil derricks.

Oil production continued at a breakneck pace throughout the early 1930s, with more than 1,100 producing oil wells within city limits at the height of the boom. The explosive growth left most civic services overwhelmed, and as a result Kilgore was forced to incorporate in 1931. With the city flooded with male workers and roustabouts, law enforcement struggled to keep order among the shanties, tents, and ramshackle honky-tonks that crowded Kilgore’s main streets. On one occasion, they had to summon help from the Texas Rangers to keep the peace.

By the mid-1930s the oil boom had begun to subside, and most of the small oil companies and wildcatters had sold out to major corporations. The boom was essentially over by 1940. But oil production has remained central to the city’s economy. The population, which fluctuated wildly throughout the 1930s, stabilized at around 10,000 in the 1950s. A 2015 estimate placed it at just under 15,000 residents.

If you want to know more, it’s well worth your time to visit the East Texas Oil Museum

KilgoreOild_19b


Back to those downtown derricks for a moment, I MAY be wrong, but I believe the old buildings shown here are the present-day home of Jack Ryan’s Steak & Chop House, one of Kilgore’s most wonderful restaurants, and one any town would be lucky to have!

I can’t mention Jack Ryan’s without a nod to The Back Porch, Kilgore’s casual venue for live music, libations, and dancing!

back porch


The Kilgore Rangerettes!

rangerettes

I KNOW you’ve heard of the Rangerettes!  They’ve been performing all over the world since 1940; to be specific…The Rangerettes have performed on four continents, in eleven foreign countries, twenty-three states, and Washington D.C…have performed at 67 Cotton Bowl halftimes in a row, and regularly perform at Dallas Cowboy pregame and halftime shows.

You may have even heard of Gussie Nell Davis, the super-famous founder of the Rangerettes….here she is:

gussie nell dvis

However, I MAY be able to clue you in on a lesser-known fact of the inventive Gussie Nell Davis’ accomplishments!  You see, I’m from Greenville Texas, home of The Flaming Flashes!  

In case you’re wondering what The Flaming Flashes have to do with the Kilgore Rangerettes, here you go:  Gussie Nell Davis was a PE teacher from  Farmersville, Texas (between Greenville and McKinney), who turned the Greenville Lions’ pep squad into a  drum & bugle corp famous for high kicks, precision routines & short skirts, and named them The Flaming Flashes!   My 2 oldest sisters were in the Flashes, and I can attest to the HIGH STANDARDS!  Back in the 60’s my oldest sister was temporarily benched upon threat of expulsion….for what? Well, for cutting her hair an inch too short!  The girls were regularly weighed in at that time, and were required to have hair of a particular length to flip up on their shoulders, looking perfect under the famous cowgirl hats!  Gussie Nell Davis had set super high standards, which were adhered to by her successor, Mary J Vance.   

But alas, in 1939 Kilgore College dean Dr Masters hired Gussie Nell away from Greenville High School; he wanted something new and unique that would increase female enrollment at the college, but also keep people in their seats during halftime, instead of drinking alcohol and brawling under the stadium!  Greenville’s loss was Kilgore’s gain…and the Rangerettes were born!

As a young Jr High and Sr High twirler in Greenville myself, I attended twirling camp in Kilgore each summer, where the name Gussie Nell Davis was in the air all the time! Her stringent standards were considered the ‘norm’ at Kilgore College, so they were just as hard on us!  (I thought the campus was SO cool; I loved twirling camp!)

And one more TODAY connection for me:  my good friend and client “Pill” Malm (formerly Barbara “Pill” Harmon) was one of Ms Davis’ assistants in the past!  She moved back to Kilgore a few years ago to help open the Rangerette Showcase and Museum, on the campus of Kilgore College, where she can be found many days behind the desk…and the showcase is absolutely fascinating!  If you haven’t visited, put it on your calendar; it’s a hidden gem!  

Texas Shakespeare Festival!

shakespeare festival

Talk about a local gem!  Started in 1986, it’s now in its 32nd season.  Need I say more?  Here’s the upcoming 2018 Season if you want to start getting excited now!

While I’m name-dropping, the Shakespeare Festival is held at Kilgore College’s Van Cliburn Auditorium….another son of Kilgore, Van Cliburn was one of Texas’ most famous classical musicians, who emerged as a prodigy when he amazingly won the Tchaikovsky International Competition in 1958, in Russia, at the age of 23!

(My Mom, as a classical pianist & later teacher herself, worshiped Van Cliburn!)

van_cliburn_russia 1958 tchaikovsky comp

I cannot possibly do justice to his story as well as Prudence Mackintosh did, for Austin’s NPR station; I invite you to read her article here.

That’s just a few noteworthy things about Kilgore; if you want to know more, please follow the links in each section!  As far as I’m concerned, I like the small-town charm and the interesting, affordable homes that are still standing there.  I have sold many Kilgore homes to first-time buyers.  One Saturday morning when I was sitting in the house, contemplating purchasing it, I heard a melodic tune getting louder and louder, till I suddenly realized it was an ice-cream truck coming down the street!  That was a nice moment…


Ok, just a couple of progress photos:

The termite-chewed area surrounding the front door has now been replaced with nice new wood and covered up with sheetrock

The new roof is being installed, and should be finished in a couple of days.  I used Weathered Wood, which has always been my favorite composition shingle; it’s a dark cool gray and brown mixture.  Of course it will look spectacular soon, when the bricks, shutters and doors are sporting THEIR new colors!

In the picture on the right, you can see a dark brick covering the spot where a window was removed to create the master  bath  (and one was removed in the kitchen as well).  We had to patch the hole with brick, and this is the only one  Roger could find that matched the size, shape and texture of our brick exactly.  If you could see it up close, you’d be impressed!  Now when the paint covers it all, you’d never know there was once a window in that spot!  Great work, guys!

This week I want to leave you with a different sort of “find”; this is not something I bought, but something I learned from my short respite, living in an apartment!

the deadbolt

This is a SECURITY feature I plan to make use of in my urban cottage…and you may want to as well!  Notice the deadbolt on the outside of my door; you unlock it with a key and enter.  But look at the inside of the door; see the EXTRA deadbolt at the top?  Yep….that makes me feel pretty safe!  So Roger has Jan at Designer Accents in Longview on the hunt for this one-sided deadbolt (she is also supplying our barn door hardware!)


Coming up at the Urban Cottage this week:

  • Sheetrock – woohoo!  We passed inspection and can now close up the walls!
  • Plumbing faucet rough-in valves
  • Hardibacker for bathroom tile; showers, tub, floor
  • Tile work in the master bath, later in the week
  • POSSIBLY setting the kitchen cabinets, later in the week
  • Tape, bed & texture begins
  • If I’m lucky, maybe I’ll see some color SOMEWHERE!

Thank you once again, my fixer-upper friends….have a wonderful week & check back in for really fun progress!  And remember… I’m never too busy for your referrals!


Posted in Nancy's Kilgore Cottage

My Urban Cottage comes to life!

Friends, I’m so glad you’re still with me….I know it’s been tough on you, watching us tear the house apart piece by piece!  From now on, you’ll get to see it being put back together, 2017 style!

5 WEEKS TO GO!

In 5 weeks we’ll all be getting ready for Halloween parties…..starting to think about what we’re serving for Thanksgiving…..and some of you will be wrapping up your holiday shopping, even as the rest of us will not have started!   What’ll I be doing????

MOVING INTO MY KILGORE COTTAGE!


Now, it’s time you met Roger Landwehr and Jose Chavarrio, my contractors who are making this all happen, and who are quietly DOUBTING my timetable is possible!  roger and jose

I seriously couldn’t ask for 2 better guys to have on my side in this project; just wait till you see what all they’ve made happen this week!

(as for the schedule, I AM moving by the end of October, and it’s totally doable!  Hopefully the house will be finished….but I’m moving in one way or the other!)  

This happened on Monday, when we were all out at the job site perusing, pondering and planning how to proceed!

roger and jose with tapes

I asked the guys to explain the angle of the roof they were going to add back to connect the house with the garage (where the old breezeway was).  The house is much higher than the garage since it’s on pier and beam, and the garage is on a slab.  So I couldn’t picture the pitch of the connecting roof…..

Hahaha! I had to get a picture of them as they both whipped out their tapes and started approximating the angle of the 2 sides of the roof, and comparing ideas….it was too funny!  Spontaneous humor is the best!

(and I still don’t get it….but some things are best taken on faith!)


Monday when I arrived about mid-morning, much to my surprise, there was a building already taking shape on the empty slab left on Friday!

That was pretty exciting, but during the time I was there on-site, here’s what I saw happening…

Wow!  They were framing the roof already – woohoo!

Now, let me stop and explain something….I’m NOT a worrier, as all my friends know….but seeing  Jose standing precariously on the roof made my heart skip….for a VERY GOOD REASON!

It was just a year ago, this month, that Jose fell off of a very tall ladder, while painting a 2-story living room in one of my listings; he suffered a VERY badly broken ankle!  He was in a cast for months, getting around slowly on crutches….then finally graduated to a stiff boot cast last spring, which he has ONLY been out of for a very short time now!   Jose still limps around while working, but swears it doesn’t hurt – he really suffered a bad break last year…….

Now look at him!

mbr 10

YIKES it makes me nervous all over again!  I’m glad he’s now finished with this roof…..though Monday he will be framing  the roof for the breezeway and the covered patio/potting area I decided to add!  Yep… adding…change orders….inevitable in remodeling!

mbr with windows

The bedroom addition gets windows!

(these are the recycled ones from the old sunroom)

mbr with sheathing

…& Tyvek wrap! (notice the roof now has tar paper too)

mbr with siding and door

And siding, and the door!

(Now we can finally lock up the site)

mbr with siding etc

This is the way it looked Saturday about noon; no doubt they finished the siding.  This is pretty exciting!

And here is a view from inside!

mbr insidembr inside 3mbr inside 2

We also had a plethora of plumbers crawling all under the house yesterday and today; they are now finished with the rough-in, so we won’t see them again until time to install all the fixtures.  Here’s the not-very-pretty-and-yet-exciting progress they made in the master bath-to-be!

mbath rough in

While this doesn’t look all that exciting, it required plenty of rooting around under the house….and this is why we love pier and beam foundations!  (and plumbers!!!)

They managed to rough-in all the plumbing in the house, AND install the new Rinnai tankless water heater on the wall outside – I’ll show you that later!  

Each week I reward your patience with my ‘find of the week’…..this time I’ll leave you with the piece that put a big grin on my face every time I even thought about it this week….no explanation…for that you will have to wait!


“I’d like to introduce you to Ms Chesterfield, coming to an urban cottage close to you soon, wearing a yummy sapphire velvet and ready to own the room!”

velvet sofa

Interiordefine.com ~ if you just have to shop!


Have a great week, my friends….once again, I thank you for joining me on the journey, and remind  you that I ALWAYS have time for your real estate referrals!


many thanks