Posted in 50's House in the Woods, Design Tips Included!, Finishing!, Interior Design Interest, Remodeling Projects

Fun with Finishes & Colors, at last!

After months of renovation that turned into something much more like “new construction”, the 50’s House in the Woods has finally made it through the finishing phase! It is so much fun to see the design plan come to life, as colors, textures and finish materials are applied and installed. As the designer, I carry a house like this “in my head” for the months it takes to demo, frame, build and add dimension to the house; when it transitions into reality looking exactly as it did in my head, my sense of satisfaction is “through the roof”!

Although there are many finishing touches to be added, I am going to share some preliminary finished photos, so this post will consist mainly of house pictures; I hope you’ll enjoy peeking at the almost-complete home! Before-and-after pictures coming soon….

Here are a few pictures of the kitchen, just after countertops were added, but before appliances were installed! The white countertops are Quartz, while the island is Quartzite (which is also used in the main bathroom). Quartzite is “the real thing”, similar to marble but much harder: Quartz is man-made, and lower in cost than quartzite, though higher than most granite or marble.
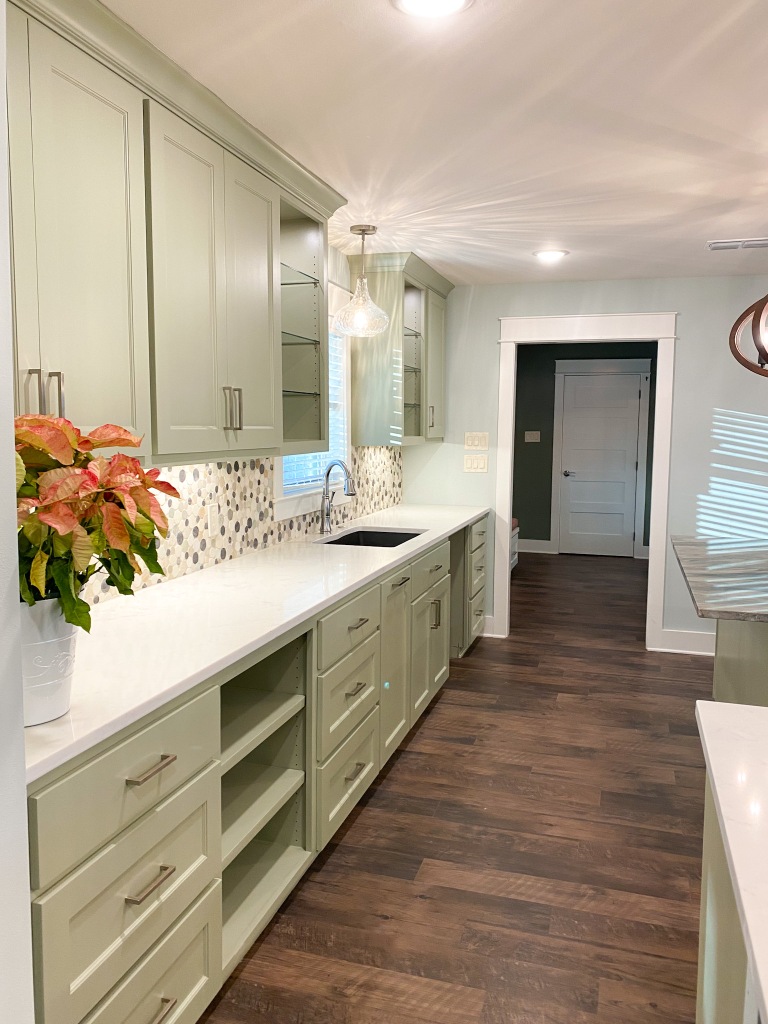
A view of the almost-finished kitchen - cabinets by Keith Farr Unlimited

Remember the long wall we removed in the beginning? That allows the kitchen to be open to the dining and living areas….most importantly, it lets the cook see out both the front and back windows while puttering in the kitchen!

Cabinets are by Keith Farr Unlimited; the finish is a lacquer form of Benjamin Moore’s 2022 Color the year, October Mist in the kitchen, and Sherwin Williams Pure White everywhere else. Flooring is Mannington Endura Max, Dockside Boardwalk. All plumbing fixtures provided by Apex Plumbing Supply. Countertops fabricated by Arturo Gonazalez of Sandbox Remodeling, Dallas. Backsplash tile is natural stone, cut and honed into random circles

Soon you’ll see the completed look with appliances installed! The appliances are from Wolf and SubZero, with a Sharp microwave drawer and Kitchenaid dishwasher (virtually silent!)

This is the mud room, entering from the back deck and connecting to the laundry room on one end and the kitchen on the other. The tall cabinets are pantries; the drawers underneath hold shoes removed at the door. Note large storage drawers under the long bench – love these!

Here are a few preliminary photos of the Hall Bath:

This lovely countertop material is granite! I was on a constant search for white granite in the ’90’s, before quartz was a “thing”. I’m so glad they found a vein somewhere, and now we have it! Flooring is a tile called Marrakesh: I liked that it was patterned, but rendered in subtle colors so it had a vintage appearance without overpowering. The shower tile is all by Daltile, and stained glass windows were part of the owner’s collection, repurposed beautifully I think! (for those who wonder, the stained glass windows are high enough to prevent anyone from seeing through, as the house next door is lower on the hill AND on a slab foundation, where this one is raised by the pier and beam foundation) Paint color is Sherwin Williams Desert Twilight

If you’re curious about the gorgeous wood doors, they are a major design element of the house, but were very hard to find and finish! They are 5-panel solid hickory doors, sent from Homestead Doors in Ohio. There are 5 doors, all opening off the main hall. During the framing phase, I had all the hall openings lined up, and the door openings moved to where they made sense: I hope these pictures convey the effect this has on the ambience in the house!

Here we see the entry leading to the main bedroom; it first leads to the closets, then on into the bedroom itself; next you’ll see some photos of the main bathroom.

This is where the addition begins, which also includes the main bathroom and music room. Wall color is Pittsburgh Iron Gate

This is another stained glass window that was in the owner’s collection. Where the 3 stained glass windows were used, a matching new window was placed in the opening, with the stained glass window hung on the inside. This protects the glass from any breakage from outside, such as a rock thrown by a lawn mower, while making it just as visible through the plain glass picture windows.

This is the living/dining area; an existing wood china cabinet now rests between the built-in display/storage cabinets. Wall color in the main area is Sherwin Williams Quiet Moments; all trim is SW Pure White

Shown here is the library/game room area; to the right is the music room overlooking the back yard and deck.

As the interior finishing touches are going in, we moved once again to the exterior. Crews came in and removed the old driveway and 50’s front walk in a day! The driveway had always had a drainage problem, directing water right into the garage. It needed to be extended for a new carport (coming soon!), so we took the opportunity to improve the drainage, and straightened it out by removing an old oak stump that was in the way.

The old walk to the front door was a narrow walk paralleling the front of the house, and long overgrown; needless to say, it never encouraged one to enter through the front door! Now the walk is a curvy design that completely changes the front of the house and invites guests right up the walk to the front! The best part by far is the problem this walk solved: because the house is on a pier and beam foundation, there was no wheelchair access, as all entrances require going up steps. The front is a bit higher, so we were able to gently slope this walk throughout the expanse so that a wheelchair or walker could roll right into the front door! The slope is barely felt when walking, and probably not even noticeable by most guests. I love this solution to such a practical but necessary design problem! I’ll show better finished photos of the driveway and front walk in a later post, but wanted to share this innovative way to make the house more accessible!

Thanks for joining us on this journey to completely remake a 50’s house that had really good bones! It has been interesting on so many levels, but the finishing and decorating is, of course, my favorite part! I will add some truly finishing photos when the time is right…meanwhile, I hope to hear from you in the comments below! Let’s all make 2023 one of our best years yet!

Posted in 50's House in the Woods, Design Tips Included!

The 50’s House is Coming Back to Life!

Hello my friends – I apologize for the lag in updates on The House in the Woods….we’ve been very busy finishing up the exterior, and are now making big strides inside as well! Our “project” is beginning to look like a house again, and we couldn’t be more excited watching it emerge ~ hopefully I’ll be able to convey some of the excitement to you in progress photos!

Newly painted & shuttered!

I had to jump ahead because I’m so excited about the exterior paint colors and cedar shutters! The image living in my head is finally beginning to emerge, and though there are a few more exterior details that will add to the story, this part is fun to watch!

If you’re considering painting the exterior of your home, I strongly recommend testing several shades first (see below for ours). Picking colors from tiny paint chips is an art any time, but it can be especially difficult when you’re choosing for the exterior. Your color will be distorted by all of these things:

  • Type of siding material
  • Direction of sun exposure
  • Amount & height of trees providing shade
  • Secondary colors (roof, shutters, windows and doors)
  • Gloss level of paint and/or stain

I was looking for a color that would allow the house to “melt” into the woods; my goal is that it look like it’s always been there, belongs there & does not detract from the beauty of it’s surroundings. Finding just the right shade of warm green/gray proved to be more difficult than I expected: here you see where we tested the 3 finalists chosen from among dozens of contenders. The cedar board is leaning up against the wall to represent the shutters and outdoor living area trim: since the ‘red’ in cedar would be complementary to our color (think opposite on the color wheel) it provided an important element in choosing the final color. In chip form, all of these colors looked very good; however, the one to the right of the cedar board looked very green outside, much to my surprise! The color all the way to the right went up looking very light and more blue gray than we wanted. The color to the left seemed way too dark, but I had tested it for contrast….and I bet you guessed it already: that one proved to be the hands-down winner! It still looks different throughout the day as the light changes, but it definitely has the river rock effect I was looking for. The dark strip above the sample is the color we sampled and used for the trim, garage door and outdoor living area ceiling. Here are the colors in case you’re curious, both mixed using Benjamin Moore paint:

Exterior Paint Colors

SW Enduring Bronze 7055 & Benjamin Moore Wildwood Crest 1538

Paint colors on the siding and soffit

Since the last progress post, we have also finished all the electrical and plumbing rough-in, had the finished roof installed, had foam insulation sprayed into all the exterior walls and attic areas, had all new sheetrock installed, and have had it taped, bedded and textured. The cabinets and built-ins are all being built now, and should be getting their lacquer finish sprayed this week; once they are installed, we can have templates made for all of the countertops.

This week the carpenters will be back to do the interior trim-out, which includes all door and window facings, cased openings, and closet detailing throughout. They will also finish installing the deck boards. For both beauty and ease of maintenance, we are using a composite decking material; while Trex is the best-known brand of this product, we chose Armadillo brand, which saved about 1/3 on the cost.

One of the most difficult parts of remodeling/building right now is gathering the materials; the supply chain is still an issue, and the oddest things are nearly impossible to find! For example, on my last job we used Leviton switches and outlets in white: they were in short supply everywhere! I had to get very creative to find enough to finish that job. This time we’re using the same, but in the color Biscuit, which is apparently not so popular at the moment: I ordered all we needed at once!

While we have sourced our share of products through Home Depot and Lowe’s, we have also been fortunate enough to use 2 smaller local suppliers for most of the “big stuff”, and they have cheerfully delivered each load as it was needed. When I ordered the sheetrock, Lowes had the best price, but I had to wait a few days for my delivery since every other builder in town was doing the same. As it happened, the roofer was having shingles delivered the same day from Home Depot, which I didn’t know. We had also ordered a new giant dumpster 4 days before this, which involves a big truck coming to drop it off. I always sweat the deliveries, as logistics on the job site can be challenging; but this time it was really a circus! The Lowe’s truck showed up 2 hours late to offload 300 sheets of sheetrock; as we were discussing where he could best put it to leave room for the eventual dumpster arrival, the Home Depot truck pulled up with the roof shingles. This is a very narrow residential dead-end street with drainage ditches on both sides, so there was no possibility of both trucks getting close to the house at one time. While they were discussing HOW to offload both trucks at once AND where to put everything, the dumpster truck pulled around the bend! All 3 trucks lined up down the street, which was comical in this tiny neighborhood! Then the across-the-street neighbor picked that moment to leave the house, but literally couldn’t get around the caravan of trucks until the 2nd and 3rd trucks backed up.

Trucks 1 & 2
There’s another stack behind the white SUV: 300 sheets!

Below I’ll post a few progress pics that got us here, but here’s a preview of some of the rooms with first foam insulation, then sheetrock:

Master suite vaulted ceilings with foam insulation
Sheetrock! We have walls!

Next week I will share the design plan for this home, including the overall concept and how you’re about to see it come to life through colors, texture, tile, lighting, flooring and fabrics. For now I will leave you with some photos of progress in the last few weeks….I hope you’ll find some ideas or inspirations along the way – and please feel free to reach out in comments if you have questions or observations! As always, I wish you all the blessings of the season, as we enter not only Autumn, but the beginning of “the holidays”! Dig out those sweaters and rain boots!

Jose replacing bricks where windows were removed

By the way, look at that difference in roof pitch!

Posted in 50's House in the Woods, Design Tips Included!

Framing: the Key to a Successful Remodel

I’ve had a few questions about what’s going on NOW at the 50’s House in the Woods! Well, we had a short break for the past couple of weeks (for the most part) while waiting for some materials to arrive. That wait corresponded nicely with other urgent projects for the carpenters, plumbers, HVAC guys, electrician and…..me! I’ve been doing finishing on my other current project, the Empty Nester’s Refresh, and that has been intense! Now it is entering the final week, including new furnishings & finishing touches. This week work ramps up once again on the 50’s House, which is quickly becoming something much more modern, as you’ll see!

Newly framed Master Suite

While one crew worked hanging siding on the exterior of the new addition, and various old areas in need of new materials, the framers moved to the inside to give definition to the new space. At the same time, they redefined some OLD spaces in preparation for their “best and highest” use! The photo above shows the new master suite from the entrance; you can still ‘see through’ the back wall of the bedroom into the architecturally stunning new master bath!

A large soaker tub will be featured under the peak of the vaulted ceiling, with windows above designed to frame the private view of oaks and stars, as this faces the back yard and private acreage beyond. To the right is the walk-in shower which will feature some amazing ceramic tile, a corner bench and an extra large shampoo niche that becomes an important design element. Here’s a clue from the tile display that inspired us:

What’s a modern master suite without ample walk-in closets?! In this case the former master bedroom/bath becomes the connector to the new suite: it includes a small “entrance” to the suite with a short hall flanked by his ‘n hers closet rooms, shown here:

The closets, formed from the “old” master bedroom

This might be a good time to point out HOW IMPORTANT good, thoughtful framing is to a successful remodeling project, assuming some walls are moving or spaces within a room are being redefined. In this project, almost all of the walls moved, either just a bit or totally – and one major supporting wall was removed completely! (If you missed that, here’s how that happened)

So back to framing….there are often small changes that can be made to redefine spaces for better use; it can be due to changing lifestyles, or sometimes just poorly thought-out plans from the original builder. (examples to follow). But while demo is going on, you should really think about changes that will make a difference. In this case, since we tore walls down to the studs in order to rewire, replumb and redo the entire roof structure, we had the opportunity to rethink all of the interior spaces ~ and, since this house is on a pier and beam foundation, all things were possible!

Here is an example of making the original design work better: bedrooms 2 and 3 both had long closets, which were placed side-by-side but opening into each room, of course. First, the closet openings were too large, so were accessed with overly wide sliding doors – 3 in fact. With that setup, one could never open the doors wide enough to reach all that closet space! It was needlessly tough to actually use the closets. In addition, the closets were placed in each room in such a way that they took up the whole wall, making it unusable for furniture. It may be hard to see here, but I’m going to show you how we reversed the closets in each room, thereby leaving usable space. In one room, there is now a nice large corner to place a dresser or reading chair and table; in the other room, which is typically used as an office, the closet is easily accessible (not behind the door) and by moving down the door we also created an area for the exercise bike behind it. Some of this will make more sense when you see the spaces with sheetrock and doors, but take a peek:

In what was formerly a den, JUST next to the living room and kitchen, we are creating a game area flanked by 2 walls of built-in bookshelves – carving out a “room” that will now be useful AND beautiful! This room opens to the sunroom, kitchen and living room:

In this 50’s house, there was the period-typical bedroom hallway, with 2 bedrooms on one side, the master on the other, and the hall bath at the end. While that design works pretty well in practice, for some reason nothing “lined up” in this one. The decision was made early on to make a major design statement with the use of solid hickory 5-panel doors in the hallway; while other doors in the house will be painted, these will be wood. But…none of them lined up, so they could not be seen at the same time. The bathroom door was not centered on the hallway – and I wanted it to be! I wanted one to look from the kitchen or living room and see the gorgeous hickory bathroom door in the center of the hallway – and the other hickory doors lining each side of the hall. Small changes made this happen (my framers may not agree the changes were ‘small’ but I say they were!) Again, this will all be much easier to see when we have sheetrock and doors, and finally, with paint, stain and trim! But the framework for these all-important design elements must be done at THIS stage! I think I have a couple of photos that show the beginning of what we laughingly called “lining it up” during framing!

Lining it up!
The hall bath door CENTERED on the hallway

The kitchen is the part that will be the most fun to show you, but it’s difficult to ‘see’ right now; I’ll show a couple of photos so you can later see how well you were able to visualilze! There will be lower and upper cabinets along the outside wall only; in the center will be a large island, and all other cabinets will be ‘lowers’ only – thus opening the space to the surrounding rooms. While cooking, my client will be able to see out the front and back picture windows and interact with those in the living room, gameroom or sitting at the counter stools. Here’s an early view to ponder:

Kitchen from the Game Room/Sunroom

I have one last thing to show you today ~ the beginning of the outdoor living areas! First, there will be a small screened porch opening off of the master bedroom; it is just framed enough to allow the roof structure to be added. Then there is the main deck extending from the back (main) entrance. Again, the roof structure is done, allowing us to get the entire roof framed and ‘in the dry’. Soon they will go ahead and do the finish out, consisting of the following:

  • Build a deck “floor” the same height as the interior spaces
  • Connect the outdoor living area with the sunroom by building a deck walkway
  • Wrap the deck supports in rough cedar
  • Finish off the vaulted ceiling and add lights and a large fan
  • Finish off the vaulted ends with rough cedar
Antique stained glass incorporated into the outdoor living area

This coming week we see the plumbers starting to redo ALL the plumbing under the house, replacing old pipes with new and replacing the old tree-root-infested sewer line. They’ll then set the rough-in for all interior tubs, faucets, and appliances. This phase will not be blog-pretty!

The electricians are also starting to update all the wiring; the old wiring was not even grounded. They will then set up the proper wiring for all new appliances, lights, switches and outlets – also not a pretty sight!

The HVAC guys will set the new 5-ton efficient unit (in the newly higher attic this time!), then begin building all new flexible ductwork, with returns in each room. All of this work will be done with the knowledge that foam insulation will be used in the walls and attic of the house later. So many things at this stage are affected by that decision – so don’t let it be an afterthought!

The flooring guy has been out to measure now that everything is framed; we’ll be using Mannington Adura luxury vinyl plank, and because of supply chain issues, will go ahead and get the material on order. This house will contain plenty of custom cabinetry, so we’ll get Keith Farr out to measure for them as soon as he has a break in his schedule. Meanwhile, the sheet rockers are planning to start in approximately 3 weeks – and that’s when I’ll update you next!

As always, thanks for checking in to see our progress: I hope you’ve seen at least one nugget that somehow helps you on your own journey through life. Until next time, live with intention & enjoy every day you have! Blessings, my friends!

Posted in 50's House in the Woods, Remodeling Projects

This 50’s House is Growing UP!

Happy mid-summer to all of you out there; I hope you’re surviving & thriving in spite of the heat wave we all seem to be experiencing this season! I know our construction workers on this project have persisted through days and days of 102-109 heat – mostly on the roof! When we had a “cold front”, with temps only 97-99, we all felt great relief! Fortunately, this lovely 50’s house is surrounded by huge oak trees, so there is always shade…somewhere!

Today I’m going to show you pictures of the progression over the last 2 weeks; we are just about finished with construction on this project, so I’ll try to show how it all went back together, though I’ll show you more of the interior framing/finishing next time. What I’ve shown up to now has been mostly the DE-construction of the existing structure; once the decision was made to remove and reframe the roof of this house, the project changed from ‘remodeling’ to ‘new construction’…though we of course kept the original foundation and exterior brick walls (mostly). In the next few weeks, the house will be treated to all new plumbing, wiring and HVAC. Then new sheetrock, trim, cabinets, appliances etc: today is about the groundwork for the finish-out which begins soon!

First, here’s a look at the house as the roof was removed (a long, hot, difficult process to put it mildly). It took a long week with a large crew to remove first the shingles, then the tar paper, then all the decking and joists, then finally all of the old insulation. The old insulation was not doing much good, judging by the look of it, but it was VERY difficult and messy to be rid of; we are very grateful to the crew that took on that task, without complaint.

They had to just keep cutting, over & over!
Roofless house!

After the roof was completely off, along with ALL old insulation (and a whole construction dumpster had been filled) the framing crews arrived, ready to put in floor joists and plywood to begin framing the new addition. However, we realized we had not left under-the-house access to the new addition! There was an access between old and new sufficient to put plumbing pipes through, but not enough for a future plumber to crawl through for repairs. So….the foundation guys came back and not only enlarged the existing access between the new and old, but cut a new access into the brand new foundation to the addition. We have a nice new access vent/door to install when the time is right.

Future access under the house
“Things I didn’t know could be done”

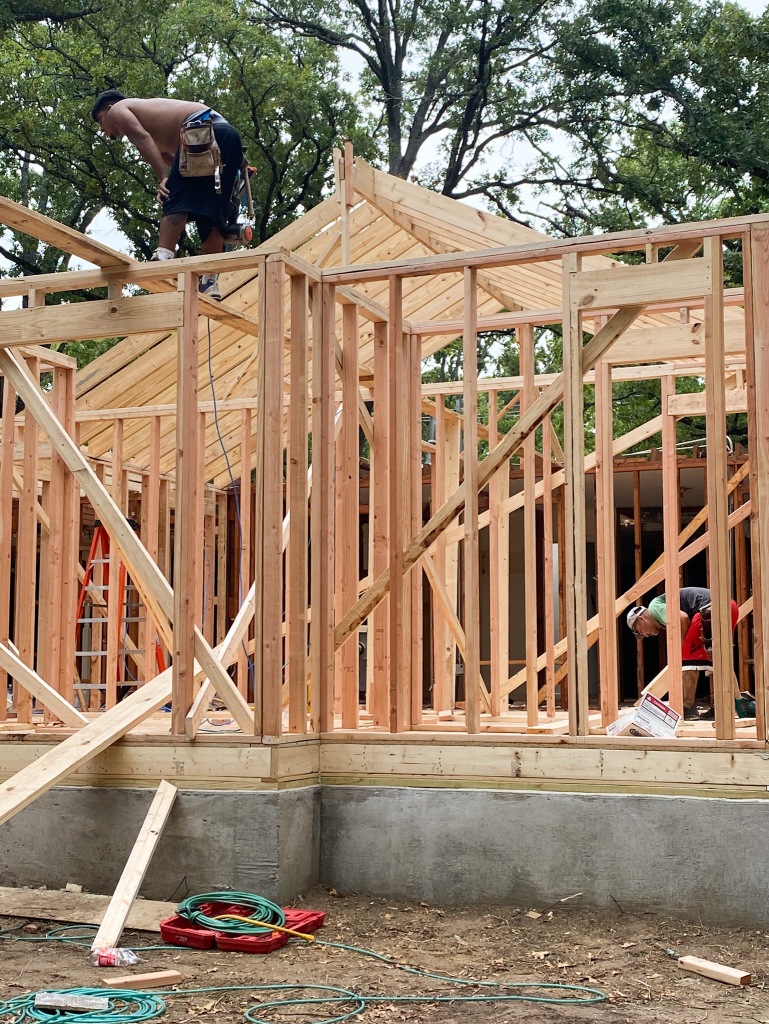
Next the framers showed up to begin framing the addition; this was exciting to watch! For walls and floors to take shape after living “in my head” for months was just too satisfying – here are a few pictures for you:

Watching the new roof emerge was GREAT! After such a ridiculously low pitch, this 50’s house now has a higher pitch, great angles and transitions, and will eventually wear beautiful bronze metal for the cost-effective, energy-efficient and beautiful finish!

Just one of many new heavy roof members going up

Once the structure was framed, they quickly added house wrap, the Tyvek seen in the photo above. Then a crew came in to add the cornice all around the perimeter at the top of the walls. The cornice gives a place to stop the roof decking and eventually forms the soffits. It has been interesting to watch various crews come in and out, as they are all specialized now. One does framing, another does cornices, another decks the roof, yet another attaches siding, and the last crew this past week put roof felt on to finally get it “in the dry”….and guess what? It rained that evening! 24 hours earlier and all the new framing wood and floors would have been drenched.

The roof, fully “in the dry” before the rainstorm!

The framing crew moved inside to begin redoing the walls I wanted moved; as you’ll later see, I wanted many areas “lined up” that had not been before. The finish-out of this process will not only be a major design element in the home, but will be one of those intangible (to most) features that create comfort and harmony for those living in or visiting there.

The first and most major move required bracing the existing kitchen and living areas so that the supporting wall could be removed. This is no task for amateurs, as the entire house structure is at risk when you remove a supporting wall! With proper bracing in place, they removed the wall; then it was time to replace that support to give the open concept we’ve all come to expect. I don’t always believe “open” is best, but in this case it definitely is. For one of the many reasons, now a person puttering in the kitchen will be able to look out the large picture window to the street as well as the new sunroom windows to the back, and interact with anyone wining/dining/or playing games in the surrounding rooms. Take a look at the new beam (we used an LVL, a laminated beam, but a steel beam may be used as well)

Those of you looking closely may have noticed that many of these photos include new windows! First of all, our windows came in weeks ahead of schedule, which was a nice touch of serendipity! We were prepared to keep the wrap on the window cutouts for at least a month, but instead we have most of them installed already! The windows were handled and installed by the wonderful people at Pane Window & Doors, a local family-owned company. We are using the prairie design of muntins/mullions in a soft beige shade; they will look wonderful with the gray-green shade of exterior paint, cedar accents and bronze metal roof!

Now you can see we’ve been busy at the 50’s House in the Woods, right?! It has been an exciting time; this week they’ll finish up the interior framing and begin adding new subflooring and plywood where needed. We will take a pause to get Keith with Keith Farr Limited in to measure for all cabinetry, now that the rooms are defined. We will also have the flooring guys in to measure for finished flooring, though we won’t need it for a bit. These days you order things as early as possible, as we are not quite past the supply chain issues that have plagued construction since Covid first hit.

Speaking of ordering, we will begin putting together orders for tile in the bathrooms and kitchen backsplash, lighting fixtures and other finish materials; plumbing supplies were ordered long ago at Apex Supply, so they are ready to be delivered whenever we’re ready (not yet!)

In the next couple of weeks plumbers will be in to re-pipe the entire house, including the sewer line. Because this house is pier and beam construction, we are free to move plumbing at will (and they’ll be glad for the extra-large access areas we created!) The electricians will also be in to rewire everything, as the 50’s wiring was badly out of date, and not grounded. HVAC guys will start new ductwork and add vents for the new high-efficiency unit; we have requested return air vents in every room, so it will be interesting to see how this plays out.

Please feel free to add comments or ask any questions about this project or products used; I will be naming many of the finishing products as we go, but I am always open to comments from my readers! Stay cool, enjoy the rest of your summer, and please check back often for updates! Thanks for spending a few minutes catching up on our project!

Posted in 50's House in the Woods, Demo!

Deconstruction 201

Just a quick update for you this week, on the 50’s House in the Woods project! This coming week we finally get to start putting things back together, as the framing crew redraws the lines of the whole structure: first they’ll frame the outline of the new addition, then completely reframe the roof over the “old” part of the house, the new wing and the patio. I can hardly wait to see how they tie the roofs together!

Since I’m NOT going up on the roof to show you how it looks while being deconstructed, here is an idea of the back (from the ground!) with only about 75% of the rafters remaining. The guys basically peeled the roof like an onion, one layer at a time. After all the shingles and tar paper, they had to remove decking boards one by one; when this house was built, decking was not 4 x 8 sheets of OSB, but single boards. They literally had their work cut out for them this past week!

Question: how do you make it rain in Texas in July???

Answer: start removing the roof decking on a house!

Yes, the day before work on the decking was to begin, the forecast showing a solid 2 weeks of 102-105 degree weather. I quipped, “Just watch, as soon as we remove the decking it’ll rain!” Haha, but never did I think it really would! Sure enough, the next morning when I walked out to open up the job site, it was dark and cloudy – and, within 30 minutes, it was pouring rain! We scrambled to get tarps up there and to cover what was below, but we just weren’t prepared. Since it was ‘supposed’ to rain again that afternoon, I went out and bought heavy-duty roof tarps so we could properly cover the next time. Do you think it rained that afternoon??? Nope!

Just now I was walking the site with the AC guy, discussing pros and cons of keeping the old ductwork or starting over, when I was struck by how interesting the house looked with only rafters overhead…the whole house is a loggia! Here, see what you think:

Someone asked this past week why we didn’t just tear the house down and build a new one; you may be wondering as well, since you cannot really “see” the house and the site. First, deconstruction is very expensive; well-built older homes do not fall apart easily. Well-built older homes are also, well, just that: WELL BUILT! This home was custom built in the late 1950’s, one of the best eras in modern America for home construction. While we are taking advantage of modern technological advances by replacing all windows and doors, using energy-efficient appliances and systems, and insulating throughout with foam, the structure itself, and the foundation it was built on, are very sound. In an area of East Texas where slab-built homes regularly settle and foundations crack, this 1950’s pier & beam foundation is solid and the floors are level. By taking advantage of quality construction, adding new energy-efficient features, and imbuing it all with a bit of modern style, we are creating a beautiful, sound home that will last for many more years. Perhaps the BEST part is the serene park-like setting this home sits on, surrounded by numerous mature oak trees not only in this yard, but the entire neighborhood.

This past week, two trucks brought building materials for the construction ahead; this being a small neighborhood with a narrow street ending in a culdesac , large-truck deliveries can be interesting, to say the least! Between the sagging overhead powerlines, narrow lane, and bicycle-darting kids across the street, I was just a tad stressed getting this all done! My stress, though, was nothing compared to the fantastic driver, who had to figure out how he could get close enough in his big rig to shuttle all the materials to the back yard, navigating through a maze of oaks the whole way! After weighing all the options, he decided to “straddle the drainage ditch”, which I admit I didn’t understand, until he actually did it: take a look!

Straddling the ditch!

Next week I’ll show you the newly-framed structure, and the finished shape will begin to emerge! My client is making some big final decisions as we speak, notably whether to go with a bronze metal roof or stay with standard shingles. You’ll be seeing the results of all the big decisions soon, and I can hardly wait to share! So just for fun, here’s a sneak peek at one of the great design elements coming to this house….

The Front Door

Have a great week, stay cool in this July heat, and come back next time for fun updates!

Posted in 50's House in the Woods, Remodeling Projects

50’s House in the Woods ~ Big Changes!

We’ve had some exciting things going on over at the 50’s House in the Woods project! We had a pause while trying to find just the right contractors for the foundation and framing, and for a very good reason! After doing the demo on the inside, even including removing the ceilings so the electricians could rewire…

NO ceilings!

… we realized the “attic” pitch was a mere 14″ at the HIGHEST POINT! We knew there was little to no attic, but come on! 14″! This was hard decision time in the project; and yes, the decision WAS made to raise the roof….literally! Here’s the outside of the house as it is now:

Loooooow roof pitch!

Tomorrow morning our Demo crew will be back to do a little more destruction before we start putting the house back together; they are going to tear off the roof AND the roof framing! This is a first for this remodeler – and it was not easy finding good crews to work with this situation. We have to be perfectly coordinated with one crew to remove everything and another crew to frame it back and get the new roof in the dry, because the house interior will be fully exposed in the meantime. We also have to coordinate getting the framing materials delivered at the right moment, but not so early they’ll be in the way of the dump trailer as it gets filled a few times. This task has a few “moving parts”, and they ALL have to work together perfectly I checked the weather for this period of time to make sure rain wasn’t forecast (what was I thinking?? Texas in July?!) So far, all we have ahead are 100++ days this week; while that is good for the no-rain outlook, the poor guys doing this job are going to be HOT! We are setting up fans to try to ease things a bit, but these guys will be heroes for working under these difficult and unusual conditions, to say the least.

So now you’re up on the “raising the roof” part of this upcoming week, but I’m so excited that they’ll ALSO be framing the 700 sq ft addition as well! To help you visualize the addition, let me show off our new foundation:

As you can see, this is a new pier and beam foundation done to match the existing one; with pier and beam one has the advantage of getting under the house to move plumbing or do repairs, which is WHY we’re able to do such fun changes to this house in the first place! However, finding a concrete contractor around East Texas who is experienced in this type of work was not easy: I would highly recommend Orta Construction – they did a fantastic job! It was so interesting watching the process, so I thought I’d share a few pictures of them drilling the piers and setting the forms.

Watch this video of digging a pier – I love the end!

Digging a pier

  • The demo crew is lined up starting tomorrow
  • The dump trailer will be here ready to cart off the old roof and timbers
  • The construction materials are being delivered Wednesday
  • The framing crew is ready to start Thursday
  • We will have the structure taking shape in a few days!

I’m going to share a small view of the plans, though you likely won’t see much due to the size; just notice the straight line of the original back of the house, then the addition of a bed/bath wing and a sunroom/music room. Now you see where we’re going with this! Next time I’ll fill you in on some style details of this MCM-ish house in the woods!

New addition on the back of the existing house

Thanks for joining us for this big project in the works – I can promise you the end will be astoundingly cool! Fortunately, my client believes in quality, so there is no skimping on this project (really, there seldom is!). Until next time, I hope you have a wonderful week and make absolutely the best of it! If you’re on vacation, I’m envious; if you’re not, I commiserate – stay cool if you can!

Posted in 50's House in the Woods

We are “down to the studs”!

If you watch HGTV reno shows, or have personally been around home remodelers, you have probably heard the term “down to the studs”! Today I’ll show you pictures of just what that LOOKS like, as we see the result of the deconstruction of the 50’s House in the Woods!

I think of these as the “before” pictures, but really this stage comes after “before” and before “after”….so I’ll show you some before and….hmmm, “between”?!

1950’s Sunny Yellow Kitchen

Since the kitchen is always truly the heart of the home, let’s start here: the original 4 x 4 yellow tile was in good shape in many places, but the specialty border pieces around the sink were hopelessly broken, with parts missing. The cabinets were built on-site, unlike today’s block-built cabinets, so saving any for reuse was impossible. While the kitchen was a good size for when it was built, there was unfortunately TOO much room between the work area, but no chance to add an island as that’s a major walk-space (and it would have been too narrow) You’ll see that we add an island in the redo, by pushing the cooktop wall back a few feet – just a hint for later! Now a few pics…

Sink Wall “before”
Sink wall “during”
Cooking wall “before”
After day 1 demo
Down to the studs, even the ceiling

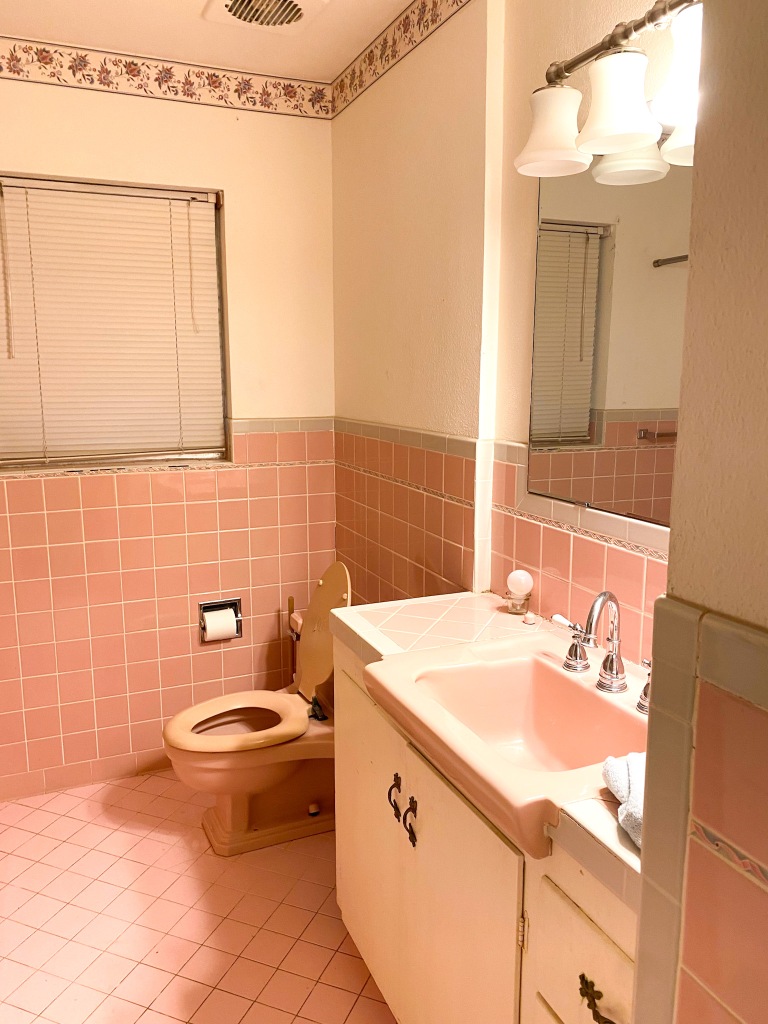
Now a look at the “pink” bathroom, before, during demo and DOWN TO THE STUDS!

Original mauve tub, toilet and sink
Old bathroom built-ins
During Demo

In this bathroom, we will be pushing both walls back a bit; on one side, the purpose is to gain some space, of course, but also to line up doors in the hallway, which I’ll pop in a picture of shortly…the windows in that bathroom and the adjoining bedroom (which becomes CLOSETS!) will also be moved/changed, causing all kinds of trouble for the framers! But as you’ll see, it will be worth it both functionally and aesthetically.

Down to the studs!

And here is the 50’s master bath – the green bathroom. I always find it interesting that the builders did not prioritize square footage in the master bath until sometime in the late 80’s. Now we tend to make huge master baths and closets, as we will be doing with our addition onto the back of this house. This actual spot will be one of the walk-in closets soon…oh, when you see the “down to the studs” photo below, the space includes the entire master closet as well – it’s on the right side of the photo!

50’s Master Bath
Down to the studs!

When remodeling, you just never know what you’ll find! This time we all saw a “first”. In this green bath, all of the tile was installed with CONCRETE instead of the normal tile mortar; the pink bath was a typical installation, so we have no idea why the master was done differently. As you can imagine, it was a bear to demo! (poor guys!) I have a closeup showing the concrete behind the tile – and this was the whole tub, shower and walls!

Concrete Tile Installation!

At this point, it might be fun to help you visualize our master bed/bath addition, so I’m going to show you the outside photo again. You’ll see where we’ve removed the brick to make way for the new wing that extends outwards. That room extends from this bathroom and bedroom, on the back of the house:

So now you’ve had a peek at the inside of the 50’s house in the woods…just a bit about our plans, which you’ll see happening soon: we are adding 700 sq ft, which consists of a master bedroom and bath, and a music/sunroom. There will be a screened porch off the master and a deck under roof off the kitchen/mudroom. All of the aforementioned are NEW construction.

Inside, the major wall in the kitchen is being removed, with the lower cabinets being pushed back a couple of feet; the removal of this supporting wall necessitates adding a steel or laminated beam in the attic above both the kitchen and den, to lend support to the whole roof structure. Speaking of roof structure, the roof on this house has an extremely LOW pitch, which is why we had to tear out ceilings in the main rooms. The idea was to give attic access to the electricians, who will be rewiring everything. It was then we discovered that the pitch was only 14″ at the HIGHEST point! Because of this, the decision was made to ‘fix it while we’re at it’….meaning, we will not only remove the roof shingles to make way for a new roof, but we will demo the entire roof framing so it can be reframed with a higher pitch and restyled to take in the additions. Now, I doubt if we’re the first to EVER try this tricky operation, but let’s just say it is not done often! The timing will have to be perfect, to coordinate the removal, reframing, and reroofing to get the house back “in the dry”. Stay tuned…

Lastly, all surfaces will be upgraded and rooms made more useful. In the hall, doors and room entrances were a bit offset, which is hard to show in a picture, though I’ll try; I’m going to line everything up so the bathroom door is centered on the hall, and all doors off the hall are uniform. The newly-aligned doors will be a major design statement as well, as they are going to be 5-panel (horizontal) hickory doors. Here’s the hall now:

Hallway “before”

Here is the type of door we’ll be using throughout, though some will be painted. The hall doors will all be stained hickory.

With that, I’ll leave you for this time; we are waiting on the guys to do the new pier and beam foundation, which we hope will be in the next couple of weeks, then everything will start moving quickly on this project. Thanks for following along, friends!